A priority group includes a group of journeys ordered by importance. You can create an unlimited amount of priority groups per parent segment. Each priority group requires a capping component. A capping value limits the number of journeys a profile can enter.
This topic includes:
- Prerequisites
- Limitations
- Create a Priority Group
- Understanding how Exits and Re-entries Work with Priority Groups
- You must have Treasure Data Customer Journey Orchestration.
- By default, your account does not have Traffic Control enabled. Your administrator must enable the feature to create priority groups with capping.
- To create, edit, and delete objects, you must have full access to Journeys and Traffic Control. You can create a policy-based permission or provide permissions at the account level. With account-level permissions, all users in the account are defaulted to full access.
- Each priority group can have a maximum of 20 journeys.
- Journey capping across priority groups is not supported.
- You can add the same journey to multiple priority groups.
- Draft and paused journeys added to a priority group are not counted in the capped count.
- Open TD Console.
- Navigate to Audience Studio.
- Select a parent segment.
- Select a folder.
- Select Traffic Control and then select Create priority group.

Let's create a priority group by selecting three journeys from three child folders in the same parent segment.
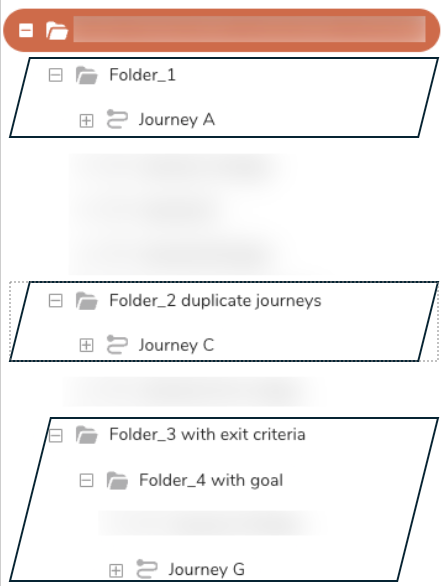
Our priority group contains the journeys from the previous example.
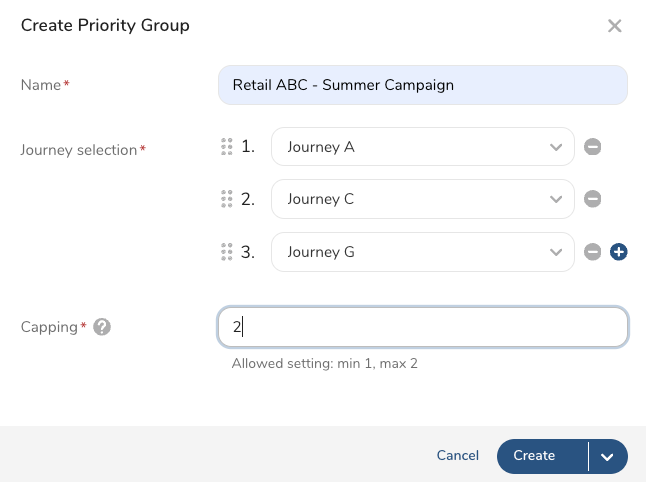
- Use the following table to help you create a priority group.
| Field | Description | Required |
|---|---|---|
| Name | Enter a name for your priority group. | X |
| Journey selection | Select two or more journeys. | The order in which you add journeys defines their priority within the group. You can reorder the journeys in a group. |
| Capping | Enter the maximum number of journeys a profile can enter. (The minimum is one journey.)Priority Groups support a maximum capping that is one less than the total number of journeys. For example, if you have selected three journeys, the maximum capping value is two. | X |
- After you have completed your priority group, choose one of the following:
- Create : Create the priority group without prioritization (this is the default).
- Create and turn on prioritization : Create the priority group and enable prioritization.
If you create a priority group and turn on prioritization, a parent segment must run before the priority group's journey selection and capping will take effect.
Journey Capping Workflow Example
In the following example, five profiles qualify for all seven journeys in the priority group NEW CUSTOMER. However, the capping value is two. Thus, all five profiles can access the two top journeys ( Journey 1 and Journey 2) in the NEW CUSTOMER priority group.
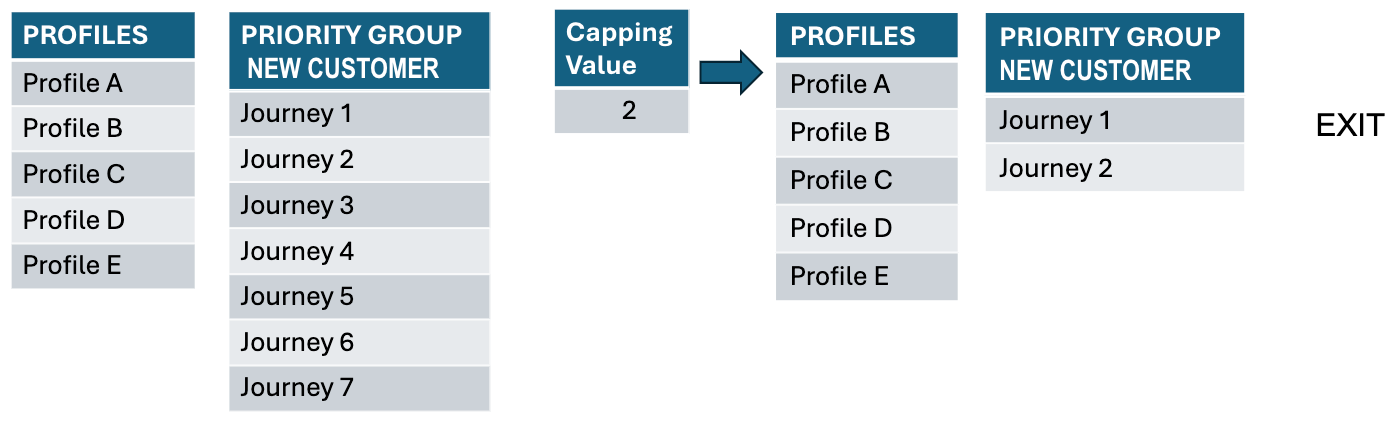
After profiles exit the journey, they still qualify for the other journeys in the priority group: NEW CUSTOMER. Because they entered and exited Journey 1 and Journey 2, they will enter the NEW CUSTOMER priority group at Journey 3. However, since the capping value remains at two, they can only access Journeys 3 and 4.
Priority groups, like individual journeys, adhere to a daily refresh schedule based on the parent segment and the journey's workflow. Review the following two sections for more information.
The following table identifies the priority groups and journey names.
| Priority | Journey Name |
|---|---|
| 1 | Journey A |
| 2 | Journey B |
| 3 | Journey C |
- Day 1 : Profiles meet Journey A's criteria, enter Journey A, meet the custom exit criteria, and leave the journey. The profiles also meet the criteria for entering Journey B. However, because we are still on Day 1, the profiles will not enter Journey B until the parent segment and journey workflow refresh.
- Day 2 : The parent segment and journey workflow are refreshed. Profiles meet Journey B's criteria, and the profiles enter Journey B.
You can specify conditions that allow/disallow profiles from entering a journey again:
- Never allow re-entry. No limitations
- Allow unless goal has been met
Let's use the same table with priorities and journey names. In this example, capping is set to 1.
| Priority | Journey Name |
|---|---|
| 1 | Journey A |
| 2 | Journey B |
| 3 | Journey C |
- Day 1 : Profiles meet Journey A's criteria, enter Journey A, meet the custom exit criteria, and leave the journey.
- Day 2 : After the parent segment and journey workflow are refreshed, additional profiles meet Journey A's criteria, and the process repeats itself.
- Day 3 : Repeat Day 2.
This loop (of profiles continuing to enter Journey A) will continue until all profiles have met the goal criteria.
See also Journey FAQs.