A list attribute (or buffer attribute) is an array of values. such as "products viewed in the last 10 hours" and "products purchased in the most recent transaction."
The length is limited by bye size, the number of elements, and time. Your customer requirements and contractual agreements determine this size.
This topic includes:
To create a list attribute, you must have Full for all parent segments.
- The maximum amount of elements allowed is 100.
- The maximum sliding duration is 60 days.
- Open TD Console.
- Navigate to the Data Workbench.
- Select a parent segment to create a list attribute.
- Select Real-time Configuration.
- Select the Attributes tab, and then select Add Attributes.
- Select List.
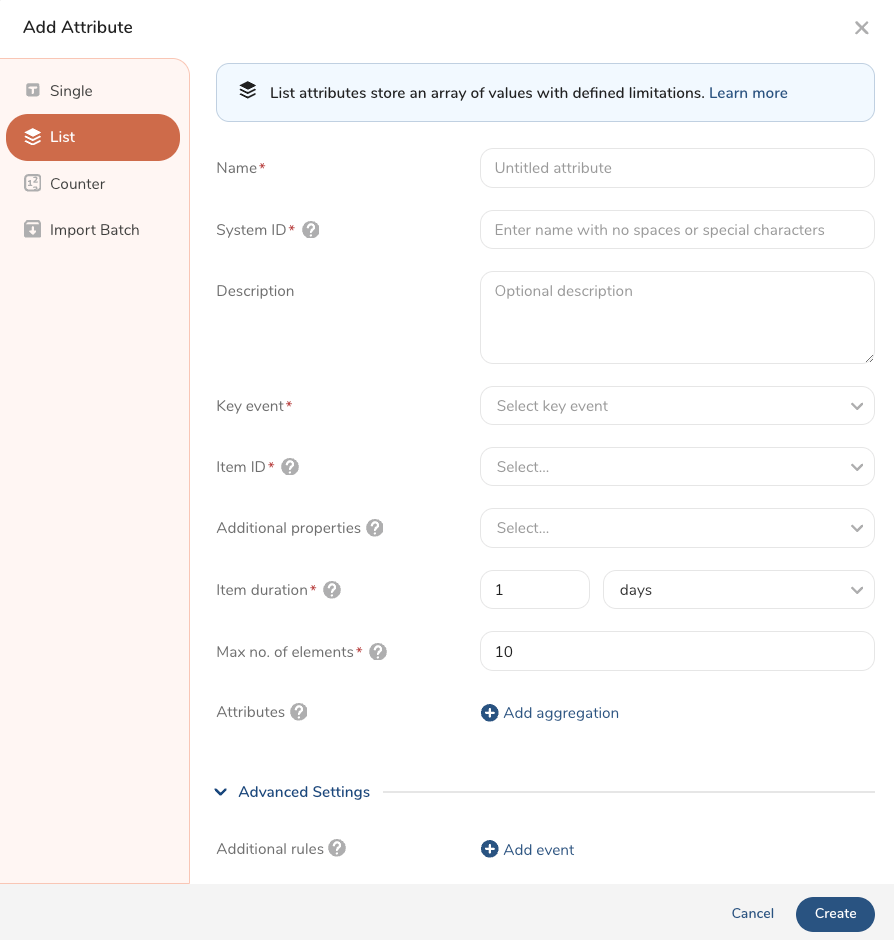
Review the information in the following table to complete the form.
| Field Name | Description | Required |
|---|---|---|
| Name | Enter a name for your attribute list. | X |
System ID | Create a system ID for a unique list attribute name. A system ID is a string that starts with an alphabet or underscore () and is optionally followed by an alphanumeric and (). No spaces or special characters are allowed. This field can not be updated once defined. The system ID is case-sensitive. Example systemID_lst_01 | X |
| Description | (Optional) Enter a description of your list attribute. | |
| Key event | Select a key event for your list attribute. For more information, see Configuring Event Definitions. Optionally, add filters. | X |
| Item ID | Select a key column for the attribute. Avoid using a profile key as an item ID. | X |
| Additional properties | Select one or more additional properties to identify other columns for your list attribute. | |
| Item duration | Select the amount of sliding time duration of the data in the list. As time progresses, new data is added, and old data beyond the duration is removed from the list attribute. The maximum value is 60 days. | X |
| Maximum no. of elements | Select the maximum number of items/elements in the list attribute array. As new elements get added, old elements beyond the limit will be removed from the list. The maximum value is 100. | X |
Attributes | Select + Add aggregation to add attributes to your list attribute. Complete the following fields for each aggregation:
| |
| Advanced Settings | ||
Additional rules | Select + Add event to create additional rules. With these rules you can define events that can affect the values in the list attribute:
Examples Event remove_cart will remove items from the cart. Event purchase will clear the list of products in the cart. |
An aggregation must be specified for a list attribute to be accessed in real-time journeys and activations.
- Select Create.
After you have created one or more list attributes, you can view them in the Data Workbench.
- Open TD Console.
- Navigate to the Data Workbench >Parent Segments.
- Select a parent segment.
- Select the ellipses in the row where the list attribute is displayed.

- Select View Details.
See also Real-time Attribute FAQs.