This feature is a public Beta release.
This topic contains:
- Enable Behavior Activation
- Activate a Segment with Behavior Data
- Behavior Activation Example
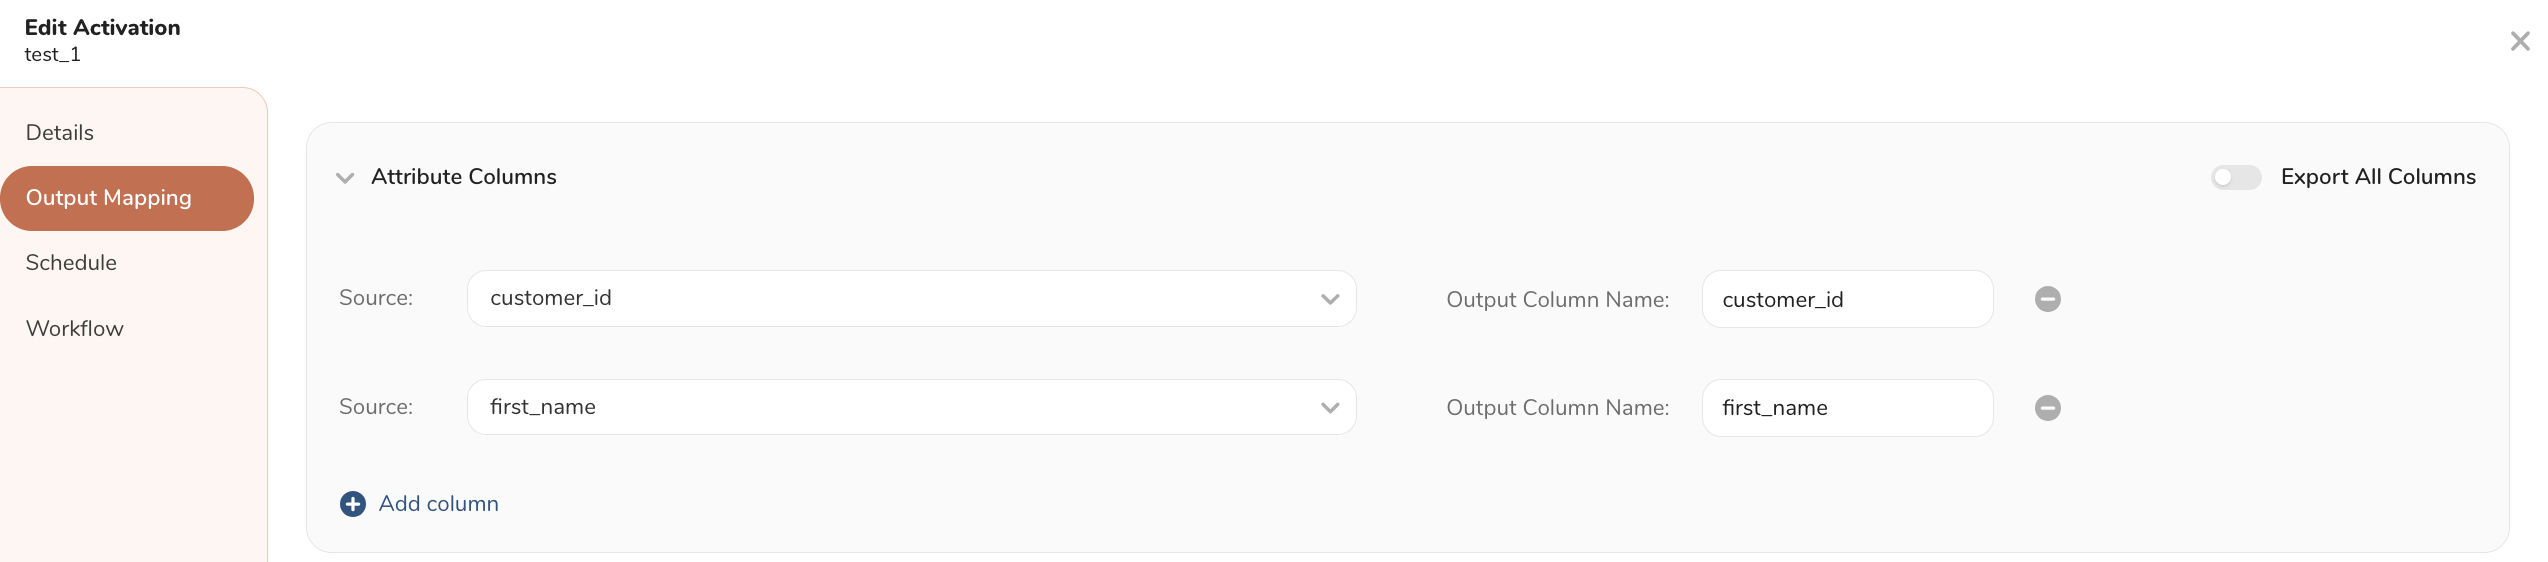
- Attribute Configuration
- Behavior Configuration
- Output Examples
Behavior Activation must be enabled at a Parent (Master) Segment level.
- Open TD Console.
- Navigate to Data Workbench > Master Segments.
- Select an existing master segment or create a new master segment. For details, see Creating Parent Segments.
- Enable Behavior Column Mapping.
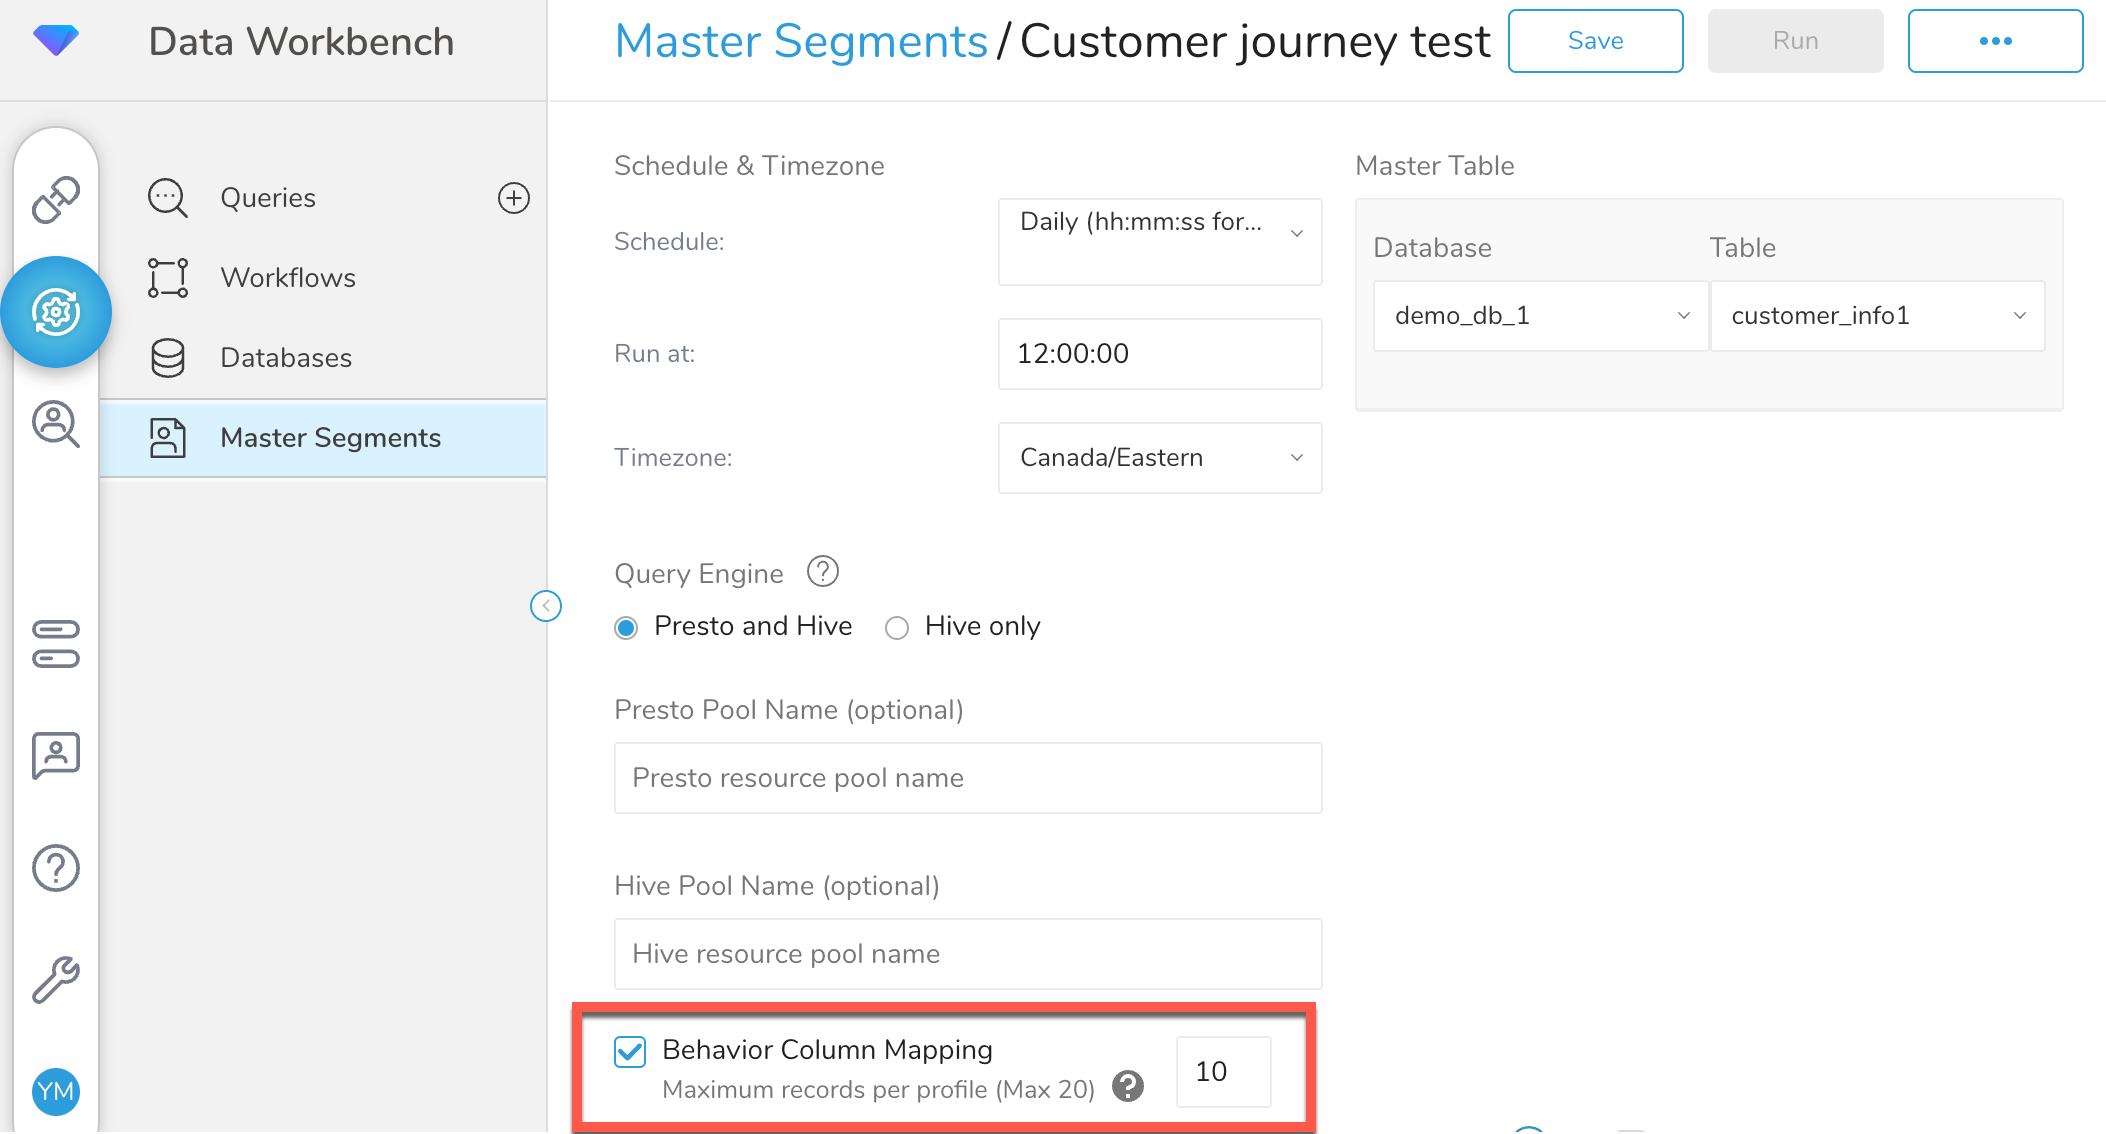
- Configure the maximum number of rows that can be associated with a single user profile. You can have a maximum of 20 rows associated with a single user profile.
For general details on segment activation UI elements, see Customize Activation Output.
- Open TD Console.
- Navigate to Audience Studio.
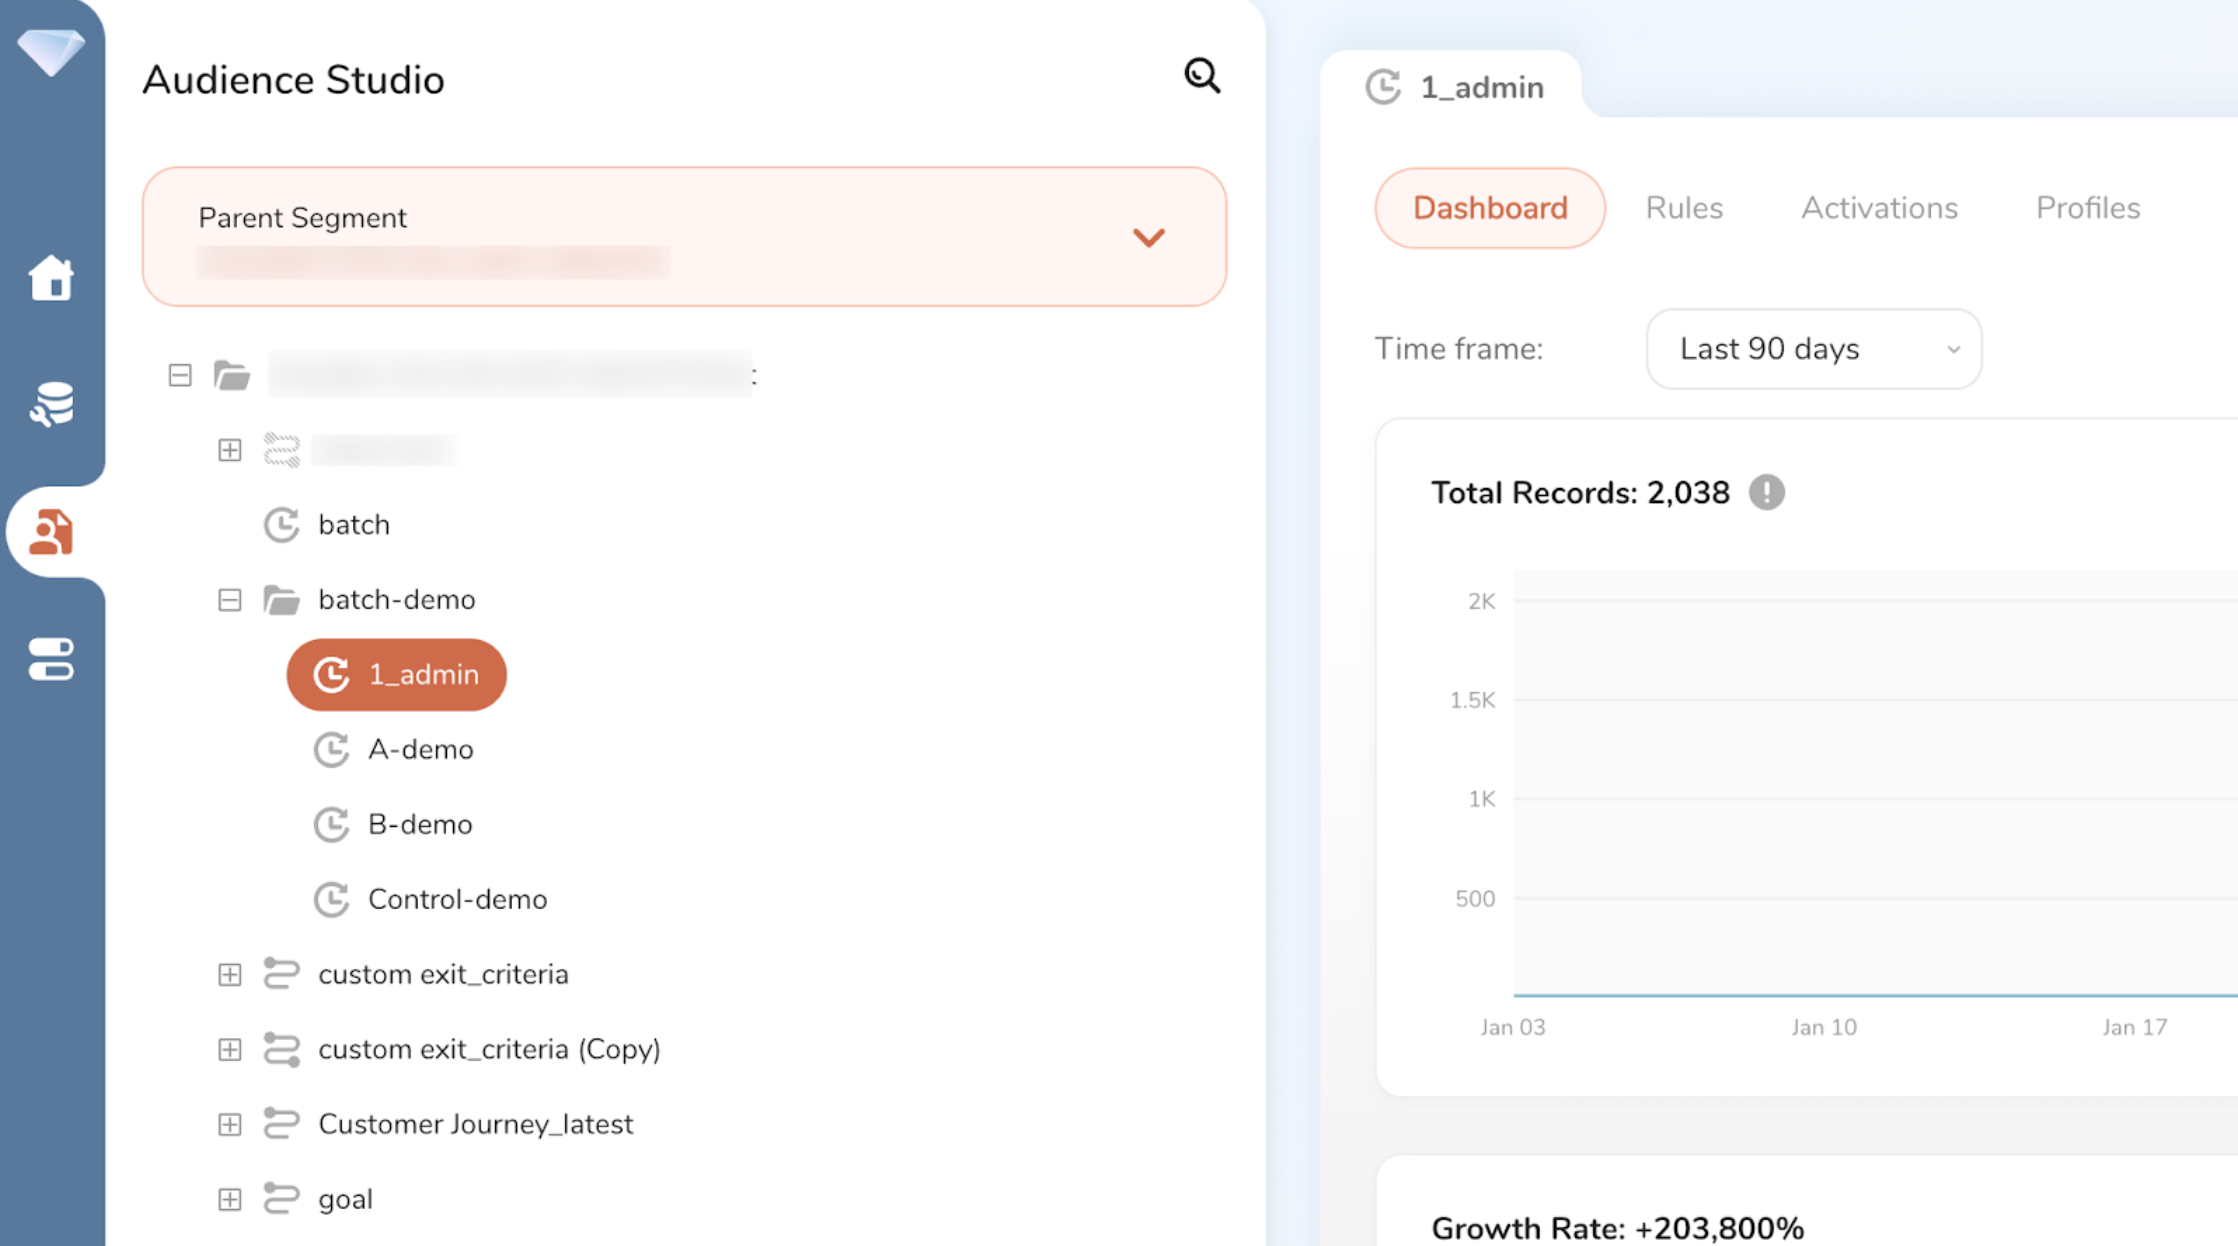
- Select an existing parent segment or create a new parent segment, For details, see Creating Parent Segments.
- Select an existing master segment or create a new master segment.
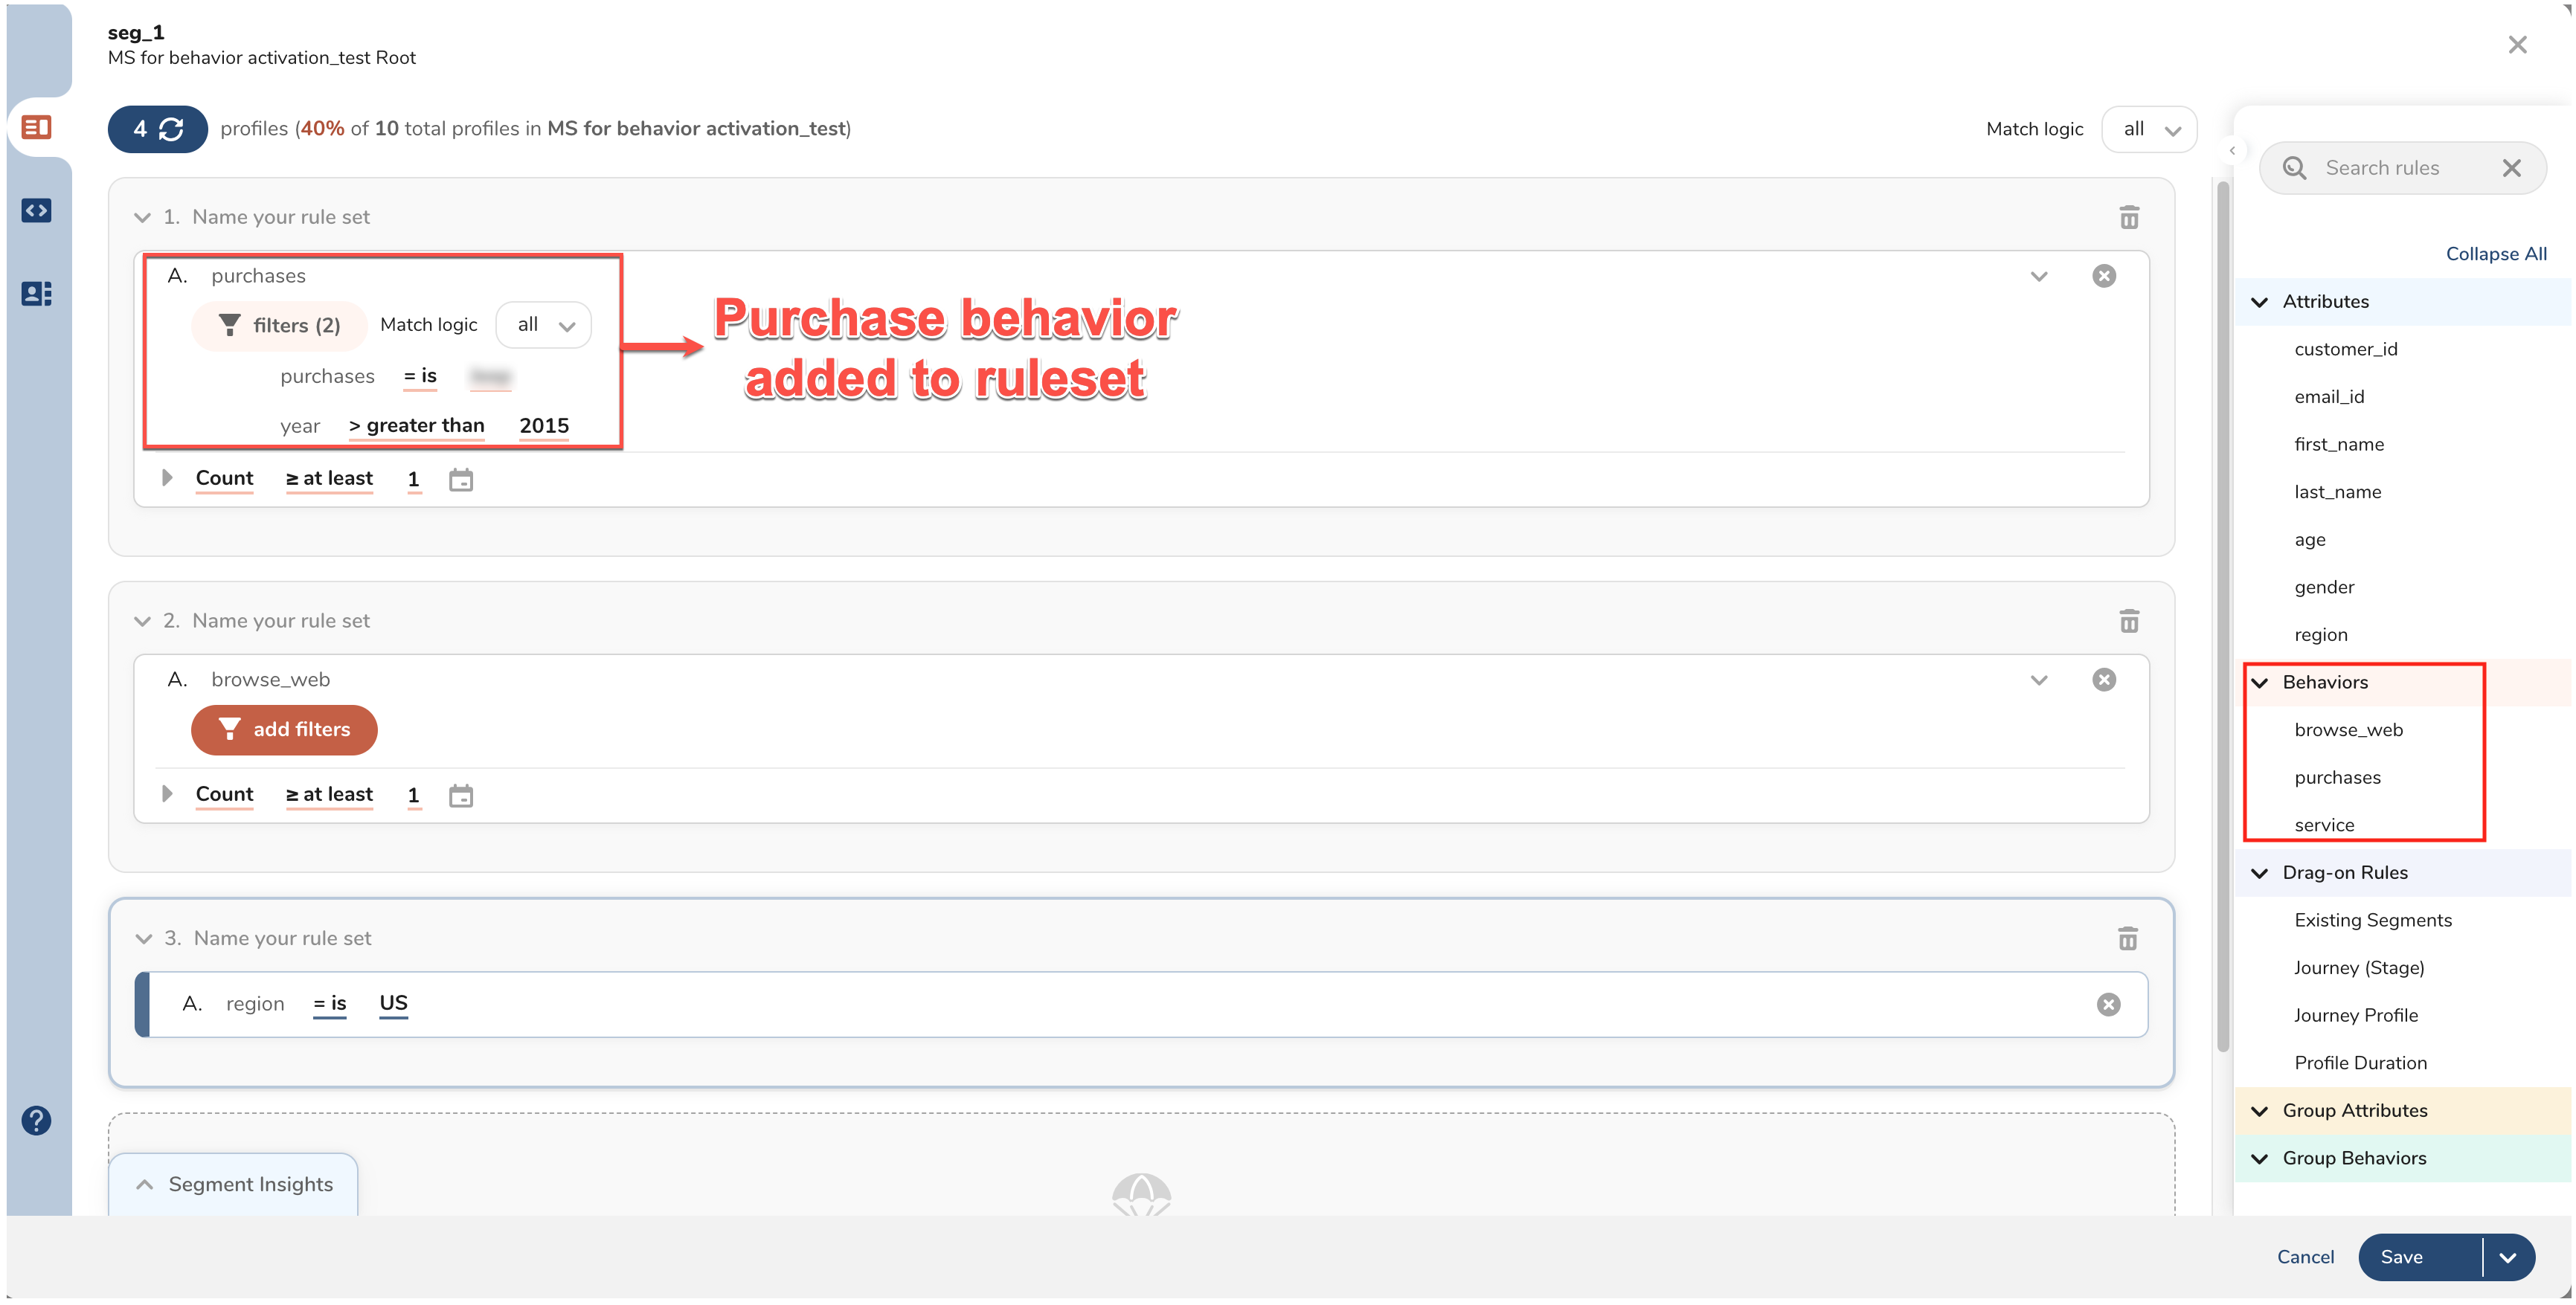
- Create a new segment with segment rules that is configured to select behavior data. For details, see Segments Overview. The following screenshot shows a segment that selects purchase behavior among others.
You must select and use the behavior field in the segment rule, if you want to activate it. If you do not use a behavior field, it cannot be activated.
When you use match logic ANY and activate attributes and behaviors, for qualifying profiles with no records meeting the rules of the activated behavior table, behavior data value would be marked as NULL. For details, see Match Logic ANY Example with NULL value
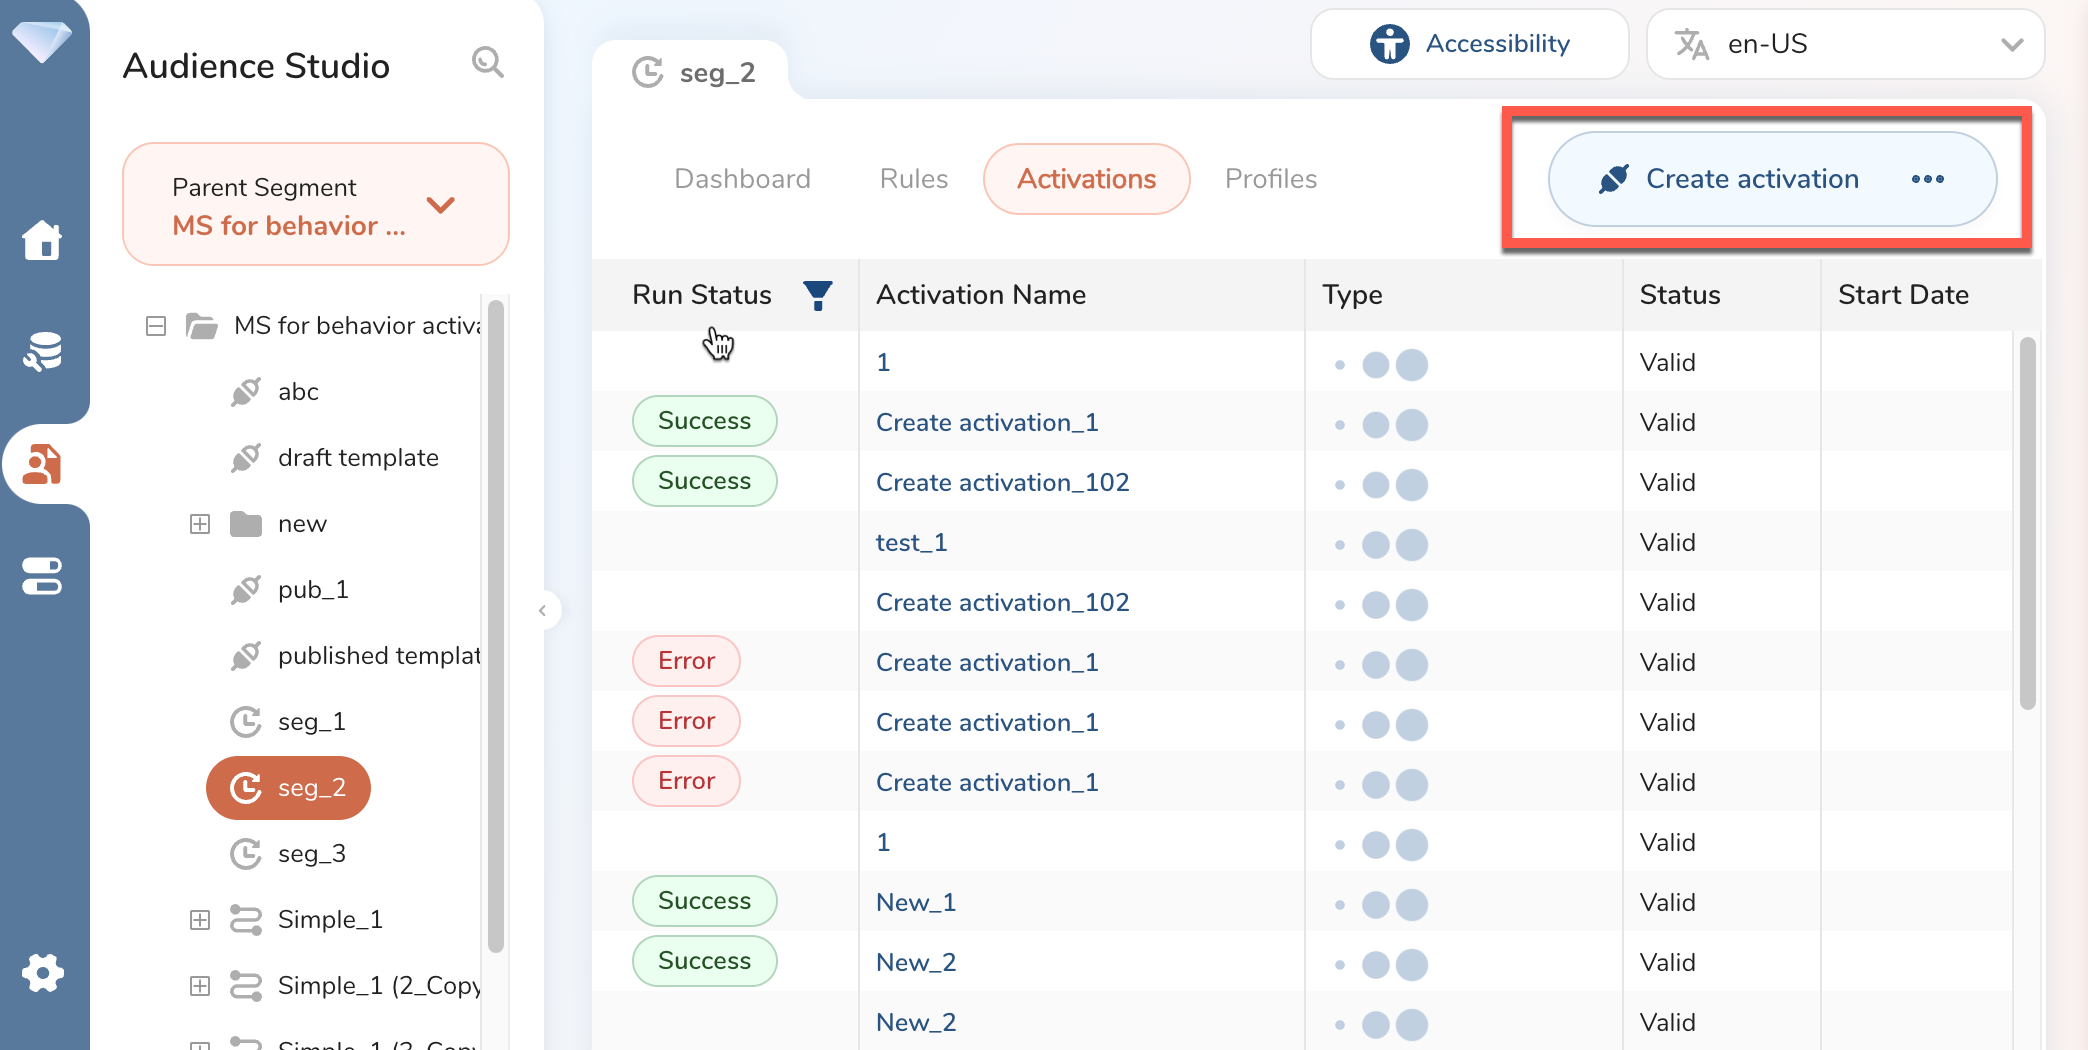
Select the segment.
Select the Activations tab.
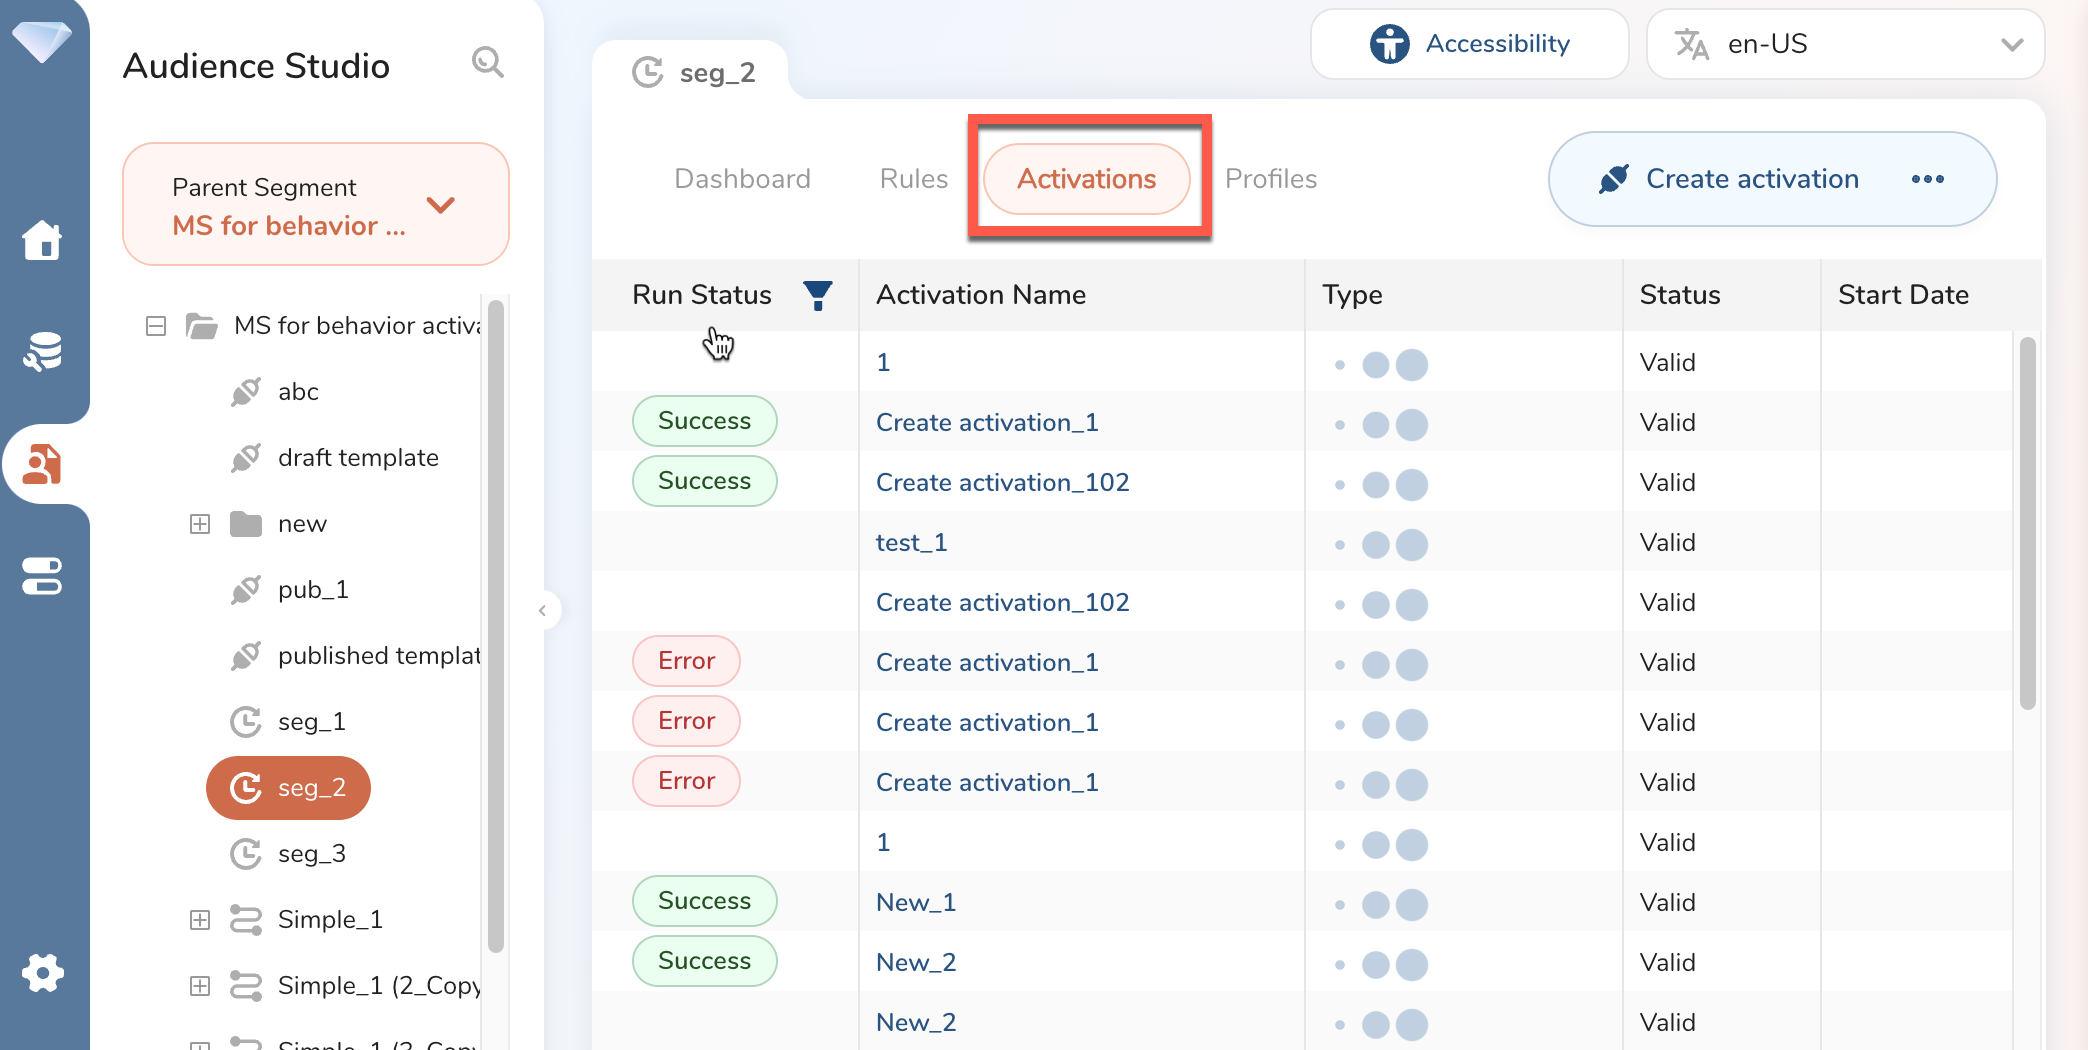
Select Create activation.
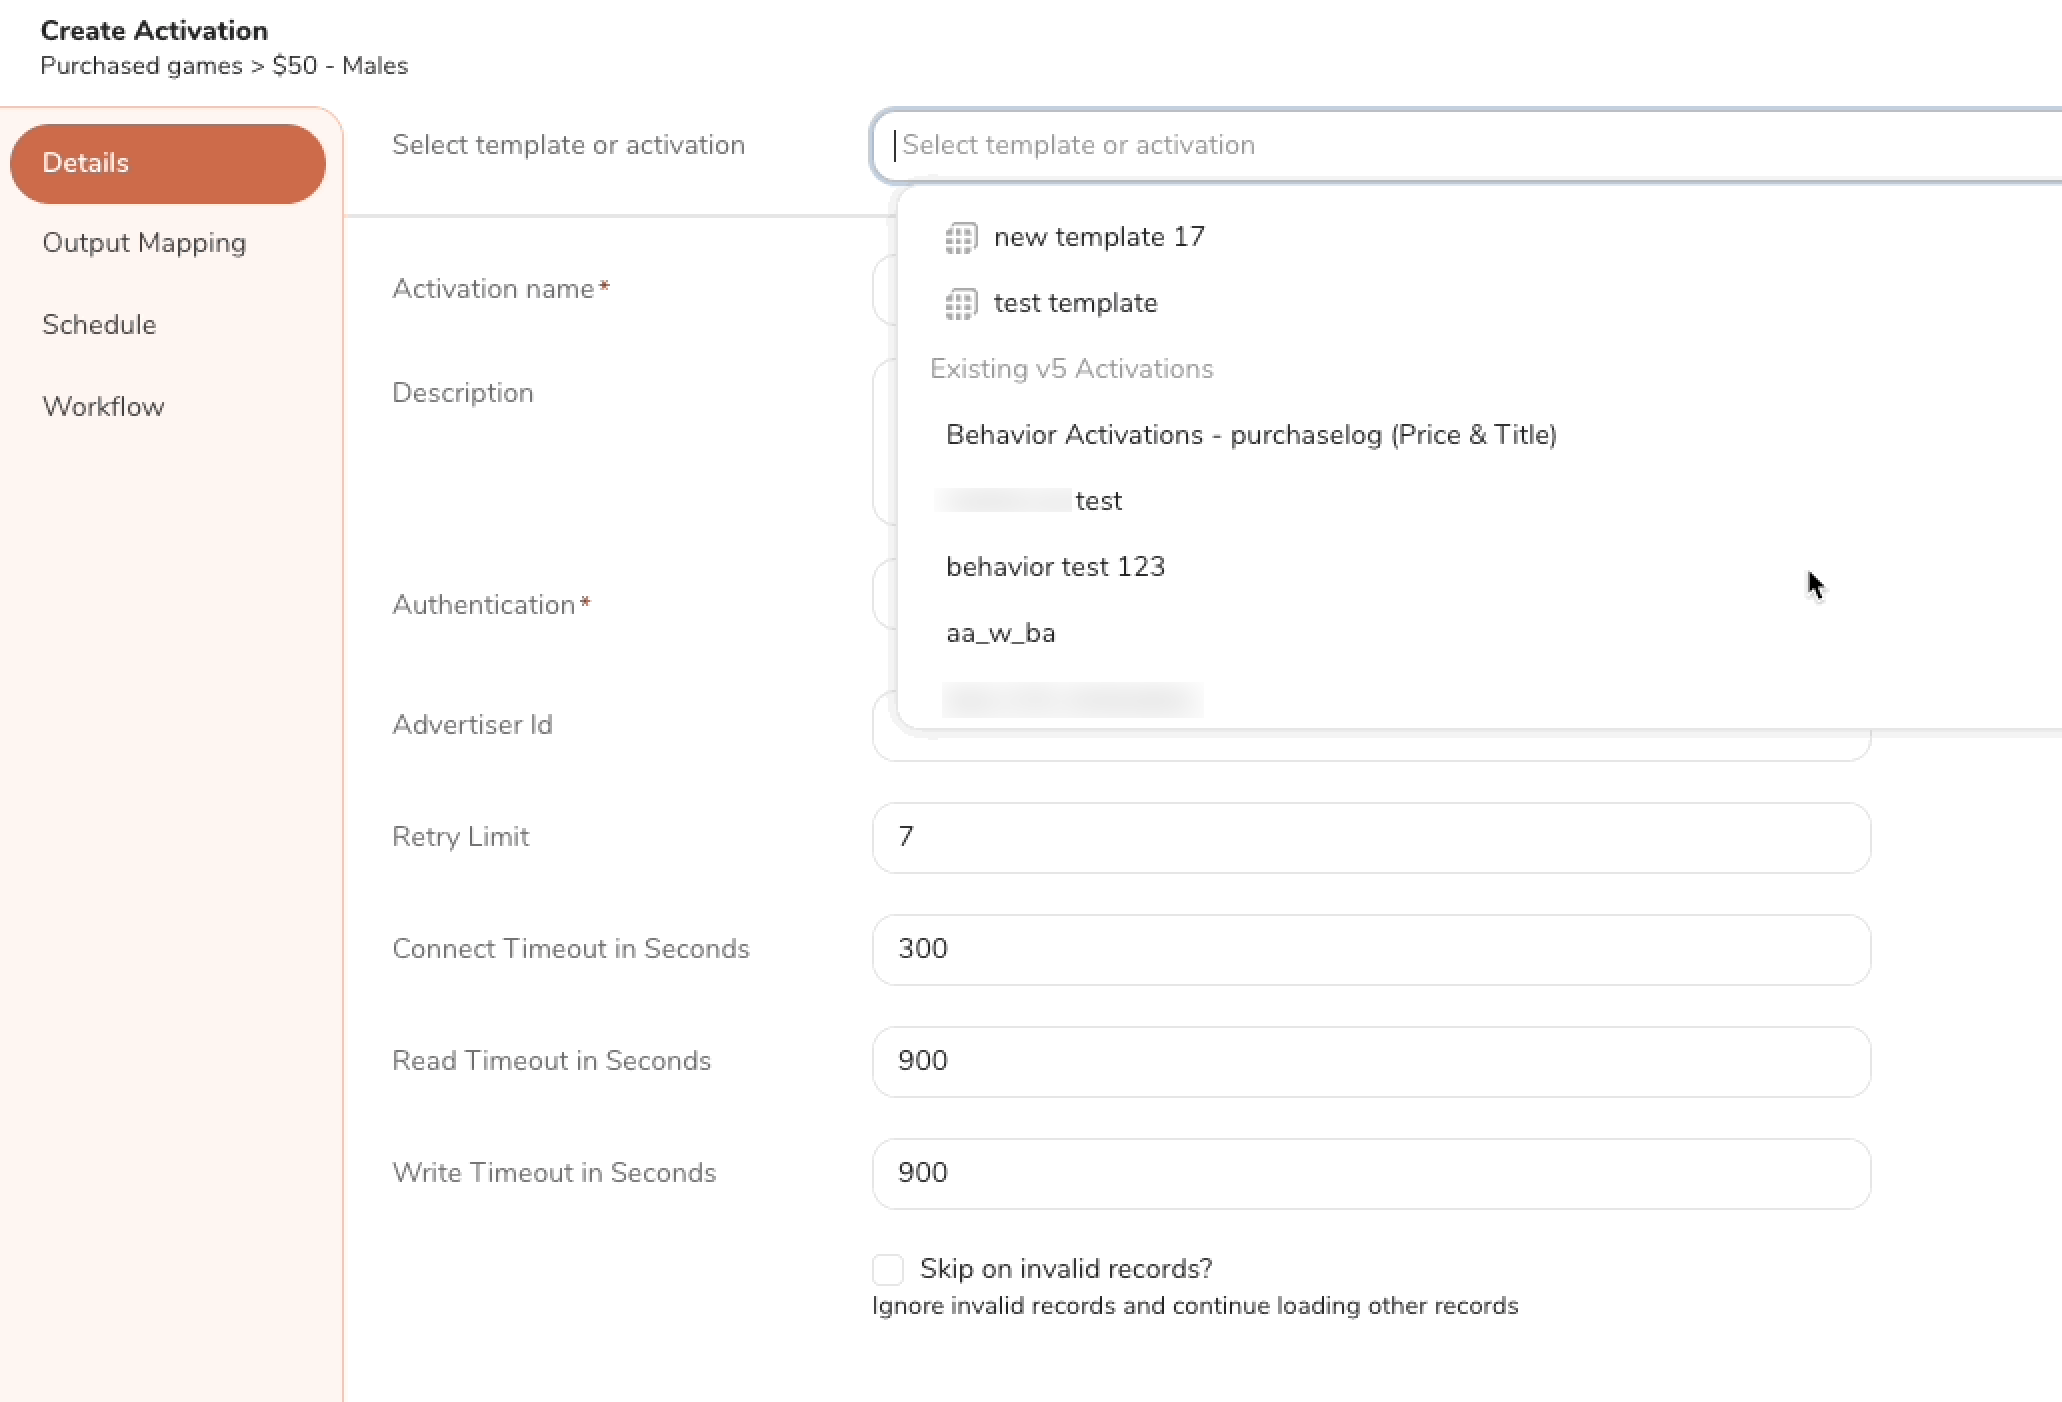
Fill Details as applicable. When selecting a template or activation, you can scroll the list to use Activation Templates or Existing v5 Activations.
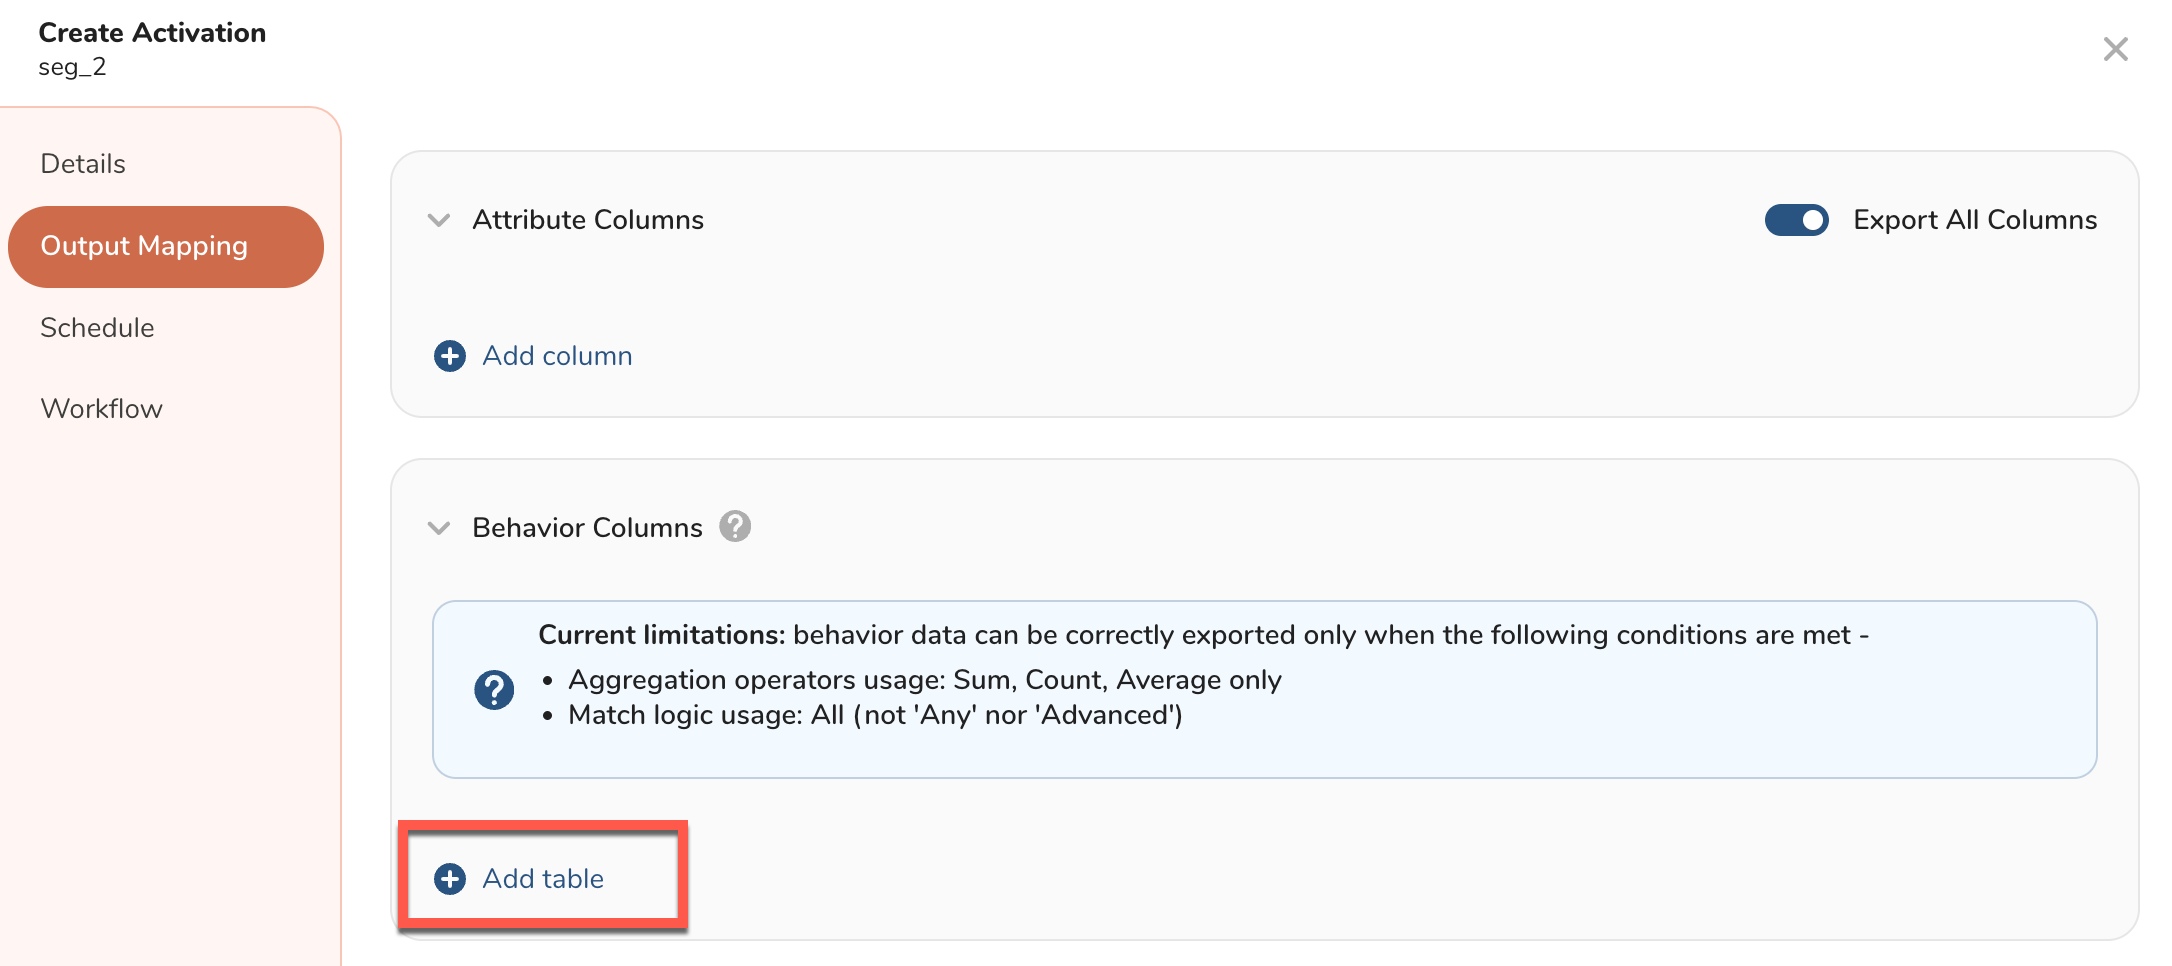
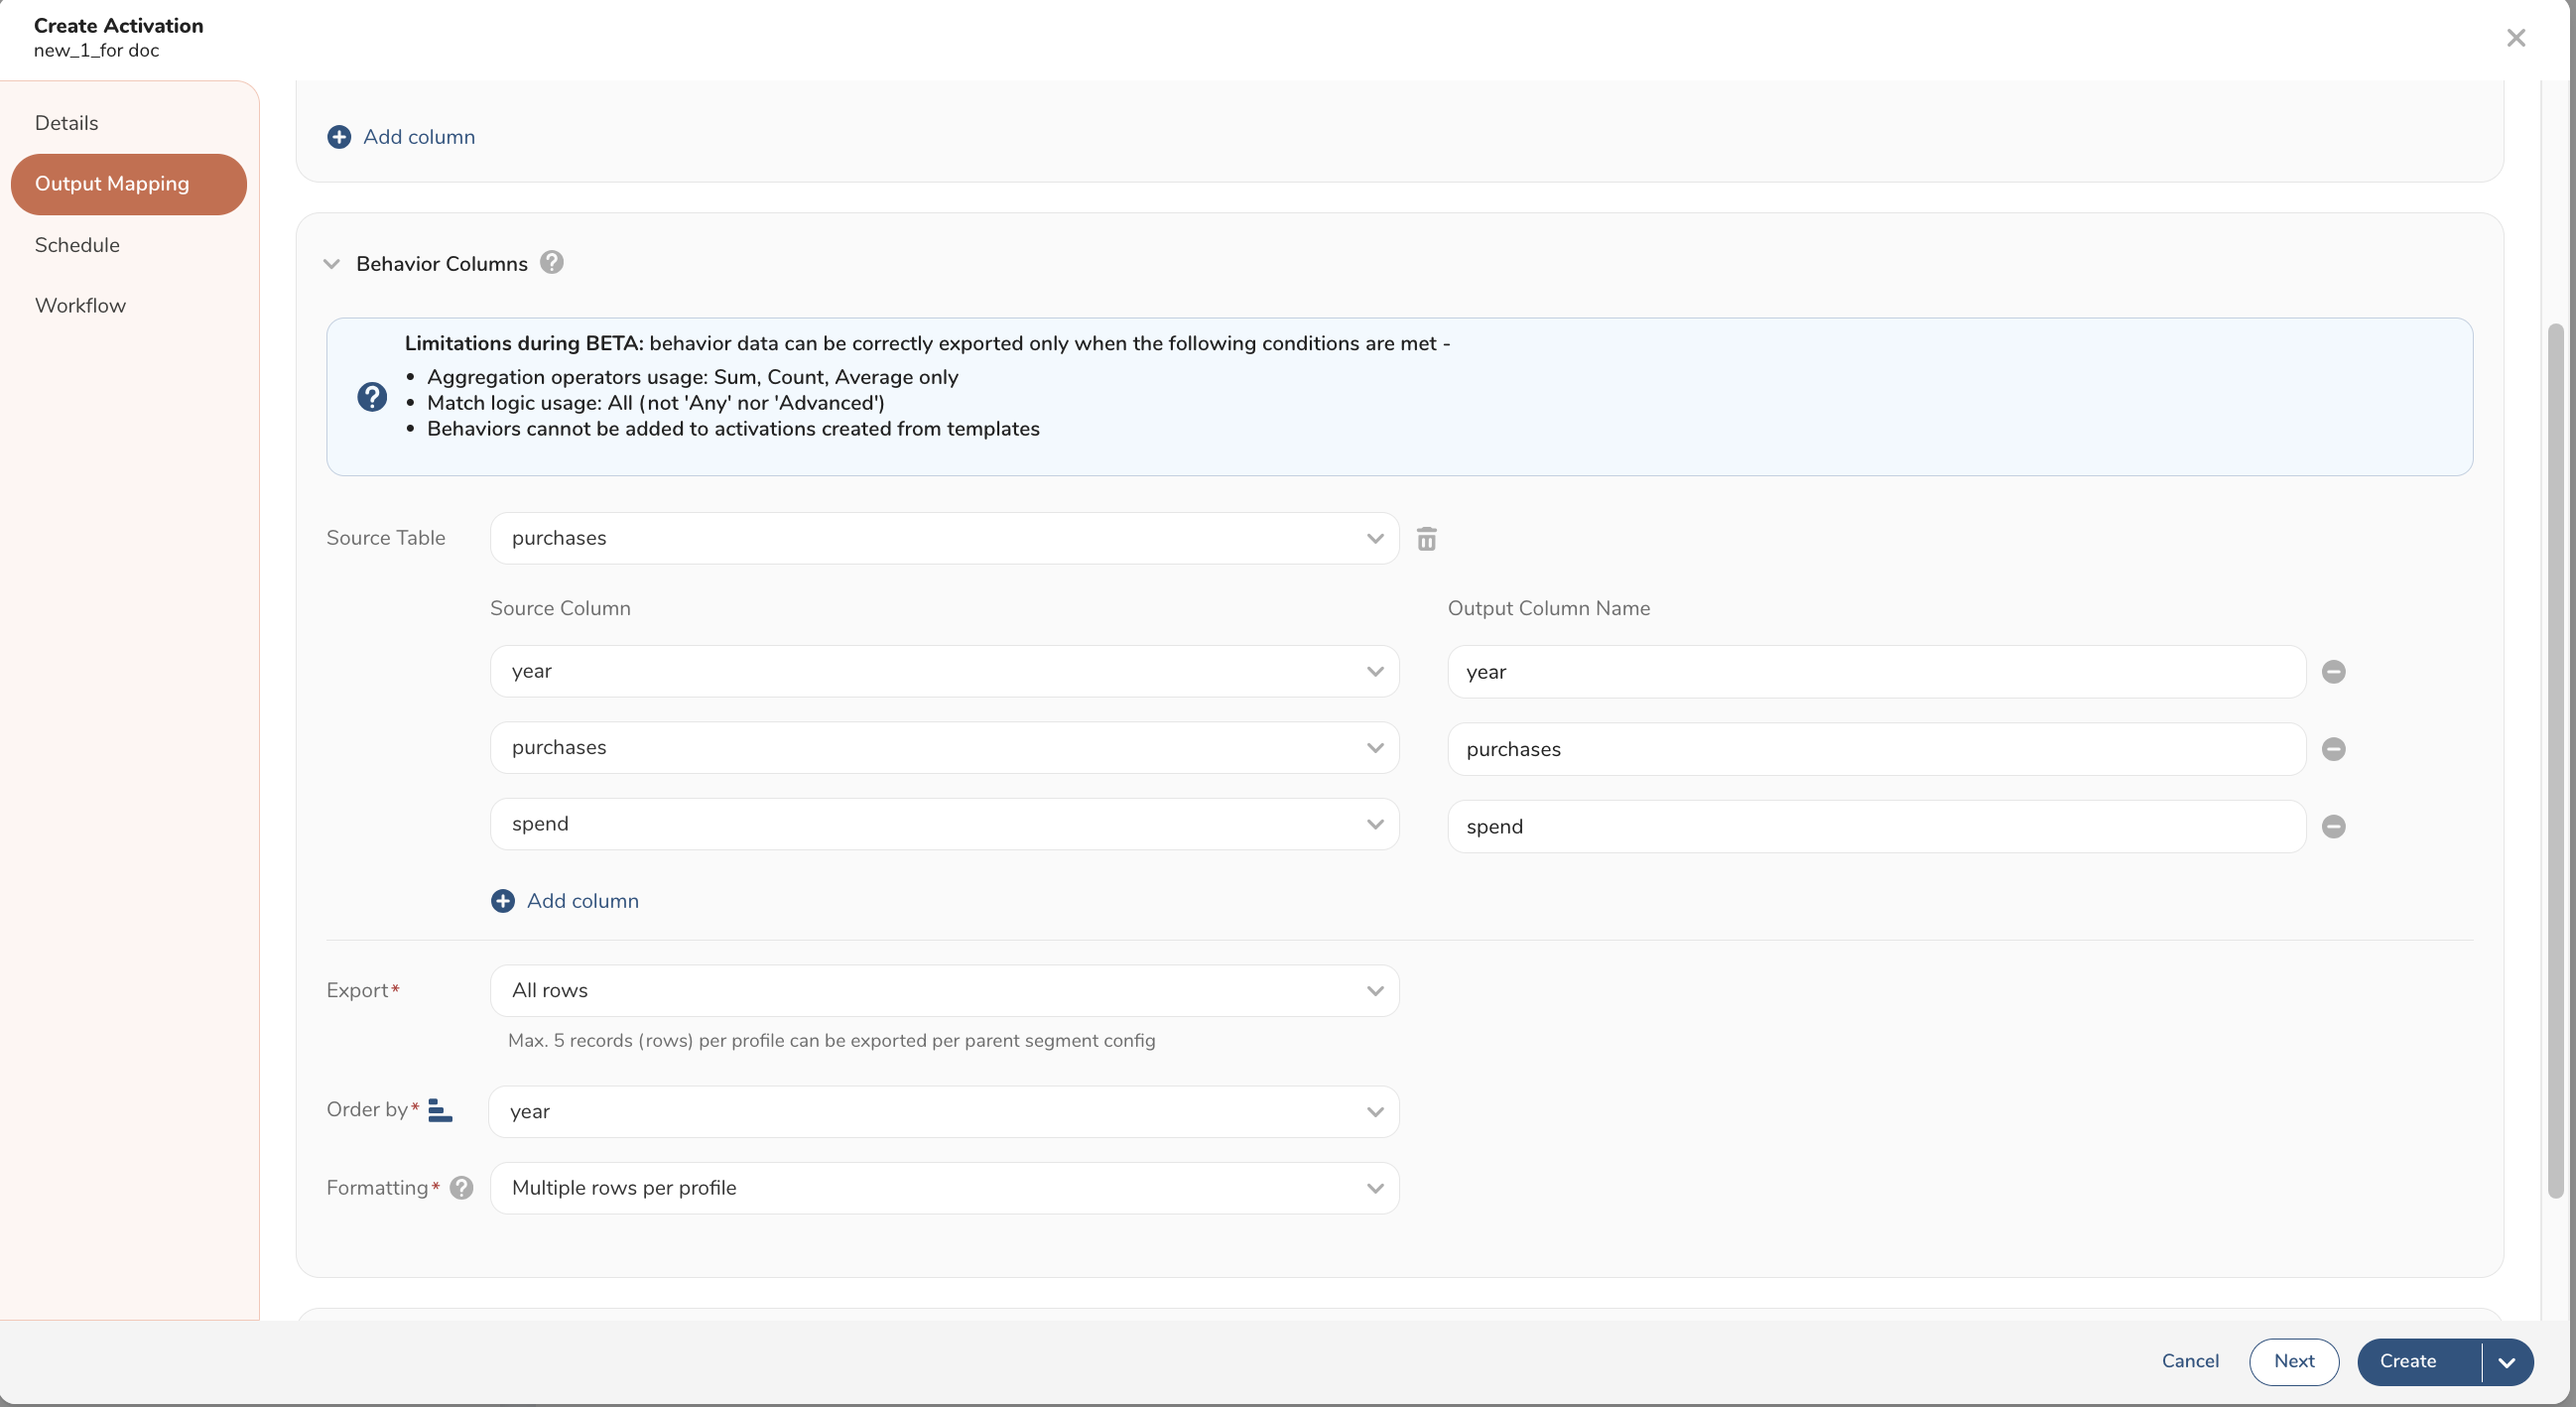
Select Output Mapping.
In the Behavior Columns section, select Add Table.
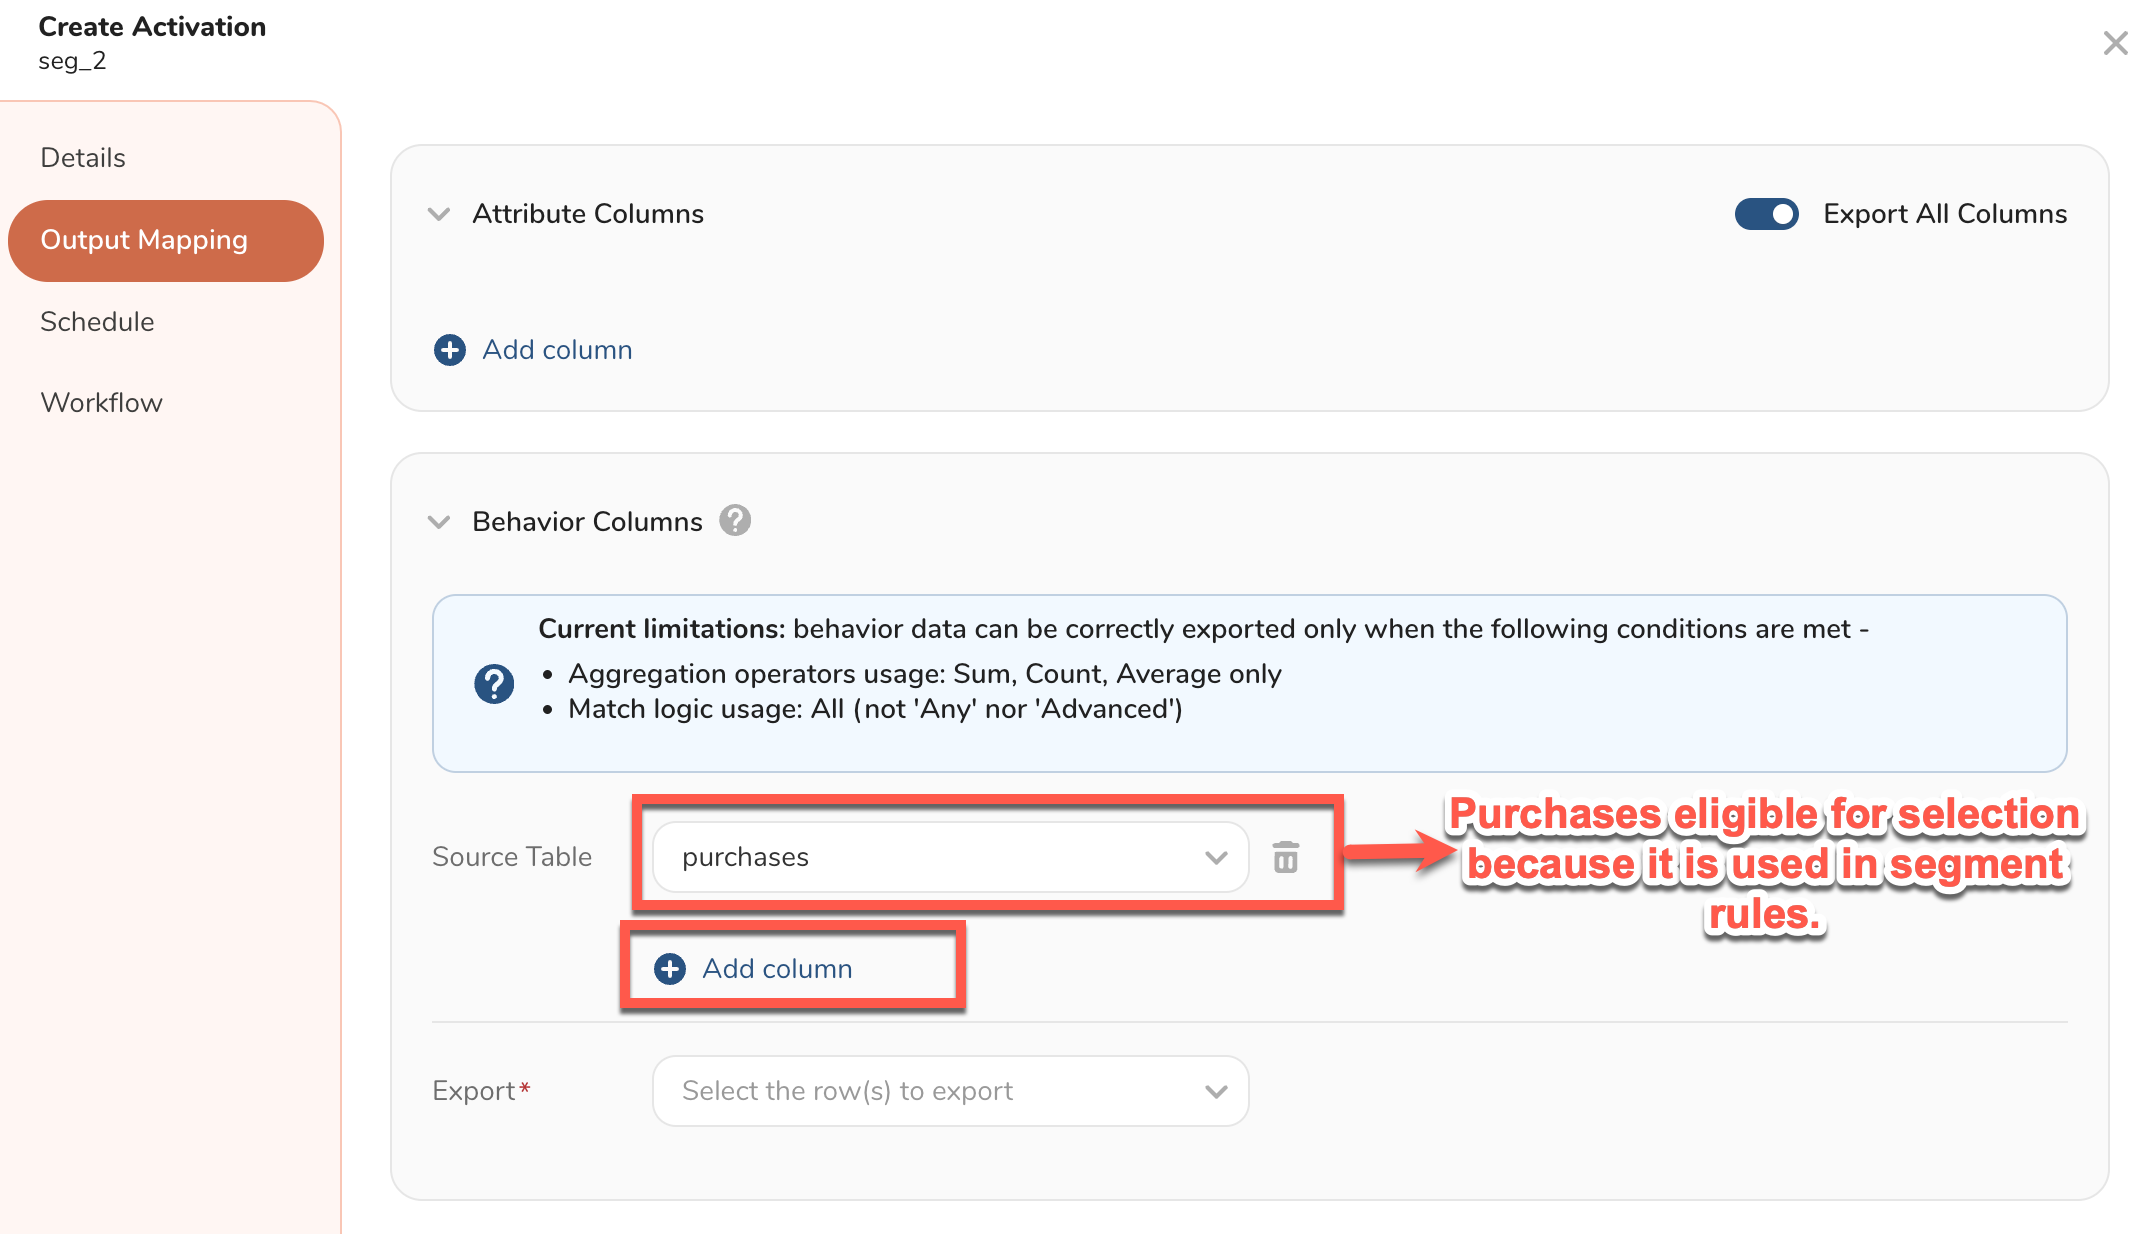
Select Add column. You can map a column in the source table to an output column in the output table. This mapping is termed as behavior column mapping. You have the option to rename the output column name.
If you want to order the activation export data by a certain column data, ensure that the source column name has not been mapped to a different output column name.
- Behaviors are selected based on the criteria provided. Select the rows that you want to export.

- You can configure additional details based on the row selection, as applicable.
- If "All Rows" or "Top # rows" are selected, attributes are duplicated for each row of exported behavior data. If you select Top # rows, you can configure the number of top rows that you want to export, the column by which the rows are ordered, and the table formatting.
- If only 1 row per profile is required to be exported, select first or last. For output table examples based on row selection, see Example.
| Option | Description |
|---|---|
| All rows | All rows from the table. |
| First row | Only the first row. |
| Last row | Only the last row. |
| Top # rows | Specify the number of top rows that needs to be exported. |
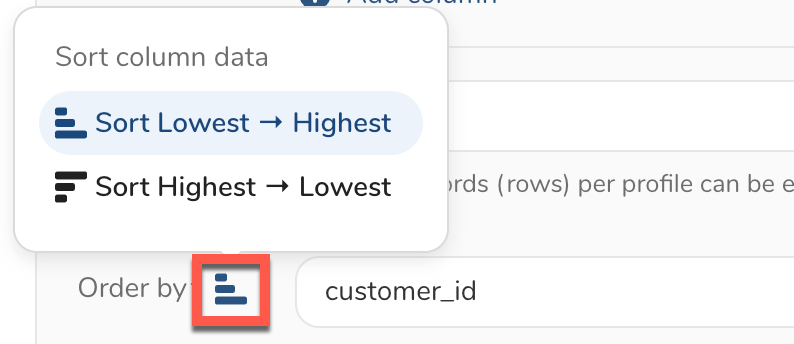
Select Order by to specify the column and configure order of the output table. For details on order and row-column formatting, see Customize Activation Output.
(Optional) You can add columns if needed using String Builder. This allows custom text to be added that can help track or associate activations to specific segments, campaigns, or datetime. For details, see string builder.
After providing all mandatory information for activation, select Create and submit an activation.
The output table data is configured based on the Export, Order by, and Formatting fields.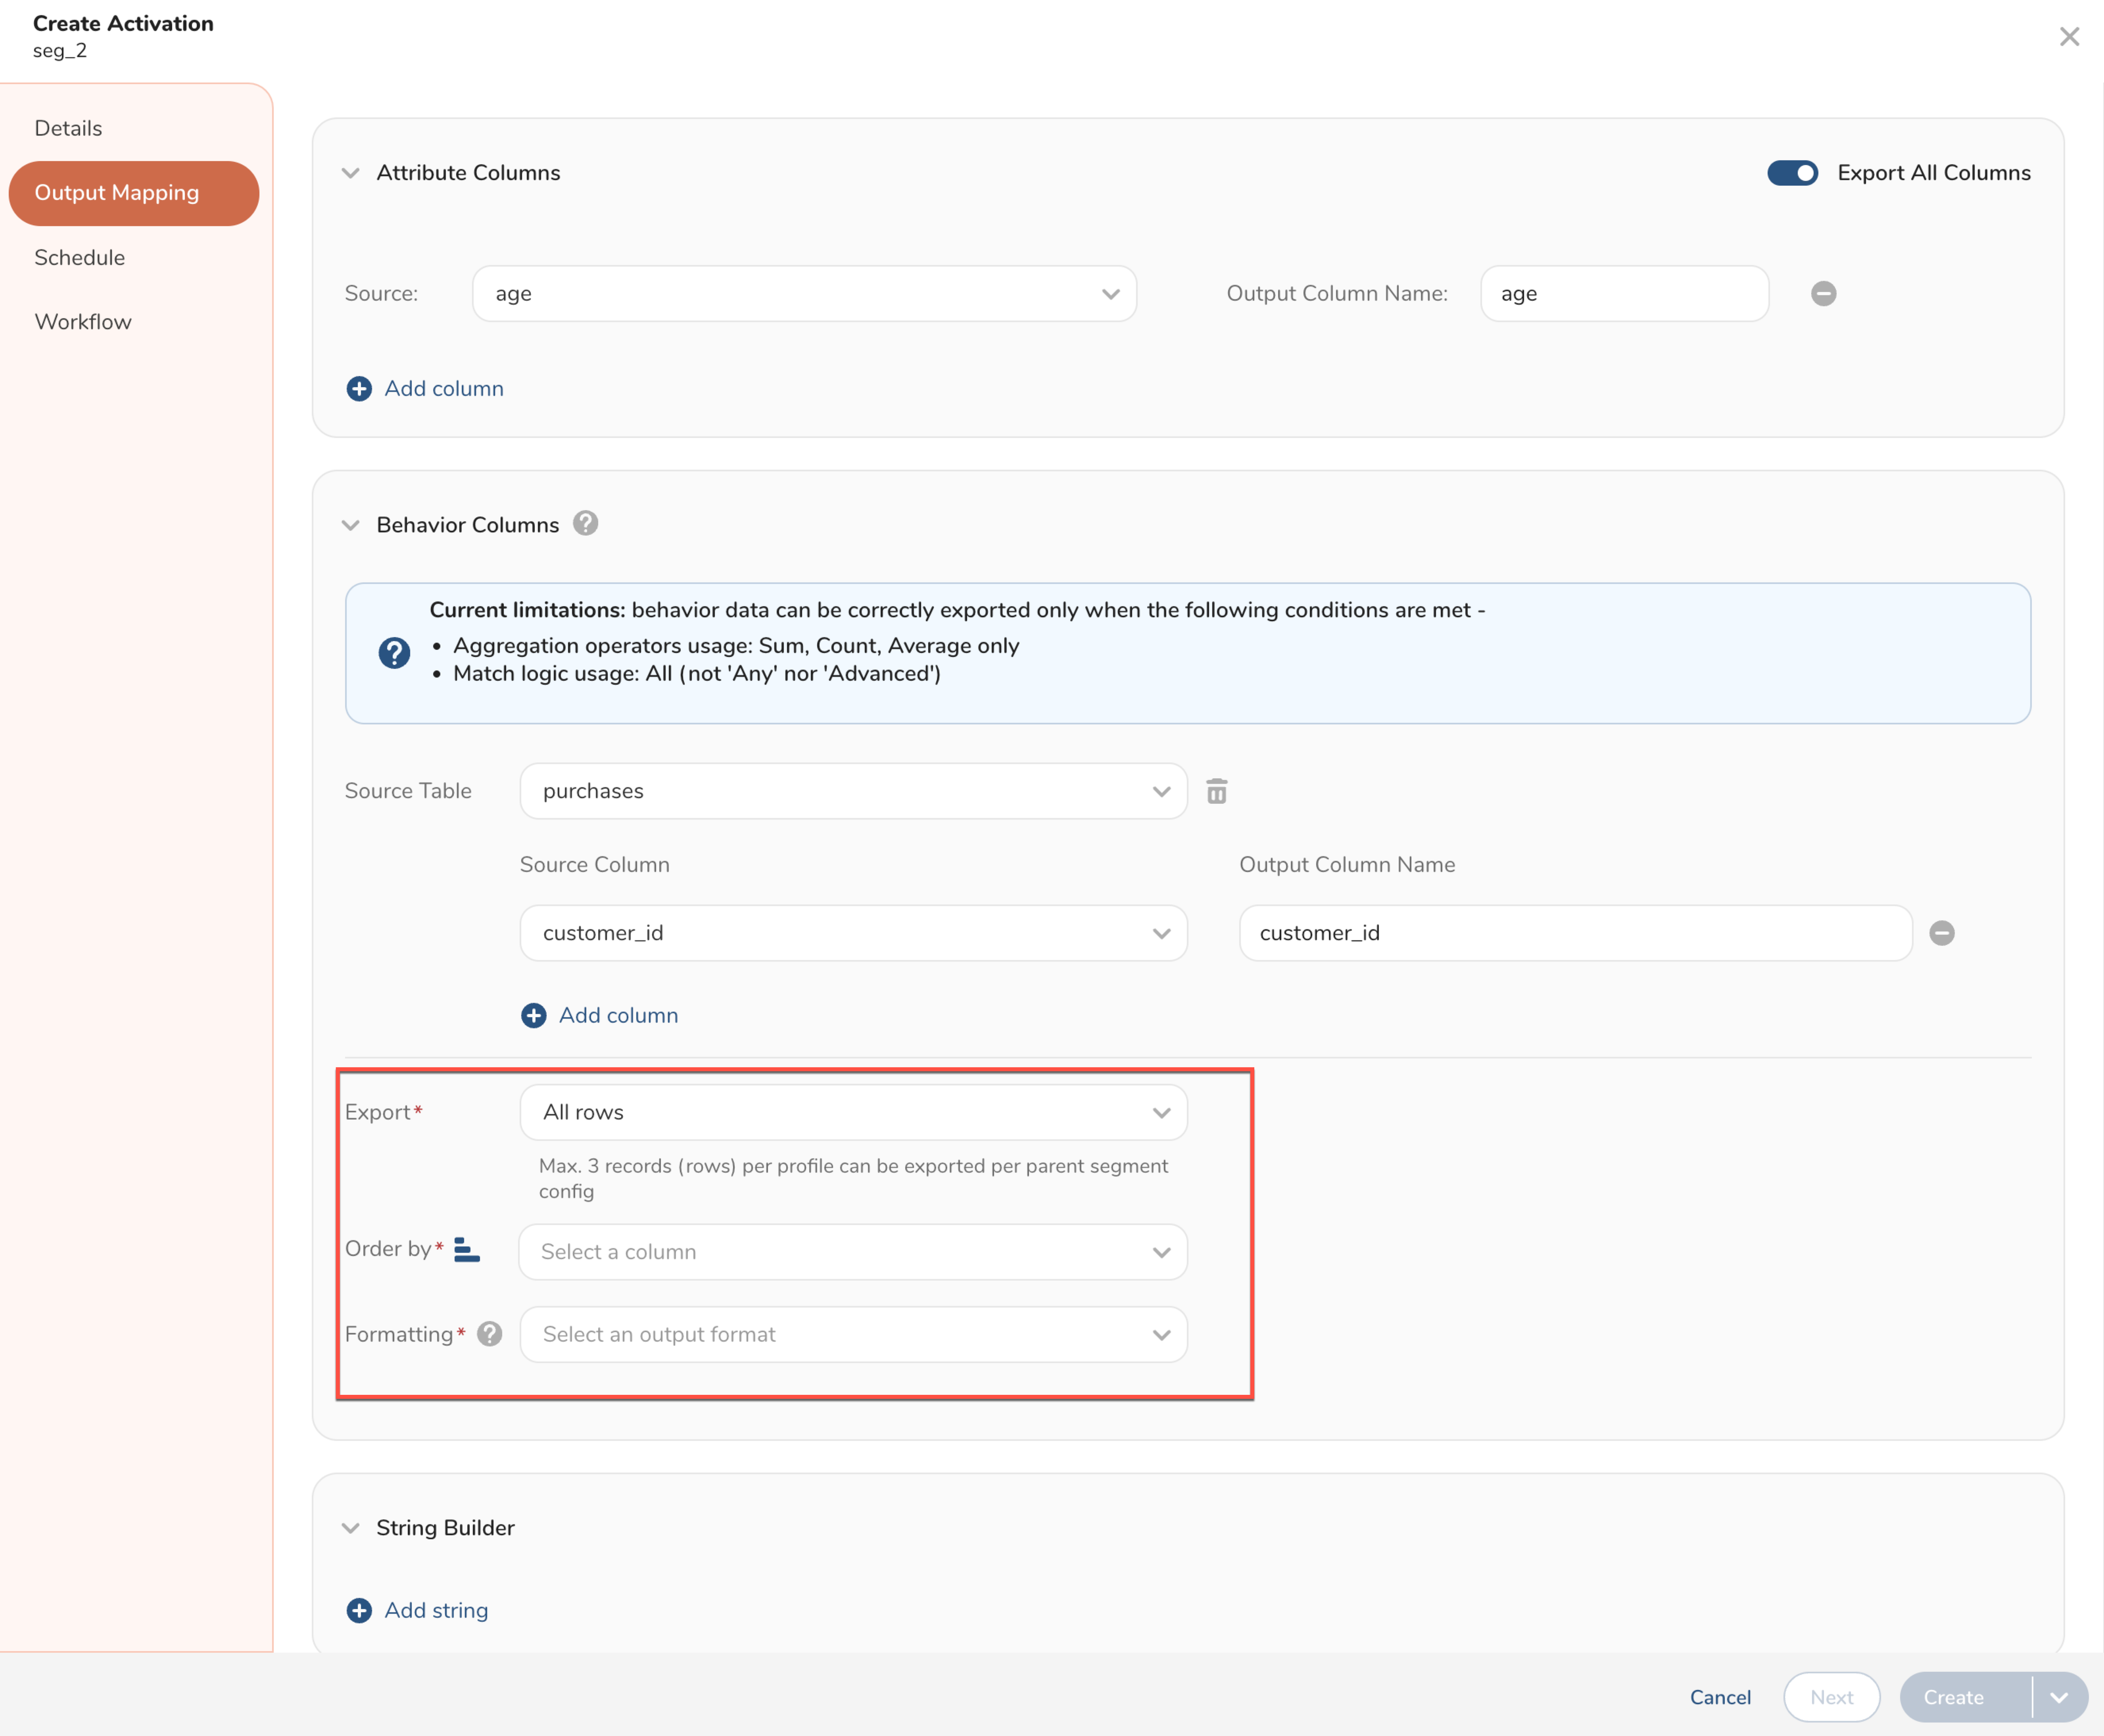
Export provides the following four row selection options:
- All rows
- First row
- Last row
- Top # rows
Order by configures column name to decide the order, and the ordering options are based on the column data type.
- Alphabetical order (A → Z or Z → A)
- Numerical order (lowest to highest or highest to lowest)
- Timestamp (Earliest to latest or latest to earliest)
Formatting configures the table row-column formatting as follows:
| Option | Description |
|---|---|
| Multiple rows per profile | Allows multiple rows for each profile |
| Transpose rows to columns | Converts rows into columns. |
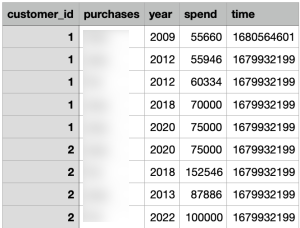
Consider the following source table sample with attribute and behavior configurations as follows:
Source Table:
The following images demonstrate the example output table based on the row selection in Export.
For each profile, all rows are activated.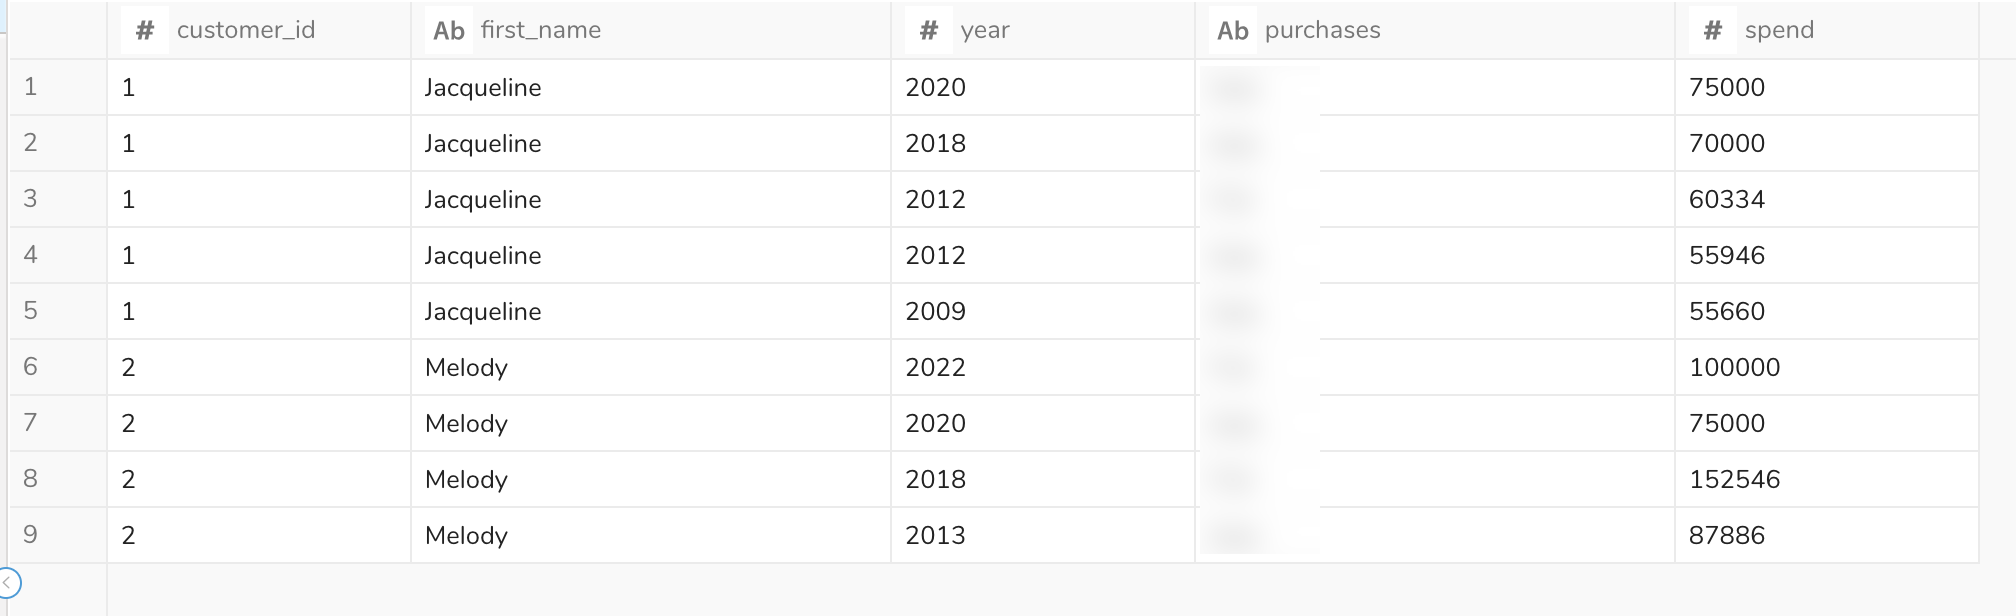
First row
Each profile's first record is activated.
Each profile's last record is activated.
If # is set to 3, the top three rows for each user profile is activated.
