Google Adsは、企業が数百万のGoogleパートナーWebサイトや、Google検索、YouTube、Mapsなどのサービスを通じて、デジタル広告で製品やサービスをプロモーションできるオンライン広告プラットフォームです。このインテグレーションを使用すると、Google Adsのレポートとメトリクスを Treasure Data にインポートして、カスタマーエクスペリエンスをカスタマイズし、データに基づいた意思決定でキャンペーンを最適化し、より良いマーケティング結果を達成できます。
- Treasure Data™ の基本知識
- Google Ads パフォーマンスデータの基本的な理解
- データが大きすぎると、インポートジョブが失敗する可能性があります。ページングを使用することで、この問題を解決できます。
- Googleは、パフォーマンスデータのデフォルトビューを時々変更する可能性があるため、以下の各レポートタイプの事前定義されたメトリクスコレクションは、Google Adsで見つかる対応するレポートと同じではない場合があります。ただし、不足しているメトリクスを追加して、データ要件を満たすことができます。
- この記事では、利用可能なすべてのattributes、segments、metrics、およびそれらの説明をリストすることを意図していません。詳細については、Google Ads Query Builder、または Google Ads UI (Campaigns > Insights and reports > Report Editor) にある Report Editor 機能を参照してください。
データをインポートする前に、TD Console でデータ接続を作成して設定する必要があります。データ接続の一部として、Google Ads アカウントの OAuth 認証を提供し、以下の手順でインテグレーションをデプロイします。
- TD Console を開く
- Integrations Hub > Catalog に移動
- Google Ads V2 を検索して選択
- Create Authentication を選択し、ターゲット Google Ads アカウントにアクセスできる Google アカウントの OAuth を提供
- Integration Hub にリダイレクトされた後、上記の手順を繰り返し(今回は提供した OAuth が表示されます)、認証の名前を入力して Done を選択
- TD Console を開く
- Integrations Hub > Authentications に移動
- 新しい認証を見つけて New Source を選択
- 最初のステップ
1 - Connectionで、Data Transfer Name フィールドに Source 名を入力し、Next を選択
以下のパラメータを使用して Treasure Data に取り込むデータを識別し、Next を選択します。
このインテグレーションは、ターゲットデータを定義する柔軟な方法をサポートしています:
- 4つの事前定義されたレポートタイプのいずれかを選択し、必要な Attributes、Segments、および Metrics を選択する。または、
- Google Ads で有効なカスタムクエリを入力して、必要なデータをインポートする。このオプションは Google Ads Query Builder と併用することをお勧めします。
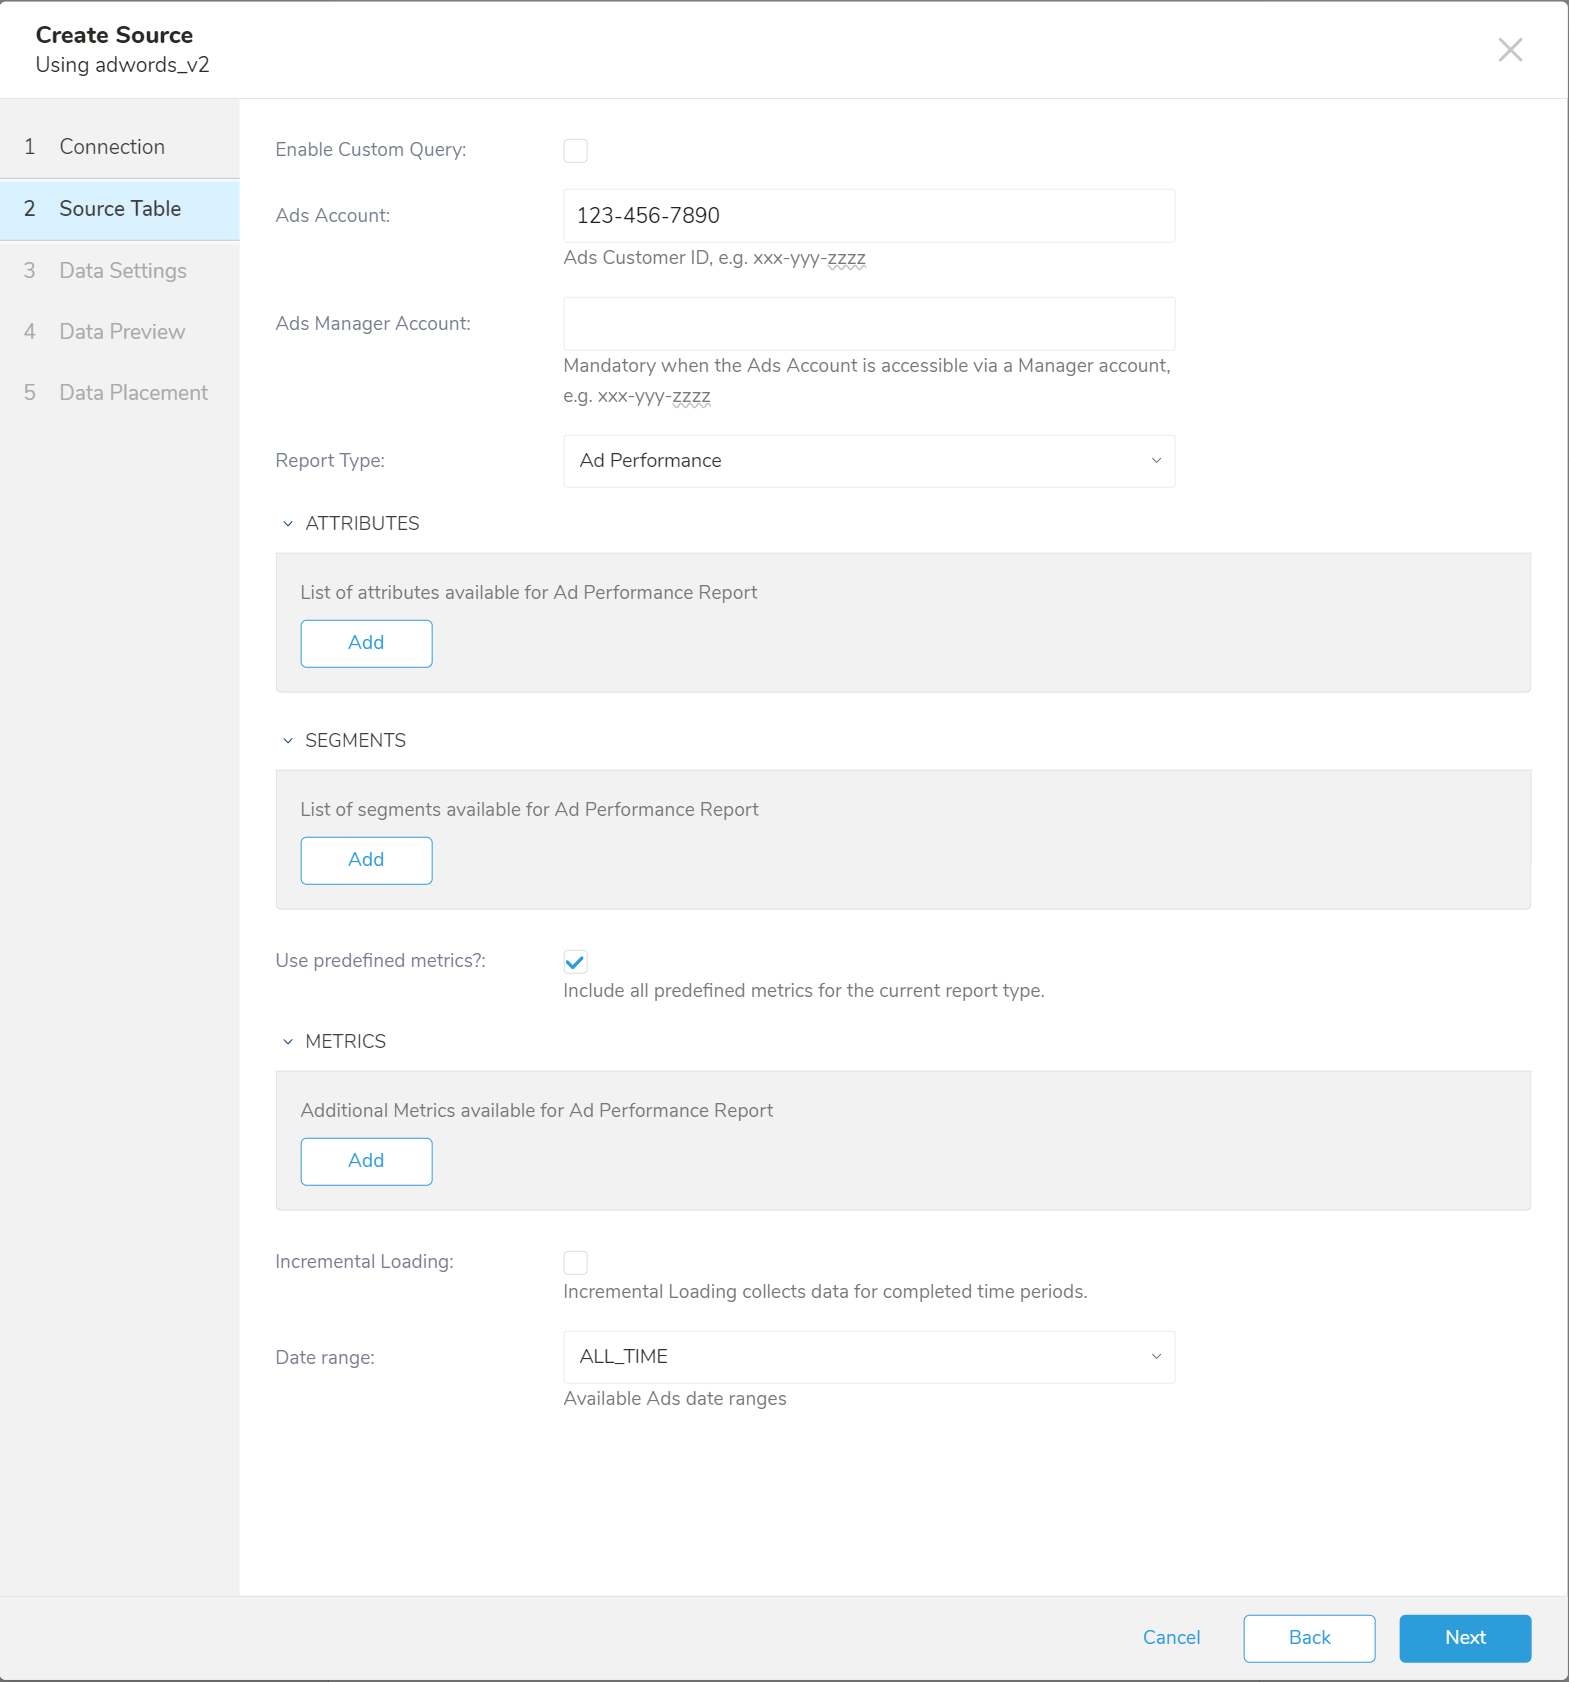
Source Table Parameter
| Parameter | Required | Type | Description |
|---|---|---|---|
| Ads Account | Required | string | ターゲット Google Ads アカウントの ID。ダッシュあり、またはなし |
| Ads Manager Account | Optional | string | Google Manager アカウントの ID。Ads Account がマネージャーアカウント経由でアクセス可能な場合に必要です。 |
| Enable Custom Query | Required | boolean | このオプションを有効にすると、カスタムクエリを使用してターゲットデータソースを宣言できます。詳細については、Google Ads Query Builder を参照してください。それ以外の場合は、事前定義されたレポートタイプのいずれかを選択し、必要な Attributes、Segments、および Metrics を選択します。 |
Report Type | Optional | string | Custom Query オプションが無効な場合は必須です。事前定義された各レポートタイプには、Attributes、Segments、および Metrics のコレクションがあります。
|
| Include Negative Keywords | Optional | boolean | レポートタイプが Keywords Performance Report の場合、negative keywords を取り込みを有効にする |
| Use predefined metrics | Optional | boolean | 追加のメトリクスを追加する代わりに、選択したレポートタイプの事前定義されたメトリクスを使用する |
| Attributes | Optional | array of string | 選択したレポートタイプの追加 attributes のリスト |
| Segments | Optional | array of string | すべての事前定義されたレポートタイプには、少なくとも1つのセグメントを追加する必要があります。サポートされているのはタイムセグメントのみです: Date、Day of week、Week、Month、Quarter、Year。Date Range が All Time の場合、タイムセグメントは不要です。それ以外の場合は、1つのタイプのタイムセグメントが必要です。 |
| Metrics | Optional | array of string | 選択したレポートタイプの追加メトリクスのリスト |
Date Range | Optional | string | ターゲットデータの日付範囲。サポートされている値:
|
| Start Date | Optional | date | カスタム日付範囲の開始日(yyyy-MM-dd 形式) |
| End Date | Optional | date | カスタム日付範囲の終了日(yyyy-MM-dd 形式) |
| Incremental mode | Optional | boolean | incremental mode でジョブを実行するには有効にする |
Source Table Parameter - Custom Query
| Parameter | Required | Type | Description |
|---|---|---|---|
| Select Columns | Optional | string | クエリするフィールドのカンマ区切りリスト。必要な attributes、segments、および metrics を含める必要があります。 |
| From Target | Optional | string | ターゲットリソース名。クエリステートメントの FROM 句で使用されます。 |
| Other Conditions | Optional | string | クエリのその他の条件。クエリステートメントの WHERE 句で使用されます。 |
| Enable Date Range | Optional | boolean | 日付範囲によるクエリオプションを有効にします。このオプションを無効にすると、Other Conditions が WHERE キーワードで始まる必要があります。このオプションを無効にすると、Incremental mode、Start Date、および End Date も無効になります。 |
オプションで、高度なデータ設定を変更できます。Next を選択して次のステップに進みます。

| Parameter | Required | Type | Description |
|---|---|---|---|
| Retry Limit | Required | int | 内部最大リトライ制限。デフォルト: 5回。 |
| Initial retry time wait in millis | Required | int | 初期リトライ待機時間(ミリ秒)。デフォルト: 500ms。 |
| Max retry wait in millis | Required | int | 最大リトライ待機時間(ミリ秒)。デフォルト: 300,000ms。 |
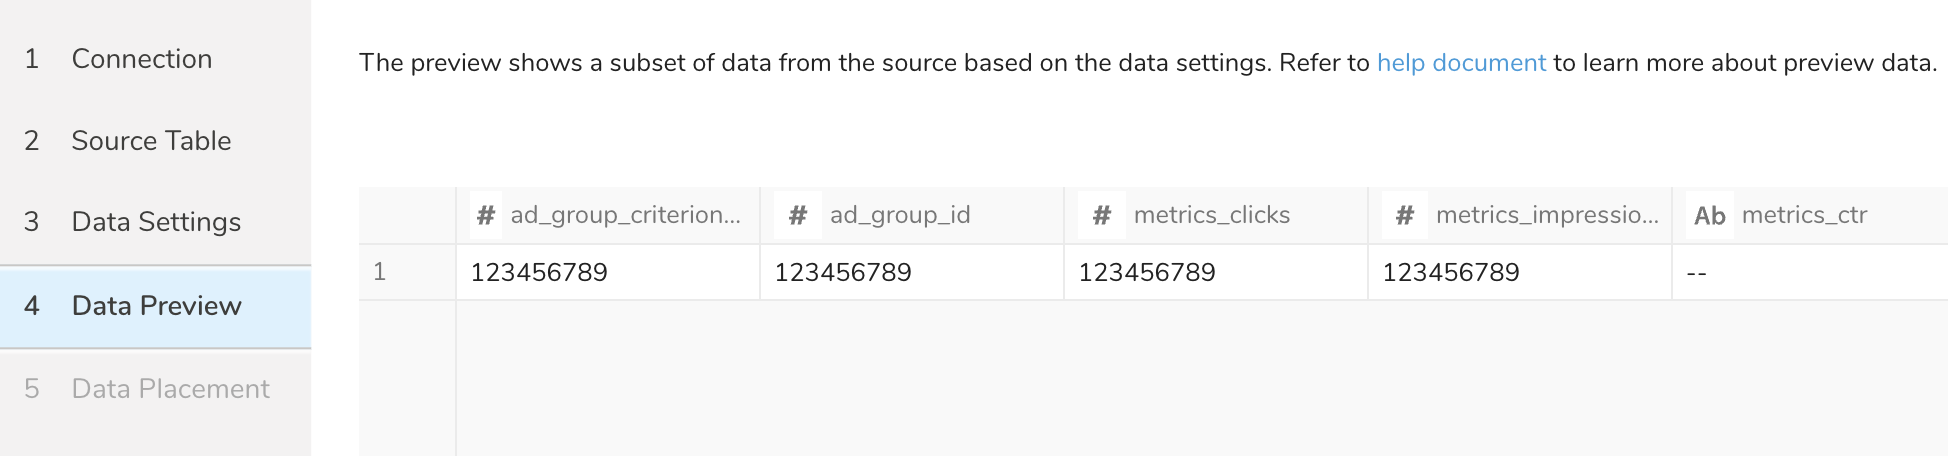
4 - Data Previewステップで、Generate Preview を選択して、インポートを実行する前にデータの近似ビューを確認します(オプション)- Next を選択して続行
データの配置について、データを配置したいターゲット database と table を選択し、インポートを実行する頻度を指定します。
Next を選択します。Storage の下で、インポートされたデータを配置する新しい database を作成するか、既存の database を選択し、新しい table を作成するか、既存の table を選択します。
Database を選択 > Select an existing または Create New Database を選択します。
オプションで、database 名を入力します。
Table を選択 > Select an existing または Create New Table を選択します。
オプションで、table 名を入力します。
データをインポートする方法を選択します。
- Append (デフォルト) - データインポートの結果は table に追加されます。 table が存在しない場合は作成されます。
- Always Replace - 既存の table の全体の内容をクエリの結果出力で置き換えます。table が存在しない場合は、新しい table が作成されます。
- Replace on New Data - 新しいデータがある場合のみ、既存の table の全体の内容をクエリの結果出力で置き換えます。
Timestamp-based Partition Key 列を選択します。 デフォルトキーとは異なるパーティションキーシードを設定したい場合は、long または timestamp 列をパーティショニング時刻として指定できます。デフォルトの時刻列として、add_time フィルターで upload_time を使用します。
データストレージの Timezone を選択します。
Schedule の下で、このクエリを実行するタイミングと頻度を選択できます。
- Off を選択します。
- Scheduling Timezone を選択します。
- Create & Run Now を選択します。
- On を選択します。
- Schedule を選択します。UI では、@hourly、@daily、@monthly、またはカスタム cron の 4 つのオプションが提供されます。
- Delay Transfer を選択して、実行時間の遅延を追加することもできます。
- Scheduling Timezone を選択します。
- Create & Run Now を選択します。
転送が実行された後、Data Workbench > Databases で転送の結果を確認できます。
前提条件:
- TD Toolbelt: 最新バージョンの TD CLI ツールをインストール: TD Toolbelt
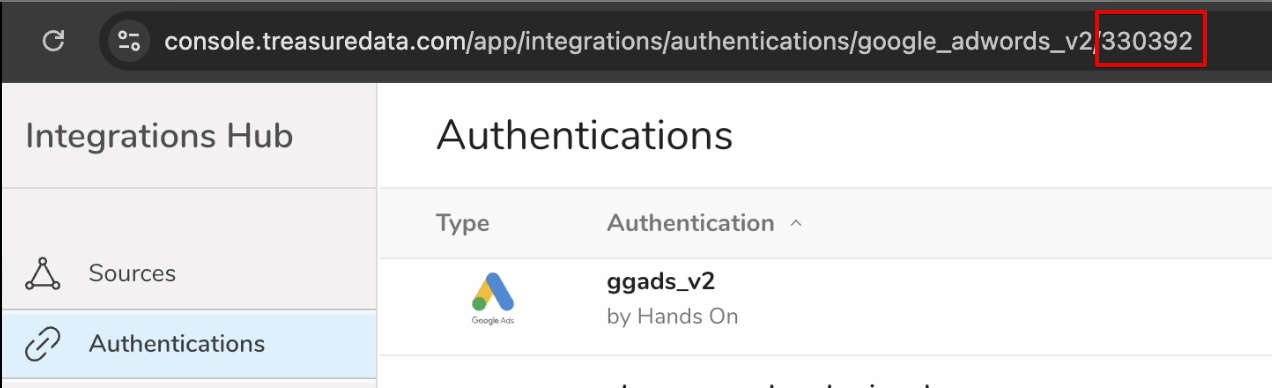
- Authentication ID: 上記の手順に従って、TD Console でこのインテグレーションの Authentication を作成します。その後、Authentication 画面の URL の最後の部分で ID を確認できます。
一般的な手順:
YML 設定ファイルを作成します。例:
load.yml、td_authentication_idフィールドで作成した認証を参照します。詳細については、以下のパラメータリファレンスと例を参照してください
次のコマンドを使用して、入力データをプレビューします(オプション):
td connector:preview load.yml- 次のコマンドを使用して、データインポートをトリガーします:
td connector:issue load.yml \
--database db-name --table table-name- 次のコマンドを使用して、実行をスケジュールします:
td connector:create daily_import \
"10 0 * * *" db-name table-name load.yml詳細な参考情報については、このページを参照してください
| Name | Description | Value | Default Value | Required |
|---|---|---|---|---|
| client_customer_id | Client customer ID | String | True | |
| login_customer_id | Ads Manager Account ID。Ads Account が Google Manager アカウント経由でアクセス可能な場合に必要です。 | String | False | |
| target | 事前定義されたレポートタイプ。enable_custom_query が false の場合に使用されます。 | String |
| False |
| segments | 追加セグメントのリスト。enable_custom_query が false の場合に使用されます。date_range が ALL_TIME の場合、タイムセグメントは不要です。それ以外の場合は、1つのタイプのタイムセグメントが必要です。サポートされているタイムセグメント: Date、Day of week、Week、Month、Quarter、Year | Array of String | False | |
| include_predefined_metrics | すべての事前定義されたメトリクスを含めます。enable_custom_query が false の場合に使用されます。 | Boolean | True | False |
| metrics | 追加メトリクスのリスト。enable_custom_query が false の場合に使用されます。 | Array of String | False | |
| attributes | 追加 attributes のリスト。enable_custom_query が false の場合に使用されます | Array of String | False | |
| incremental | incremental mode でジョブを実行 | Boolean | False | False |
| incremental_duration | incremental ジョブの日数。end_date を無視し、次の式で再計算します: end_date = start_date + incremental_duration | Integer | 0 | False |
| date_range | ターゲットデータの日付範囲。サポートされている値については、こちらを参照してください | String | ||
| start_date | 開始日。date_range が custom_date の場合に使用されます | Date | False | |
| end_date | 終了日。date_range が custom_date の場合に使用されます | Date | False | |
| include_negative_keywords | negative keywords でレコードをフィルタリング。keywords_performance_report でのみ使用されます | Boolean | False | False |
| enable_custom_query | カスタムクエリの使用を有効にする | Boolean | False | True |
| select_columns | クエリするフィールドのリスト。カンマ区切り | String | False | |
| from_target | レポートターゲット名 | String | False | |
| other_conditions | クエリのその他の条件 | String | False | |
| enable_date_range | データ範囲クエリと incremental mode を有効にする | Boolean | True | False |
| td_authentication_id | TD Console で作成された Authentication の ID。日付範囲によるクエリオプションを有効にします。このオプションを無効にすると、Other Conditions が WHERE キーワードで始まる必要があります。このオプションを無効にすると、Incremental mode、Start Date、および End Date も無効になります | String | True | |
| refresh_token | 認証情報が必要です。UI で作成してから、上記のパラメータを使用してその ID を参照する方が便利です。あるいは、これら4つのパラメータに必要な認証情報を提供するために Google API プロジェクトを作成することもできます。 | String | False | |
| client_id | String | False | ||
| client_secret | String | False |
in:
  type: google_adwords_v2
  td_authentication_id: 330392
  enable_custom_query: false
  client_customer_id: xx-xxxx-xxxx
  target: AD_PERFORMANCE_REPORT
  date_range: "CUSTOM_DATE"
  include_predefined_metrics: false
  incremental: true
  start_date: 2020-03-01
  end_date: 2020-03-02
  segments: ["segments.date"]
  metrics: ["metrics.absolute_top_impression_percentage"]
out:
mode: appendin:
type: google_adwords_v2
td_authentication_id: 330392
enable_custom_query: true
client_customer_id: xx-xxxx-xxxx
date_range: "CUSTOM_DATE"
enable_date_range: true
incremental: true
start_date: 2020-03-01
end_date: 2020-03-02
select_columns: ad_group_criterion.criterion_id, ad_group.id, ad_group.name, segments.date
from_target: keyword_view
other_conditions: "AND ad_group_criterion.type = 'KEYWORD'"
out:
mode: appendin:
type: google_adwords_v2
td_authentication_id: 330392
enable_custom_query: true
client_customer_id: xx-xxxx-xxxx
login_customer_id: xx-xxxx-xxxx
date_range: "CUSTOM_DATE"
incremental: true
start_date: 2020-03-01
end_date: 2020-03-02
select_columns: ad_group_criterion.criterion_id, ad_group.id, ad_group.name, segments.date
from_target: keyword_view
other_conditions: "AND ad_group_criterion.type = 'KEYWORD'"
out:
mode: appendTD Workflow を使用して Google Ads からデータをインポートできます。詳細については、こちらを参照してください。
Query language リファレンス: https://developers.google.com/google-ads/api/docs/query/overview?hl=en
例:
SELECT
  campaign.id,
  campaign.name,
  campaign.status,
  metrics.impressions,
  segments.date,
FROM campaign
WHERE segments.date during LAST_30_DAYS
  AND campaign.status = 'PAUSED'
  AND metrics.impressions > 1000
ORDER BY campaign.idin:
type: google_adwords_v2
enable_custom_query: true
client_id: xxx
client_secret: xxx
refresh_token: xxx
client_customer_id: xx-xxxx-xxxx
date_range: "LAST_30_DAYS"
developer_token: xxx
select_columns: campaign.id, campaign.name, campaign.status, metrics.impressions, segments.date
from_target: campaign
other_conditions: "AND campaign.status = 'PAUSED' AND metrics.impressions > 1000"in:
type: google_adwords_v2
enable_custom_query: true
client_id: xxx
client_secret: xxx
refresh_token: xxx
client_customer_id: xx-xxxx-xxxx
login_customer_id: xx-xxxx-xxxx
date_range: "LAST_30_DAYS"
developer_token: xxx
select_columns: campaign.id, campaign.name, campaign.status, metrics.impressions, segments.date
from_target: campaign
other_conditions: "AND campaign.status = 'PAUSED' AND metrics.impressions > 1000"注: クエリには時間が必要で、where 条件を含める必要があります。例のように、other_conditions は AND で始まる必要があります。
| Report Type | Predefined Metrics |
|---|---|
| Ad Performance AdGroup Performance Campaign Performance |
|
| Keywords Performance |
|
| Date Range | Description |
|---|---|
| TODAY | 今日のみ。 |
| YESTERDAY | 昨日のみ。 |
| LAST_7_DAYS | 今日を含まない過去7日間。 |
| LAST_WEEK | 前の月曜日から始まる7日間。 |
| LAST_BUSINESS_WEEK | 前の営業週の月曜日から金曜日までの5日間。 |
| THIS_MONTH | 今月のすべての日。 |
| LAST_MONTH | 先月のすべての日。 |
| ALL_TIME | 利用可能なすべての期間。 |
| CUSTOM_DATE | カスタム日付範囲。start_date と end_date が yyyy-MM-dd 形式で必要です。 |
| LAST_14_DAYS | 今日を含まない過去14日間。 |
| LAST_30_DAYS | 今日を含まない過去30日間。 |
| THIS_WEEK_SUN_TODAY | 前の日曜日から今日までの期間。 |
| THIS_WEEK_MON_TODAY | 前の月曜日から今日までの期間。 |
| LAST_WEEK_SUN_SAT | 前の日曜日から始まる7日間。 |