This feature is in BETA version. For more information, contact your Customer Success Representative.
Shopify Import Connector V2は、ShopifyのGraphQL Admin APIで動作するように特別に設計されたShopifyコネクタの新しいバージョンです。このバージョンは、Shopifyが複数のREST APIエンドポイント(/productsと/variantsを含む)を廃止し、GraphQLの対応するエンドポイントに置き換えることに対応して開発されました。その結果、継続的な機能性と将来の互換性を確保するために、API廃止の影響を受けるリソースのデータインポートを処理するこのV2コネクタを開発しました。
V2コネクタは、以前はREST APIで管理されていた次のインポート操作を特別に処理します:
- 製品データインポート
- 基本的な製品情報
- 製品バリアント
- 製品ステータスと可視性設定
- 製品オプションとバリアント設定
- 製品バリアントデータインポート
- バリアント固有の属性
- SKU情報
- 価格詳細
- 在庫追跡情報
- メタフィールドインポート
- 製品メタフィールド
- 製品バリアントメタフィールド
次の場合はV1バージョンのコネクタを引き続き使用してください:
- 在庫レベルインポート
- 在庫アイテムインポート
- ロケーションデータインポート
- コレクションメタフィールドインポート
- 製品画像メタフィールドインポート
- V2の範囲にリストされていない他のリソースタイプ
ただし、次の場合はV2コネクタを使用してください:
- 製品データのインポート
- 製品バリアントデータのインポート
- 製品メタフィールドのインポート
- 製品バリアントメタフィールドのインポート
- Treasure Dataの基本知識
- Shopifyの基本知識
- メタフィールドインポートの制限
- 製品ごとに最大250個のメタフィールド
- 製品バリアントごとに最大250個のメタフィールド
- 製品バリアントインポートは、created_atタイムスタンプによる増分読み込みをサポートしなくなりました。updated_atタイムスタンプによる読み込みのみをサポートします。
If your security policy requires IP whitelisting, you must add Treasure Data's IP addresses to your allowlist to ensure a successful connection.
Please find the complete list of static IP addresses, organized by region, at the following document
最初のステップは、資格情報のセットで新しい認証を作成することです。
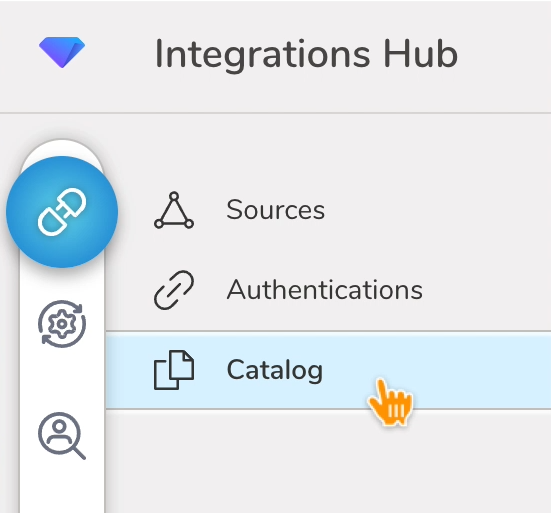
- Integrations Hubを選択します。
- Catalogを選択します。
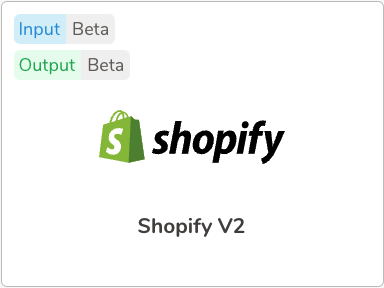
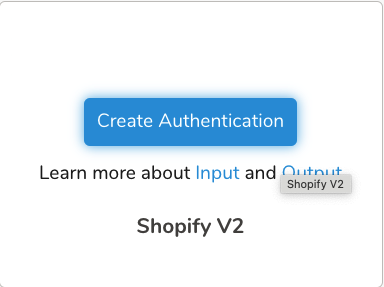
 3. CatalogでShopifyを検索し、アイコンの上にマウスを置いてCreate Authenticationを選択します。
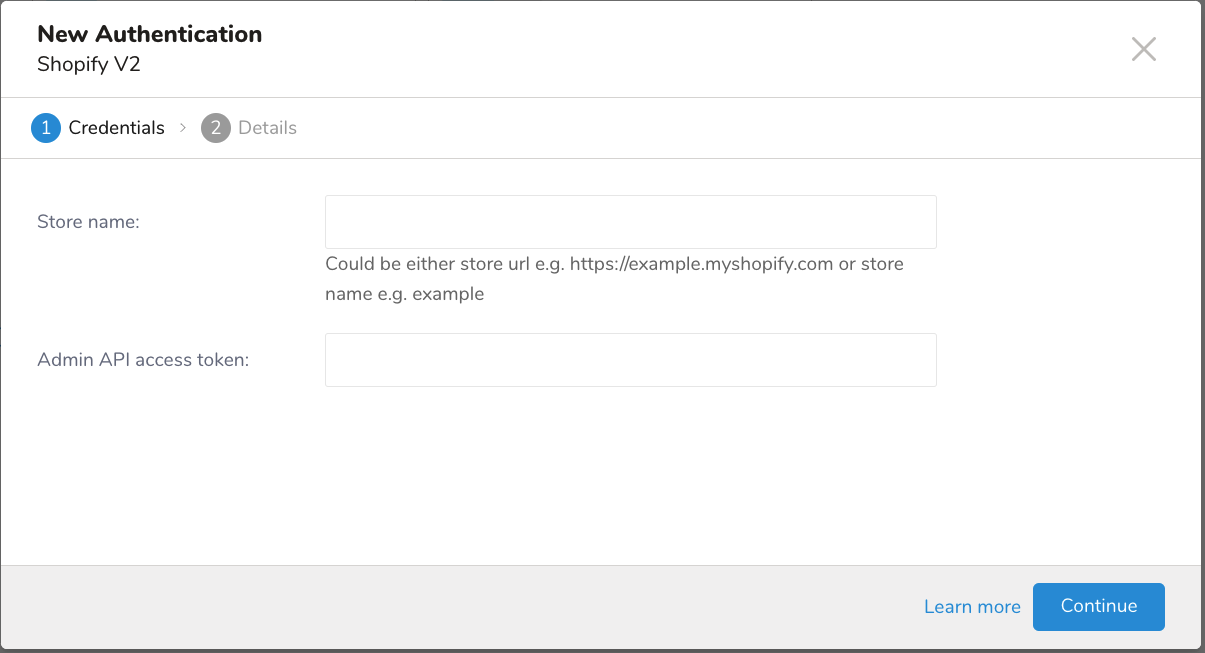
- Credentialsタブが選択されていることを確認してから、統合の資格情報を入力します。
新しい認証フィールド
| Parameter | Description |
|---|---|
| Store name | Shopifyストアのストア識別子。これは2つの形式で入力できます: - 完全なストアURL: 例 https://mountbaker.myshopify.com - ストア名のみ: 例: mountbakerストア名のみを使用している場合は、.myshopify.comドメインなしのストアの一意の識別子である必要があります。 |
| Admin API access token | ShopifyのAdmin APIで認証するために使用されるアクセストークン。このトークンは、Shopify管理パネルのApps > Develop apps > Create an app > Configure Admin API scopesから生成できます。トークンには、メタフィールドの管理などの操作を実行するための適切な権限が必要です。 |
- Continueを選択します。
- 認証の名前を入力し、Doneを選択します。
認証がコンソールで利用可能になった後、インポートジョブを設定します。
- TD Consoleを開きます。
- Integrations Hub > Authenticationsに移動します。
- Shopify認証を見つけてNew Sourceを選択します。
- Data Transfer Nameフィールドにソース名を入力します。
- Nextを選択します。
| Parameter | Description |
|---|---|
| Data Transfer Name | 転送の名前を入力します。 |
| Authentication | このフィールドには、Shopifyとの接続に使用される認証の名前が含まれます。 |
- ソーステーブルのフィールドを設定します。
| Field | Description |
|---|---|
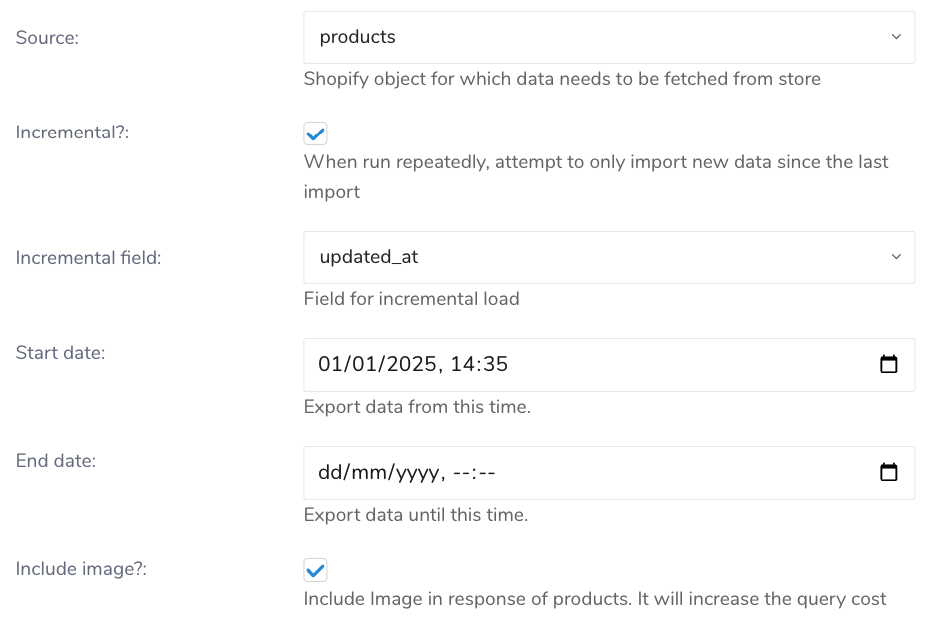
Source | 次のShopifyオブジェクトを含むドロップダウンメニュー:
Shopifyストアからインポートしたいデータを含むShopifyオブジェクトを選択します。 |
| Incremental? | 有効にすると、コネクタは最後のインポート実行以降の新しいまたは更新されたデータのみをインポートし、後続のインポートをより効率的にします。 |
| Incremental field | 増分読み込みに使用するタイムスタンプを選択します:
|
| Start date | データをエクスポートする開始タイムスタンプ(形式: dd/mm/yyyy, hh:mm) |
| End date | データのエクスポートを終了する終了タイムスタンプ(形式: dd/mm/yyyy, hh:mm)。空のままにすると、終了日は現在時刻になります。 |
| Include image? | 有効にすると、製品画像データがレスポンスに含まれます。これによりクエリコストが増加することに注意してください。 |
| Resource | メタフィールドのリソースタイプを指定するにはproductを選択します。 |
| Objects | メタフィールドのオブジェクトタイプを選択します:
|
Product ID | このフィールドは必須です。メタフィールドを取得したい製品IDのカンマ区切りリストを入力します。 product variantが選択されている場合、フィールド名はVariant IDに変わります。 |
- Nextを選択します。
- データ設定を設定します。
| Parameter | Description |
|---|---|
| Retry Limit | インポートが失敗するまでの再試行回数。 |
| Initial retry time wait in millis | 再試行前に待機する初期時間(ミリ秒)。 |
| Max retry wait in millis | 再試行前に待機する最大時間(ミリ秒)。 |
- Nextを選択します。
You can see a preview of your data before running the import by selecting Generate Preview. Data preview is optional and you can safely skip to the next page of the dialog if you choose to.
- Select Next. The Data Preview page opens.
- If you want to preview your data, select Generate Preview.
- Verify the data.
For data placement, select the target database and table where you want your data placed and indicate how often the import should run.
Select Next. Under Storage, you will create a new or select an existing database and create a new or select an existing table for where you want to place the imported data.
Select a Database > Select an existing or Create New Database.
Optionally, type a database name.
Select a Table> Select an existing or Create New Table.
Optionally, type a table name.
Choose the method for importing the data.
- Append (default)-Data import results are appended to the table. If the table does not exist, it will be created.
- Always Replace-Replaces the entire content of an existing table with the result output of the query. If the table does not exist, a new table is created.
- Replace on New Data-Only replace the entire content of an existing table with the result output when there is new data.
Select the Timestamp-based Partition Key column. If you want to set a different partition key seed than the default key, you can specify the long or timestamp column as the partitioning time. As a default time column, it uses upload_time with the add_time filter.
Select the Timezone for your data storage.
Under Schedule, you can choose when and how often you want to run this query.
- Select Off.
- Select Scheduling Timezone.
- Select Create & Run Now.
- Select On.
- Select the Schedule. The UI provides these four options: @hourly, @daily and @monthly or custom cron.
- You can also select Delay Transfer and add a delay of execution time.
- Select Scheduling Timezone.
- Select Create & Run Now.
After your transfer has run, you can see the results of your transfer in Data Workbench > Databases.
td_load>: src_idを使用してワークフロー経由でShopifyレポートからデータをインポートできます。すでにソースを作成している場合は実行できます。ソースを作成したくない場合は、.ymlファイルを使用してインポートできます。
- Integrations Hub > Sourcesを選択します。
- 画面の右端にあるFiltersペインで、Integration Typeドロップダウンメニューを使用してShopify V2を選択します。
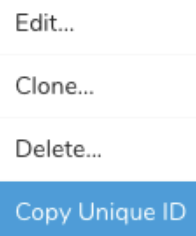
- Sourcesペインで、使用したいソースを含む行を特定し、その行のmoreドロップダウンメニュー(•••アイコン)を使用してCopy Unique IDを選択します。
- ワークフロータスクを定義し、td_load>:にステップ3でコピーしたIDを使用します。
+load:
   td_load>: unique_id_of_your_source
   database: ${td.dest_db}
table: ${td.dest_table}- ワークフローを実行します。
- .ymlファイルを特定します。
.ymlファイルを作成する必要がある場合は、Create Seed Config File (seed.yml)にある手順を参照してください。 2. ワークフロータスクを定義し、td_load>:に.ymlファイルを指定します。
+load:
   td_load>: config/daily_load.yml
   database: ${td.dest_db}
table: ${td.dest_table}- ワークフローを実行します。
サンプルワークフローコードについては、Treasure Boxesをご覧ください。
統合を設定する前に、最新バージョンのTD Toolbeltをインストールしてください。
in:
   type: shopify_v2
   admin_api_access_token: xxxxxxxx
   target: products
   store_name: xxxxxxx
   from_date: '2024-12-31T17:00:00.000Z'
   incremental_field: created_at
out:
   mode: replace
この例では、Shopify Productオブジェクトのリストを取得します。from_dateは、データの取得を開始する日付を指定します。この場合、インポートは2024年12月31日17:00からデータのプルを開始します。
パラメータリファレンス
| Name | Description | Value | Default Value | Required |
|---|---|---|---|---|
| type | インポートのソース。 | "shopify_v2" | Yes | |
| admin_api_access_token | ShopifyのAdmin APIで認証するために使用されるアクセストークン。このトークンは、Shopify管理パネルのApps > Develop apps > Create an app > Configure Admin API scopesから生成できます。トークンには、メタフィールドの管理などの操作を実行するための適切な権限が必要です。 | String | Yes | |
| target | データを収集するソース | String。有効なターゲットは以下です: - products - product_variants - meta_fields | Yes | |
| store_name | Shopifyストアのストア識別子。これは2つの形式で入力できます: - 完全なストアURL: 例 https://mountbaker.myshopify.com - ストア名のみ: 例: mountbaker ストア名のみを使用している場合は、.myshopify.comドメインなしのストアの一意の識別子である必要があります。 | String. | Yes | |
| incremental | レポートをグループ化するメトリクスのリスト。許可される値はレポートタイプによって異なります。 | Boolean. | False | No |
| incremental_field | 増分読み込みに使用するタイムスタンプ。 | String. | created_at | No |
| start_date | データをエクスポートする開始タイムスタンプ | String。形式: yyyy-MM-dd'T'HH:mm:ss.SS'Z' | No | |
| end_date | データのエクスポートを終了する終了タイムスタンプ | String。形式: yyyy-MM-dd'T'HH:mm:ss.SS'Z' | No | |
| metafield_resource | メタフィールドのターゲット | String。値は「product」になります。 | Yes(ターゲットがmeta_fieldsの場合) | |
| metafield_object | メタフィールドオブジェクト | String。値は次のいずれかです: - product - product_variant | Yes(ターゲットがmeta_fieldsの場合) | |
| product_ids | メタフィールドを取得したい製品IDのカンマ区切りリスト | String。例: "gid://shopify/Product/8472042950, gid://shopify/Product/8472044230" | Yes(metafield_objectがproductの場合) | |
| product_variant_ids | メタフィールドを取得したい製品バリアントIDのカンマ区切りリスト | String。例: "gid://shopify/ProductVariant/28753686918, gid://shopify/ProductVariant/28753705670" | Yes(metafeld_objectがproduct_variantの場合) |
データをプレビューするには、td connector:previewコマンドを使用します。
td connector:preview load.ymlデータのサイズによっては数時間かかる場合があります。データを保存するTreasure Dataデータベースとテーブルを必ず指定してください。 Treasure Dataのストレージは時間でパーティション化されているため、Treasure Dataでは--time-columnオプションを指定することも推奨しています(data partitioningを参照)。このオプションが提供されていない場合、データコネクタは最初のlongまたはtimestamp列をパーティション化時間として選択します。--time-columnで指定する列のタイプは、longおよびtimestampタイプのいずれかである必要があります。
データに時間列がない場合は、add_timeフィルターオプションを使用して時間列を追加できます。詳細については、add_time Filter Functionのドキュメントを参照してください。
$ td connector:issue load.yml --database td_sample_db --table td_sample_table --time-column created_atconnector:issueコマンドは、すでにdatabase(td_sample_db)とtable(td_sample_table)を作成していることを前提としています。データベースまたはテーブルがTDに存在しない場合、このコマンドは失敗します。データベースとテーブルを手動で作成するか、td connector:issueコマンドで--auto-create-tableオプションを使用してデータベースとテーブルを自動作成してください。
$ td connector:issue load.yml --database td_sample_db --table td_sample_table--time-column created_at --auto-create-tableデータコネクタはサーバー側でレコードをソートしません。時間ベースのパーティション化を効果的に使用するには、事前にファイル内のレコードをソートしてください。
timeというフィールドがある場合は、--time-columnオプションを指定する必要はありません。
$ td connector:issue load.yml --database td_sample_db --table td_sample_tableload.ymlファイルのout:セクションでファイルインポートモードを指定します。out:セクションは、Treasure Dataテーブルへのデータのインポート方法を制御します。たとえば、データを追加するか、既存のテーブルのデータを置き換えるかを選択できます。
| Mode | Description | Examples |
|---|---|---|
| Append | レコードはターゲットテーブルに追加されます。 | in: ... out: mode: append |
| Always Replace | ターゲットテーブルのデータを置き換えます。 ターゲットテーブルに加えられた手動スキーマ変更はそのまま残ります。 | in: ... out: mode: replace |
| Replace on new data | インポートする新しいデータがある場合にのみ、ターゲットテーブルのデータを置き換えます。 | in: ... out: mode: replace_on_new_data |
増分ファイルインポートのために定期的なデータコネクタの実行をスケジュールできます。Treasure Dataスケジューラーは、高可用性を確保するために最適化されています。
スケジュールされたインポートの場合、指定されたプレフィックスと次の条件のいずれかに一致するすべてのファイルをインポートできます:
- use_modified_timeが無効になっている場合、次の実行のために最後のパスが保存されます。2回目以降の実行では、統合はアルファベット順で最後のパスの後に来るファイルのみをインポートします。
- それ以外の場合、ジョブが実行された時刻が次の実行のために保存されます。2回目以降の実行では、コネクタはその実行時刻以降にアルファベット順で変更されたファイルのみをインポートします。
td connector:createコマンドを使用して新しいスケジュールを作成できます。
$ td connector:create daily_import "10 0 * * *" td_sample_db td_sample_table load.ymlTreasure Dataのストレージは時間でパーティション化されているため、Treasure Dataでは--time-columnオプションを指定することも推奨しています(data partitioningを参照)。
$ td connector:create daily_import "10 0 * * *" td_sample_db td_sample_table load.yml --time-column created_atcronパラメータは、3つの特別なオプション: @hourly、@daily、および@monthlyも受け入れます。
デフォルトでは、スケジュールはUTCタイムゾーンで設定されます。-tまたは--timezoneオプションを使用して、タイムゾーンでスケジュールを設定できます。--timezoneオプションは、Asia/Tokyo、America/Los_Angelesなどの拡張タイムゾーン形式のみをサポートします。PST、CSTなどのタイムゾーンの略語はサポートされておらず、予期しないスケジュールになる可能性があります。