SalesforceとTreasure Dataを接続することで、Salesforceデータをより詳細に制御し、マーケティングおよびセールスオペレーションスタック内の他のビジネスアプリケーションとのより良い統合が可能になります。
SalesforceとTreasure Dataを統合することで、以下のことが簡単になります:
- Salesforceに新しい機能を追加する。 たとえば、Web利用状況を追跡し、顧客の製品使用量が減少したときにアラートを受け取ることで、チャーンを防ぐことができます。
- Salesforceデータを使用してマーケティングスタックの他の部分を改善する。 たとえば、新規顧客をFacebook Custom Audiencesから自動的に削除することで、Facebook Ads ROIを向上させることができます。
Salesforceからデータをインポートするサンプルワークフローについては、Treasure Boxesを参照してください。
Treasure Dataアカウントをお持ちでない場合は、お問い合わせいただければセットアップいたします。
- SOQL: この設定では、カスタムSOQL(Salesforce Object Query Language)を使用してデータをクエリおよびフィルタリングできます。SOQLを使用すると、単一のオブジェクトまたは相互に関連する複数のオブジェクトからデータを取得できます。特定の列を選択し、条件文で出力をフィルタリングまたはソートできます。制限として、データコネクタはcount() FROM ObjectやSELECT * from salesforceObjectなどのSOQL構文をサポートしていません。
- Bulk API制限: Bulk APIはより高速な取り込みを提供しますが、24時間以内に10,000バッチの割り当て制限もあります。ターゲットが大きい場合、利用可能なバッチ割り当て全体が消費され、最終的にジョブが失敗する可能性があります。Bulk APIを使用しようとして、すべてのレコードを取り込む結果になった場合は、synchronous transfer-onlyオプションを有効にしてREST APIを使用することを検討してください。REST APIはバッチ割り当ての制限を回避しますが、速度が遅くなる可能性があります。
- LIMIT句を含むSOQL: SOQL クエリはBulk APIモードでLIMIT句と正しく機能しません。Bulk APIは大量のデータを処理するために特別に設計されています。LIMIT句を使用するには、代わりにREST APIを使用することが不可欠です。
- OAuth: OAuthはカスタムドメインをサポートしていません。したがって、カスタムドメインを使用している場合は、認証方法として資格情報を使用してください。
SFDCインポートは以下の認証タイプをサポートしています:
- Credential
- ユーザー名とパスワードフローを有効化: SETTINGS → Identity → OAuth and OpenID Connect Settings → Allow OAuth Username-Password Flows (オンにする)
- OAuth Policies: PLATFORM TOOLS → App → Connected Apps → Manage Connected Apps → Choose App → Edit Policies → Permitted Users (選択: All users may self-authorize)
- OAuth
インポートではSession IDによる認証はサポートされていません。
Session IDはSalesforce Export Integrationでのみサポートされています。
TD Consoleを使用してSalesforceに接続するのは迅速かつ簡単です。または、コマンドラインを使用してSalesforce接続を作成することもできます。インポート統合は資格情報をサポートしています。資格情報を使用して認証するには、クライアントIDとクライアントシークレットが必要です。
これらの手順は、資格情報を使用して認証するために必要なクライアントIDとクライアントシークレットを見つける方法を説明します。
これはLightning Experience UIのガイドです。
Setup > Apps > App Managerに移動します。
New Connected Appを選択します。
いくつかの値を設定し、Enable OAuth Settingsをチェックします。次に、OAuth権限スコープを付与します。
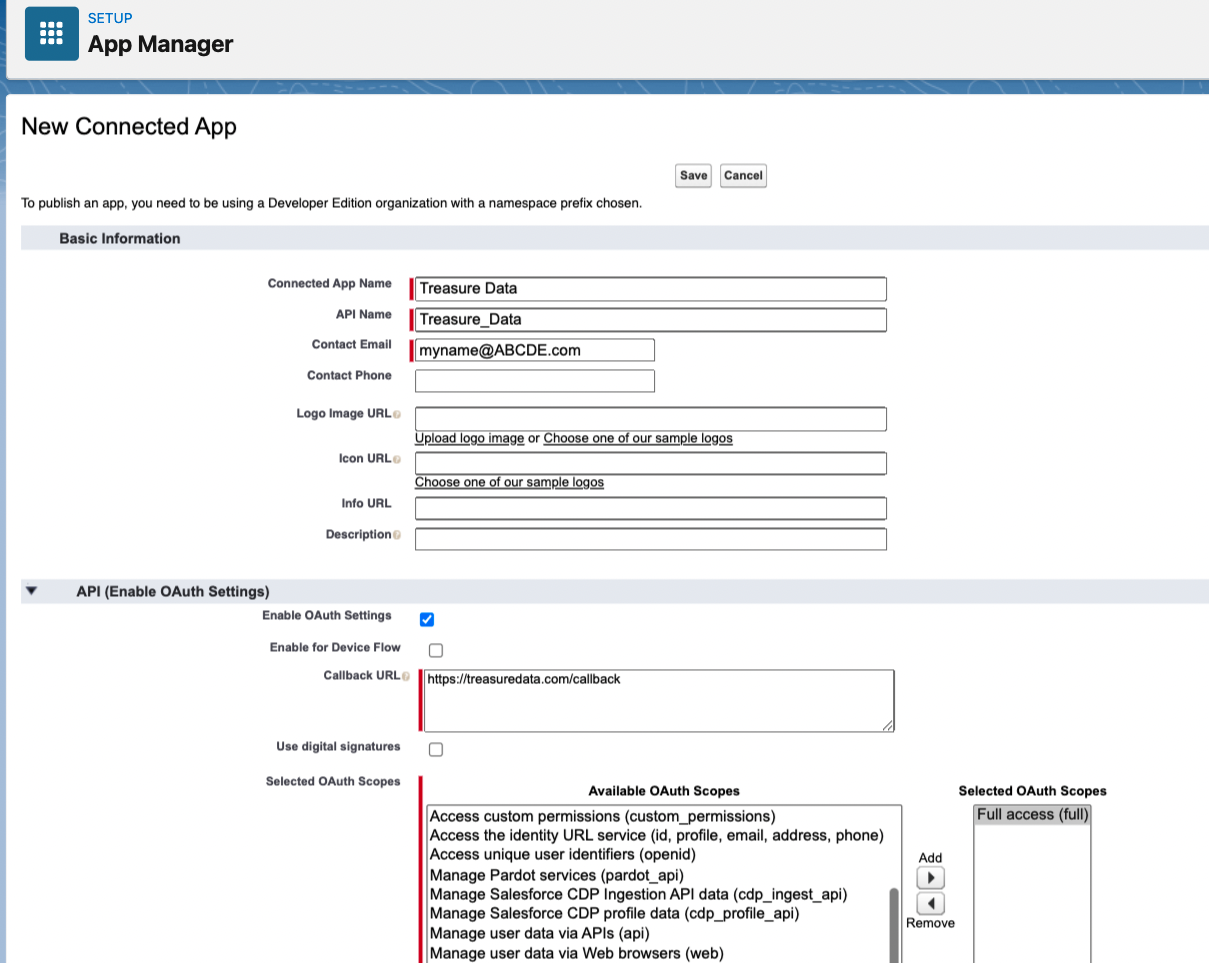
Saveをクリックします。アクティベーションには最大10分かかる場合があります。
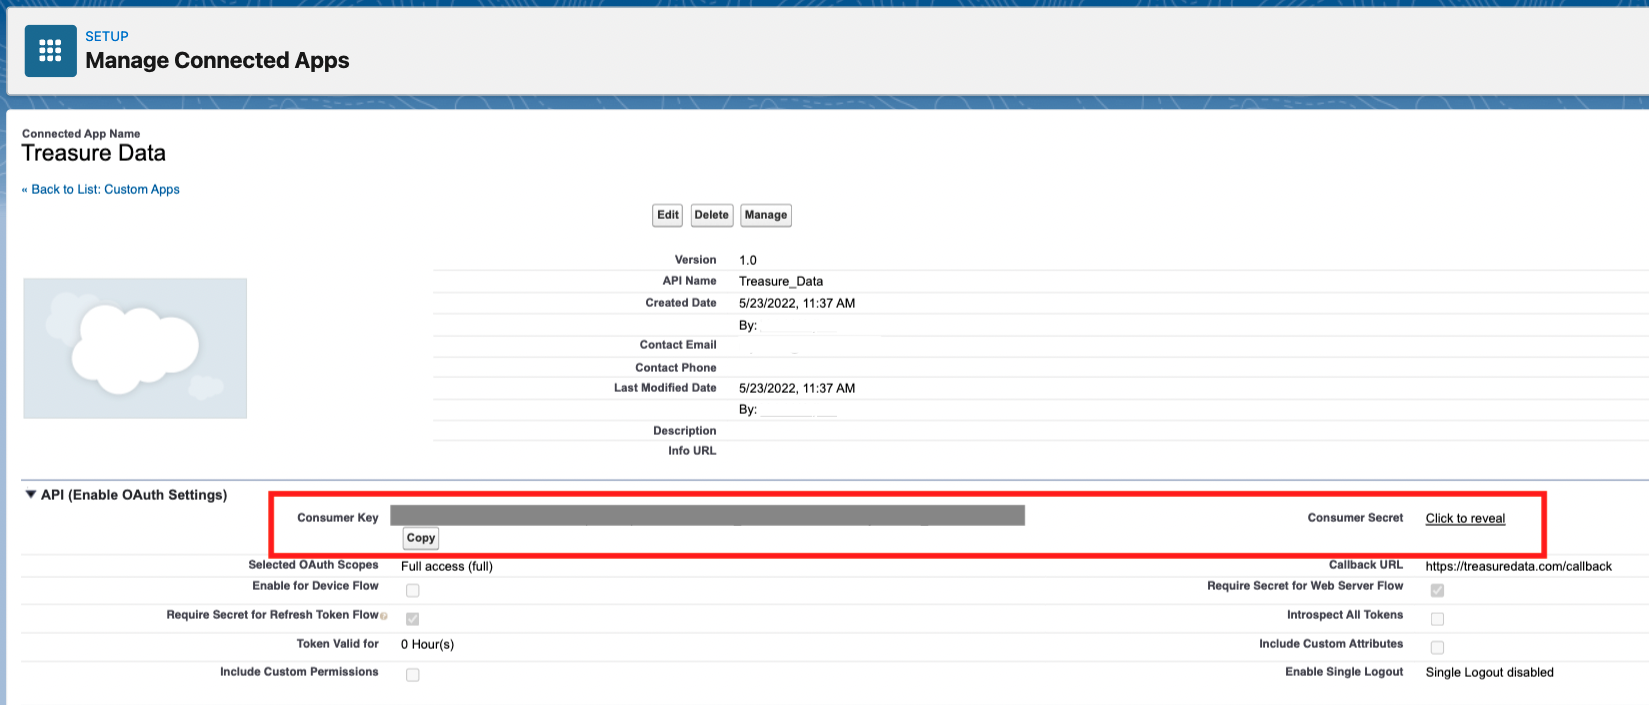
Setup > Apps > App Managerに移動します。
接続されたアプリを見つけ、▼をクリックして、Viewを選択します。

Consumer Key (client_id)とConsumer Secret (client_secret)を書き留めるかコピーします。
- TD Consoleを開きます。
- Integrations Hub > Catalogに移動し、Salesforceを検索します。
- 以下のいずれかを選択します:
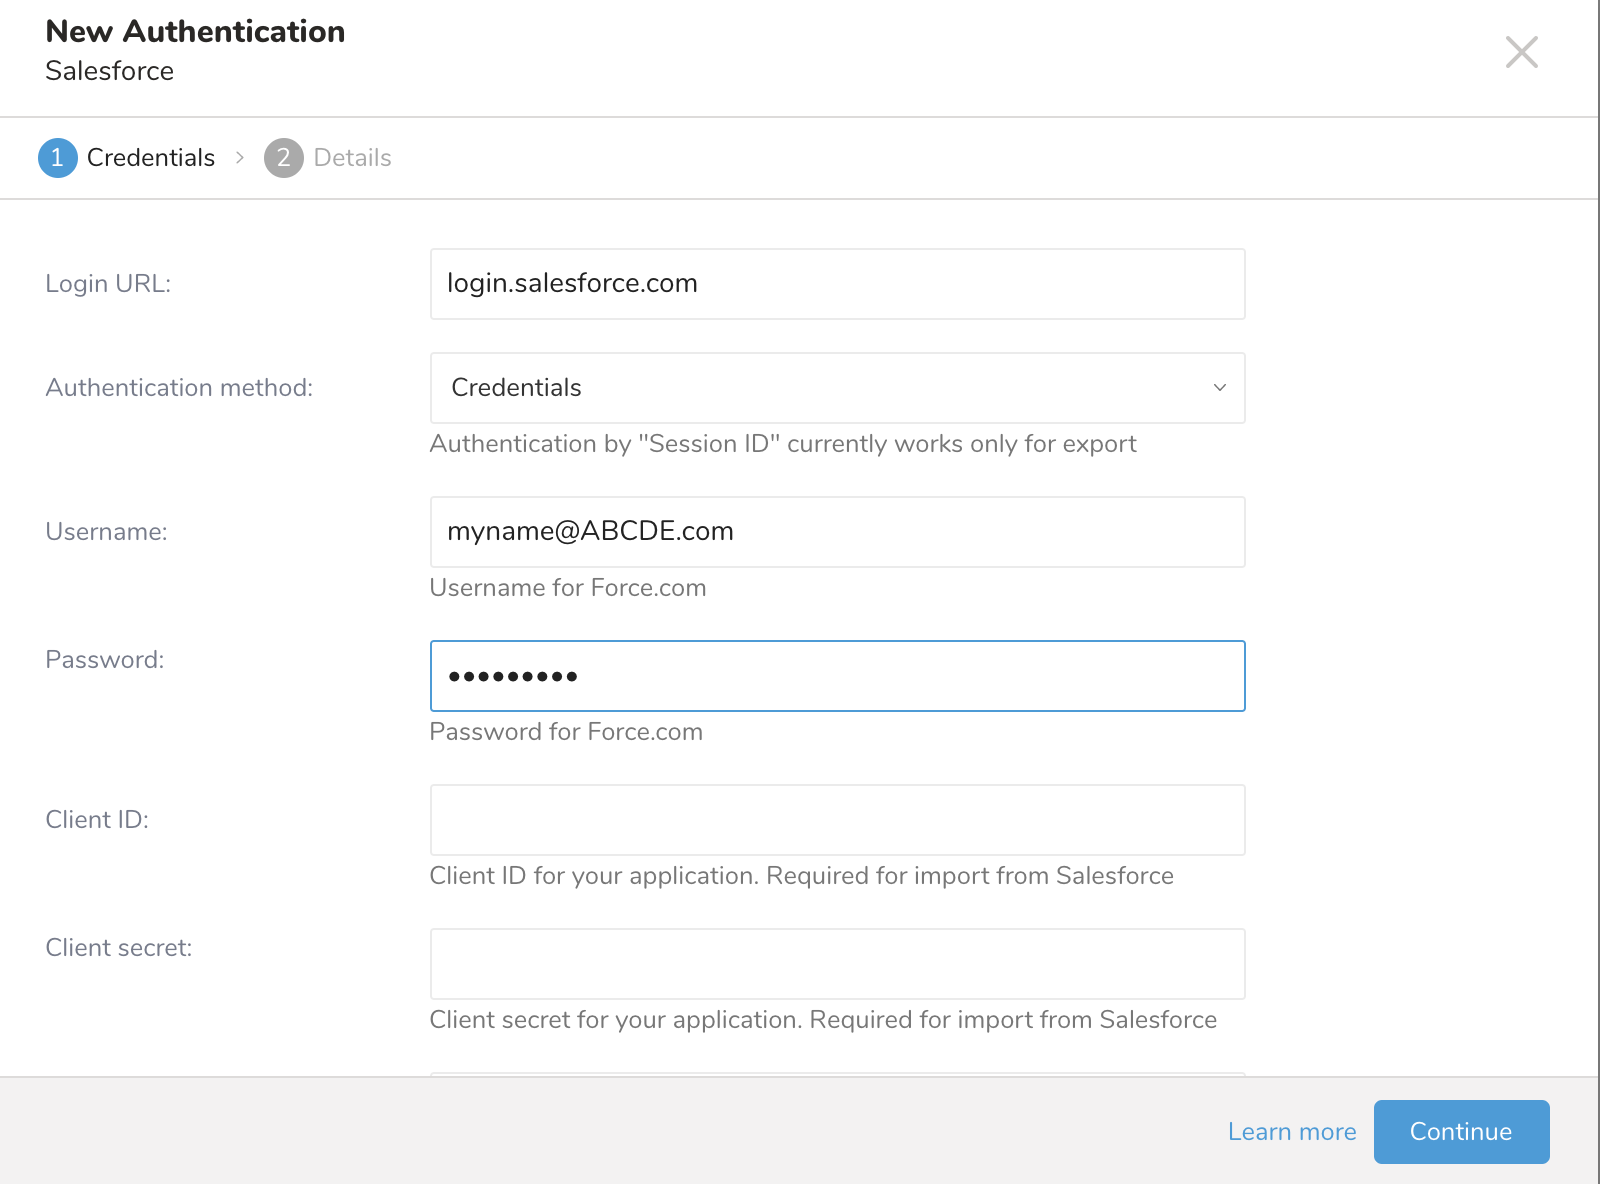
- 資格情報で認証するには、ユーザー名(メール)とパスワード、およびClient ID、Client Secret、Security Tokenを入力します。
- ダイアログボックスで、ログインURLとしてlogin.salesforce.comを入力します。Login URLパラメータから不要な文字を削除します。
ユーザー権限を検証するには、Salesforceを使用して以下を検証してください:
- Authority: Salesforceインポート統合の接続手順を確認してください。
- Treasure DataからSalesforceへのアクセスが許可されている: これを設定するには、TDの静的IPアドレスを知って設定する必要がある場合があります。静的IPアドレス情報が必要な場合は、サポートにお問い合わせください。
適切に設定された権限とアクセスがないと、アクセス制限エラーが発生する可能性があります。例えば:
Response not 2xx:
400 Bad Request {"error":"invalid_grant","error_description":"authentication failure"}
Object and Field Permissions for Salesforce CRM in Data Cloudの詳細をご覧ください。
認証された接続を作成した後、自動的にAuthenticationsに移動します。
作成した接続を検索します。
New Sourceを選択します。
Data TransferフィールドでSourceの名前を入力します。
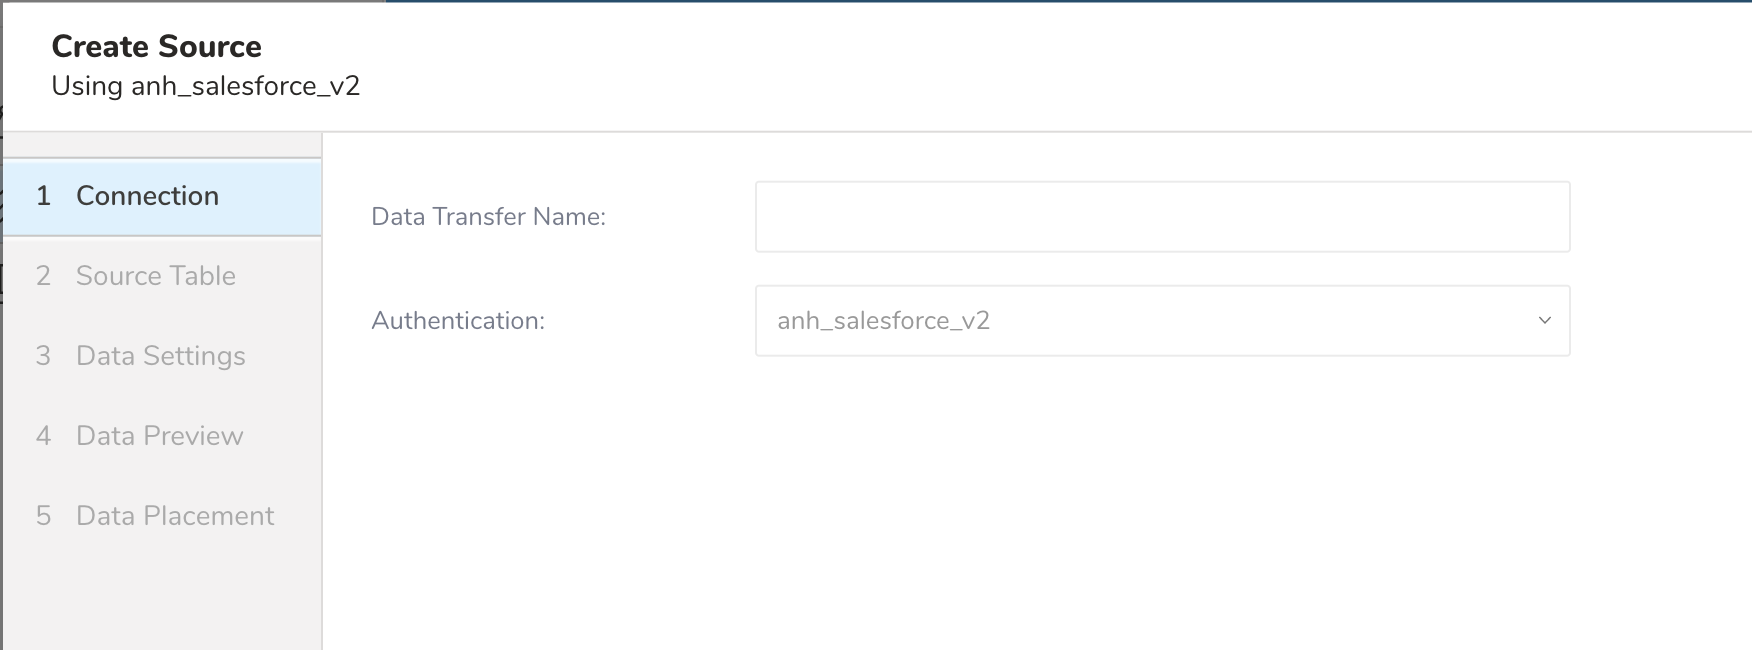
Nextをクリックします。
以下のパラメータを編集します:
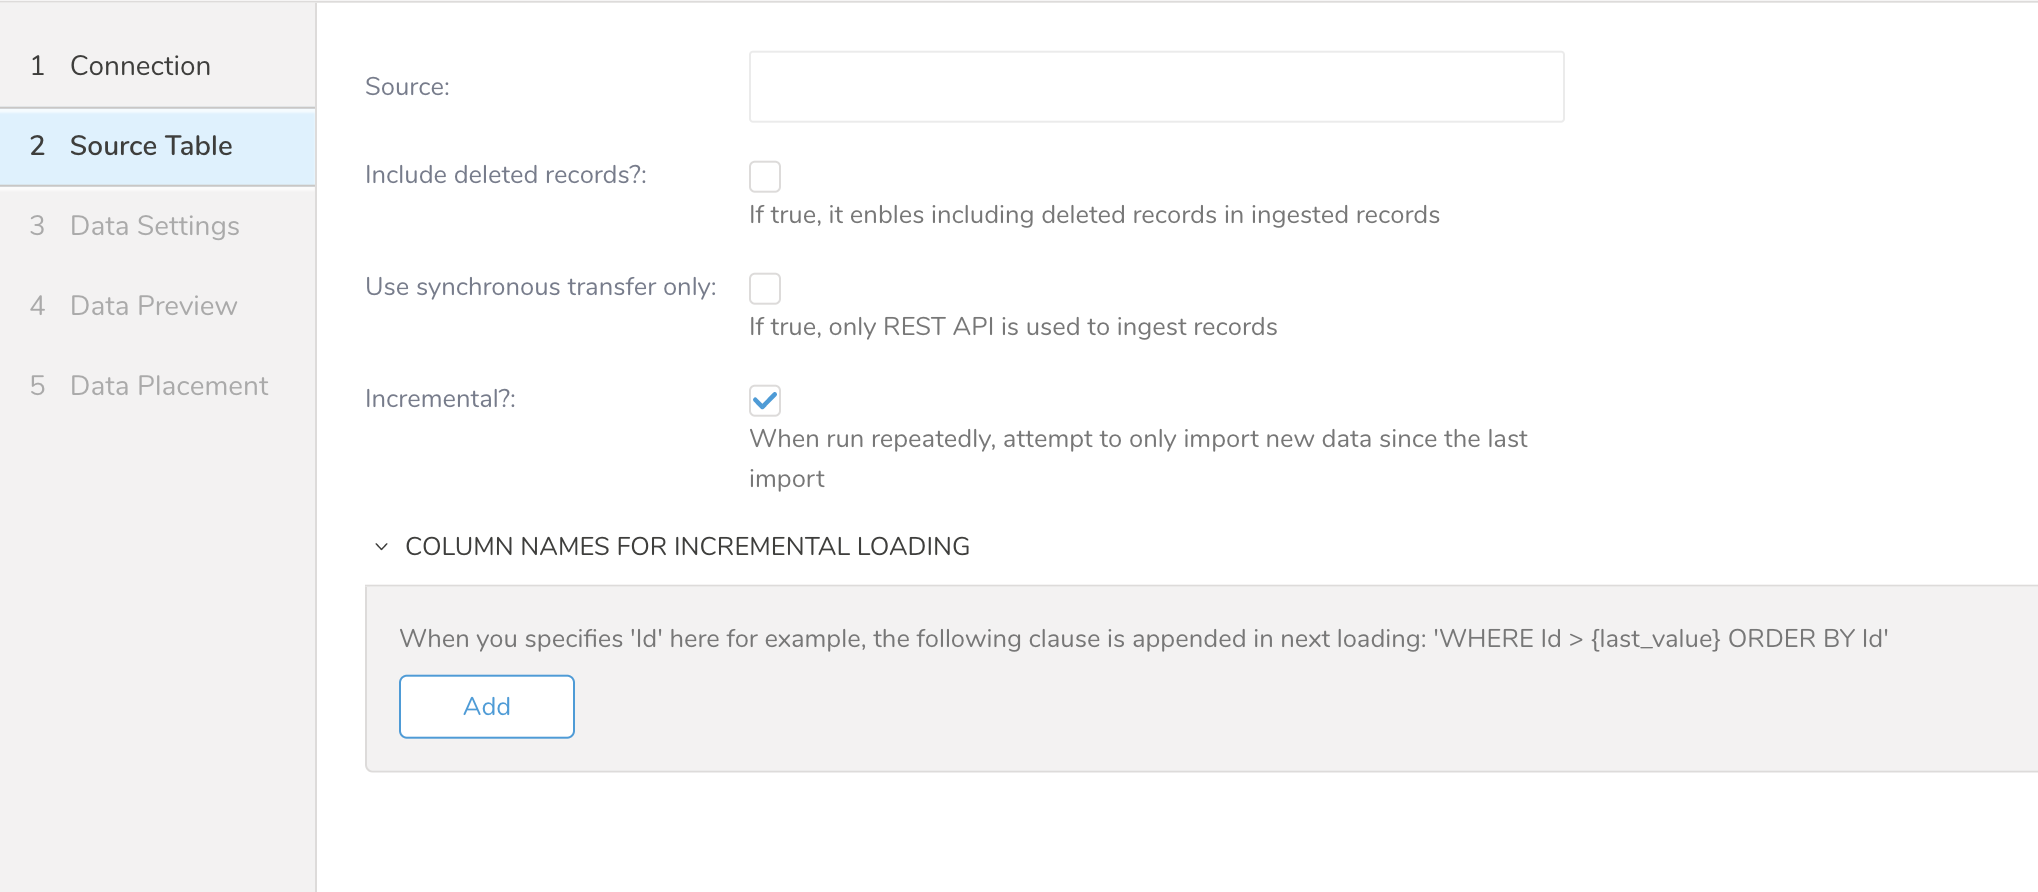
| Parameters | Description |
|---|---|
| Source | インポートするオブジェクトの名前 |
| Include deleted records | 削除されたレコードを含めることを有効にします |
| Use synchronous transfer only | REST APIを使用した同期転送を有効にします |
| Incremental | 前回のインポート以降の新しいデータのみをインポートします |
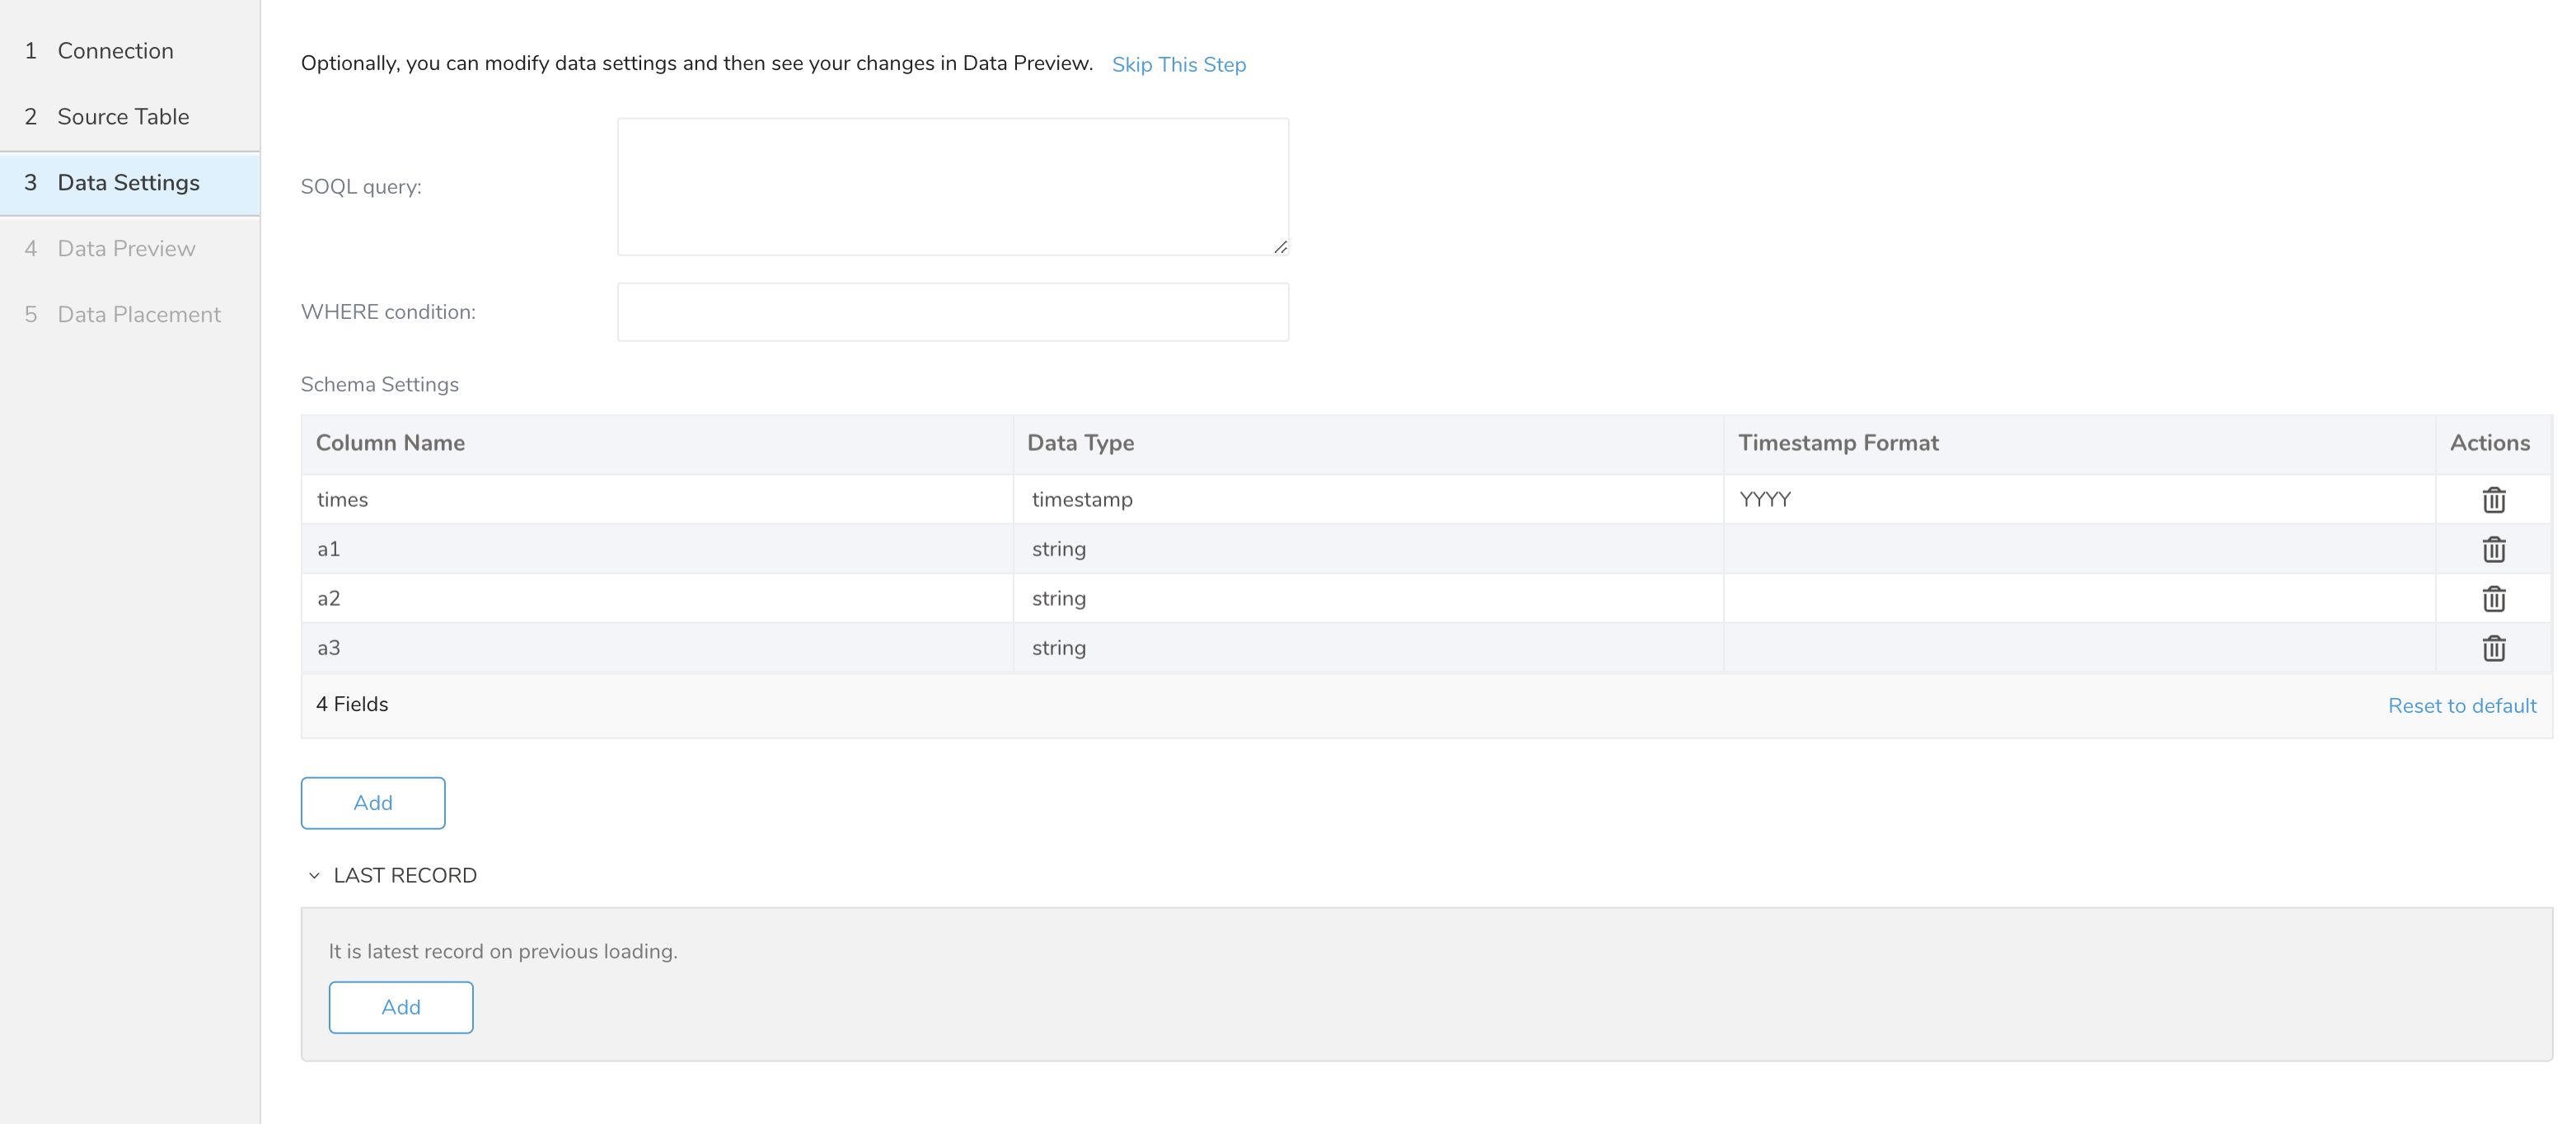
Nextを選択します。Data Settingsページが開きます。
ここでSOQLクエリ、WHERE条件、およびSchema設定を編集できます。
オプションで、ダイアログのこのページをスキップします。
You can see a preview of your data before running the import by selecting Generate Preview. Data preview is optional and you can safely skip to the next page of the dialog if you choose to.
- Select Next. The Data Preview page opens.
- If you want to preview your data, select Generate Preview.
- Verify the data.
For data placement, select the target database and table where you want your data placed and indicate how often the import should run.
Select Next. Under Storage, you will create a new or select an existing database and create a new or select an existing table for where you want to place the imported data.
Select a Database > Select an existing or Create New Database.
Optionally, type a database name.
Select a Table> Select an existing or Create New Table.
Optionally, type a table name.
Choose the method for importing the data.
- Append (default)-Data import results are appended to the table. If the table does not exist, it will be created.
- Always Replace-Replaces the entire content of an existing table with the result output of the query. If the table does not exist, a new table is created.
- Replace on New Data-Only replace the entire content of an existing table with the result output when there is new data.
Select the Timestamp-based Partition Key column. If you want to set a different partition key seed than the default key, you can specify the long or timestamp column as the partitioning time. As a default time column, it uses upload_time with the add_time filter.
Select the Timezone for your data storage.
Under Schedule, you can choose when and how often you want to run this query.
- Select Off.
- Select Scheduling Timezone.
- Select Create & Run Now.
- Select On.
- Select the Schedule. The UI provides these four options: @hourly, @daily and @monthly or custom cron.
- You can also select Delay Transfer and add a delay of execution time.
- Select Scheduling Timezone.
- Select Create & Run Now.
After your transfer has run, you can see the results of your transfer in Data Workbench > Databases.
A. これはSFDCインポート統合が自動的に作成した列です。APIリクエストURIとターゲットオブジェクトが含まれています。