This article covers changes around integrations with replacing Data Tank with Data Tank 2.0. As part of its commitment to security and protection of sensitive data, Treasure Data recommends reviewing the entire document before beginning any steps.
This topic contains:
- Features differences between Data Tank and Data Tank 2.0
- Change Integration with Data Tank to that with Data Tank 2.0
- Authentications for Data Tank
- Authentications for Data Tank 2.0
- Import from Data Tank
- Sources
- CLI (TD Toolbelt)
- Export Result of Hive/Trino to Data Tank
- Query Editor on TD Console
- td_run>: operator of Workflow
- td>: operator of Workflow
- CLI (TD Toolbelt) for Export
- Connect to Data Tank via "pg>:" operator of Workflow
- Connect to Data Tanks via 3rd party tool
- References
In this section, feature gaps between Data Tank and Data Tank 2.0 are described.
| Feature | Status | Data Tank 1.0 | Data Tank 2.0 |
|---|---|---|---|
| Endpoint | DIFF | Static IP address | Writer endpoint URI; associated IP address cannot be fixed |
| Database name | DIFF | datatank | aciddb |
| Access controls (roles and schemas) | DIFF | Treasure Data provides tank_user and tank_integration_user accounts | Users and schemas are created in Management UI (accounts are called Access Keys); access control is managed within the UI (ref) |
| DDL statements | DIFF | No additional command required | SET ROLE _owner_aciddb_<schema_name> must be executed before running DDL |
| SSL encryption | DIFF | Not enforced | All connections require SSL |
| Maintenance windows | DIFF | No regular window; support coordinates as needed | Customers define a weekly maintenance window; patches are applied during that time (see Understanding Data Tank 2.0 Maintenance) |
| IP allowlist size | DIFF | No limit | Up to 200 IP addresses |
| Engine behavior gaps | DIFF | Based on PostgreSQL 12 | Based on Aurora PostgreSQL 12.13; some engine differences apply |
| Custom port number | UNSUPPORTED | Default 5432, customizable via Support | Fixed to port 5432 |
| Port forwarding | UNSUPPORTED | Support can add ports 80, 443, or 5439 | Not supported |
| IPv6 allowlist | UNSUPPORTED | Supports IPv6 | IPv6 is not supported |
| Extensions | UNSUPPORTED | plpgsql, pgcrypto, cstore_fdw, mysql_fdw, tds_fdw, foreign_table_exposer installed by default | Only plpgsql and pgcrypto available; SERVER, FOREIGN DATA WRAPPER, FOREIGN TABLE, and USER MAPPING objects cannot be migrated |
| Management UI | NEW | Not available | Web interface for managing configurations, roles, schemas, and monitoring |
| Log collection | NEW | Not available | PostgreSQL logs viewable in Management UI |
| Monitoring | NEW | Dashboards provided via DataDog link | Dashboards available directly in Management UI |
Refer to the AWS Aurora PostgreSQL extension documentation for the full list of extensions supported in Data Tank 2.0 (Aurora PostgreSQL 12.13).
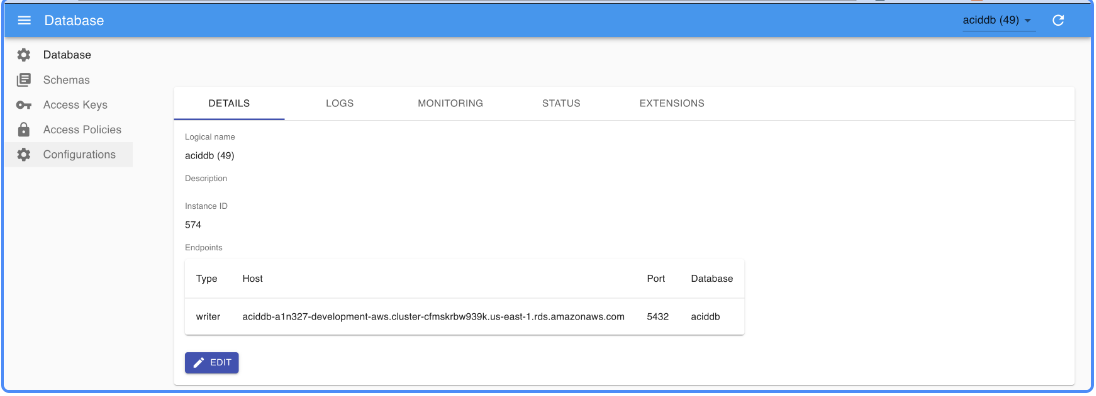
Within the Management UI you can configure database settings, create and manage schemas and access keys, and review logs and dashboards from a single interface.
| Legacy Monitoring | Management UI Monitoring |
|---|---|
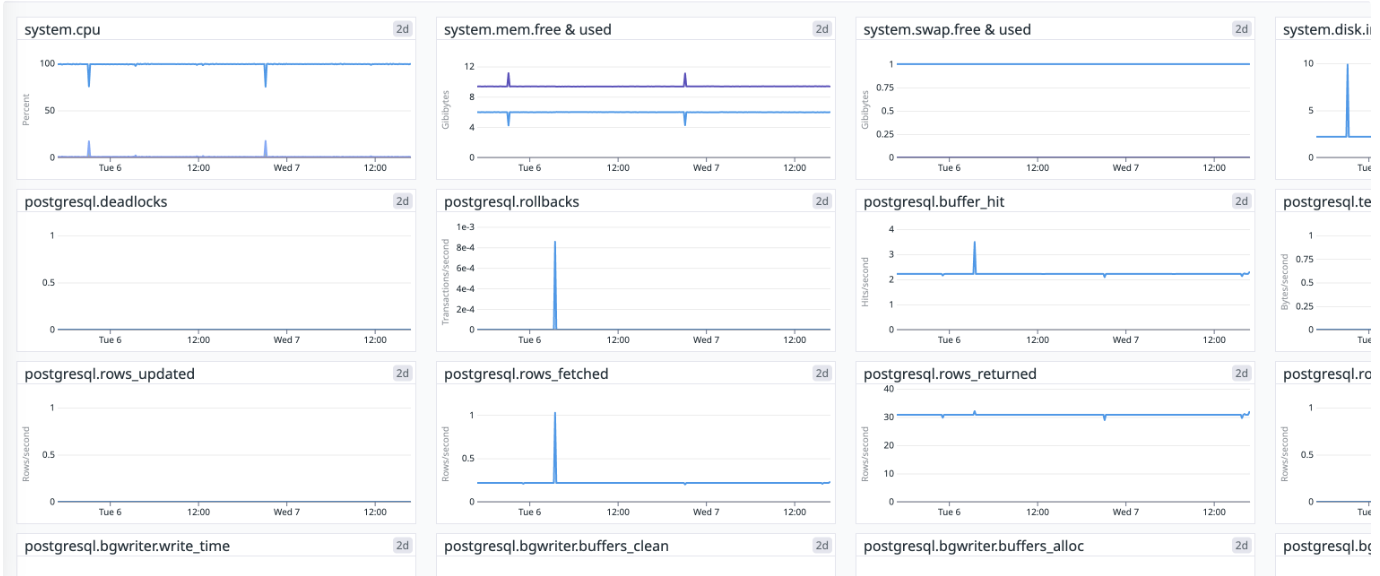 | 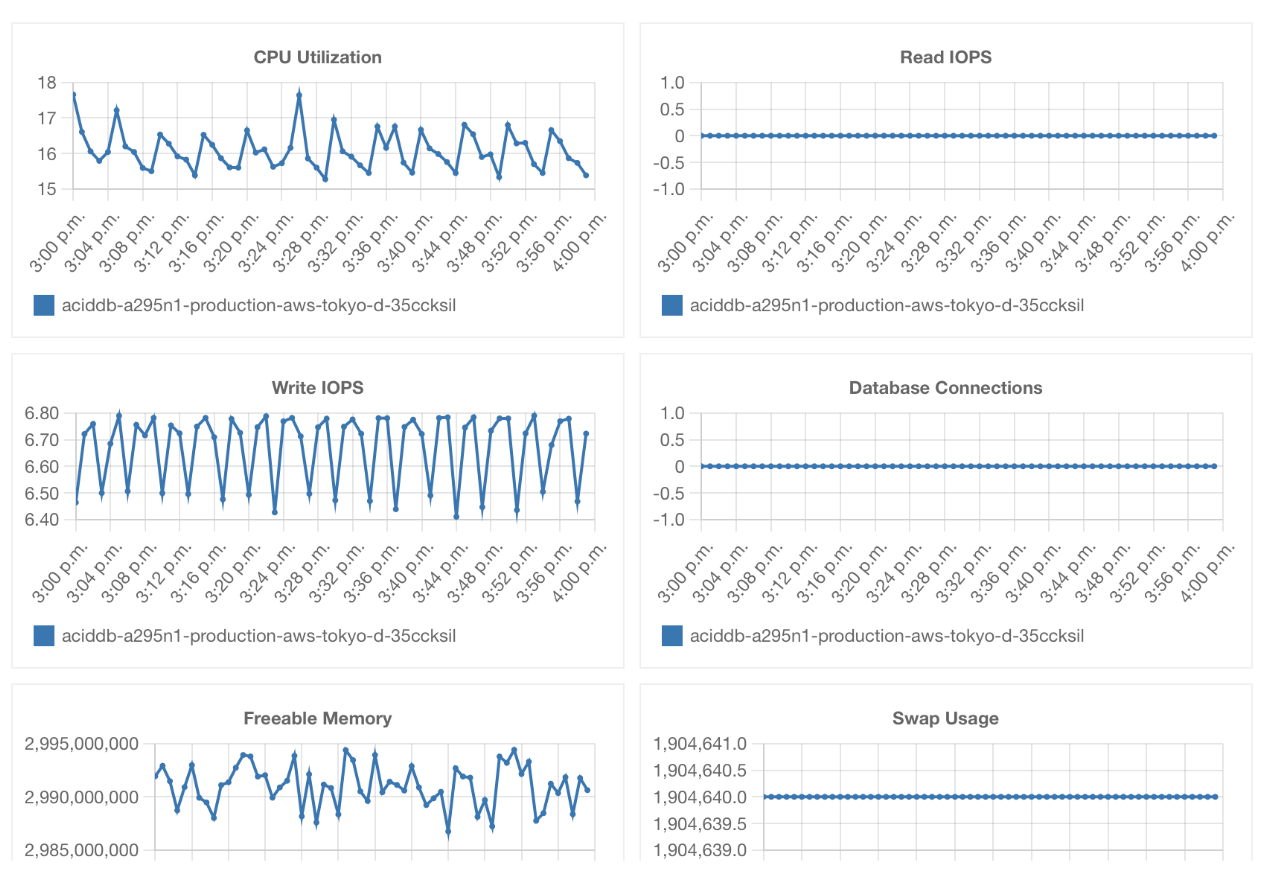 |
The following two functions can be used to import records in Data Tank or export the result of Hive/Trino query to Data Tank.
To use these integrations, you need to create an Authentication in advance in most cases.
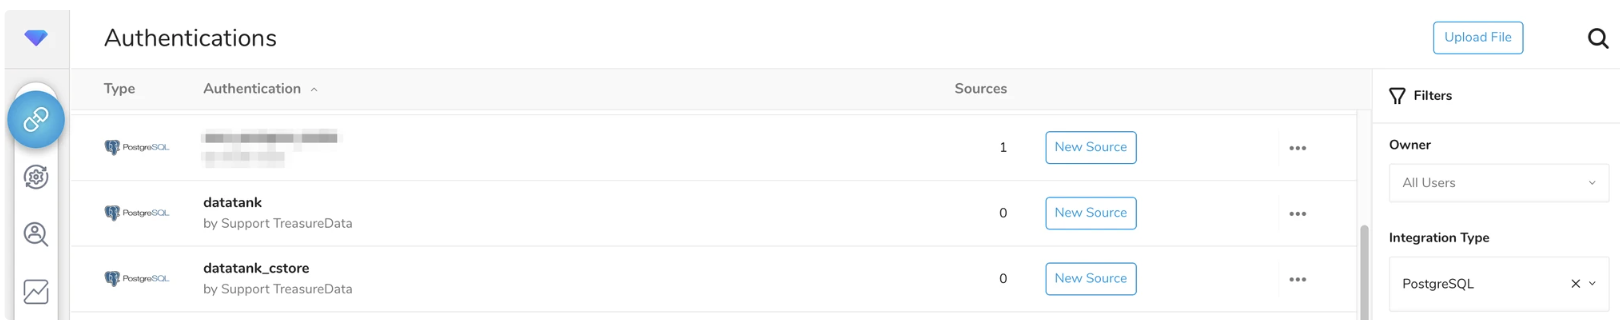
The following Authentications are prepared by default. tank_integration_useris used as a database user for both of the following Authentications.
- datatank
- datatank_cstore
You can also create user-defined Authentications by yourself.
Authentications are not prepared by default. You need to create new Authentications by yourself.
To import from Data Tank, you need to run a Bulk Load job. To run this type of job, you use either of the following. If you want to replace Data Tank with Data Tank 2.0, you must change the import source from Data Tank to Data Tank 2.0.
- Sources(TD Console)
- CLI(Toolbelt, td_load>: operator of Workflow)
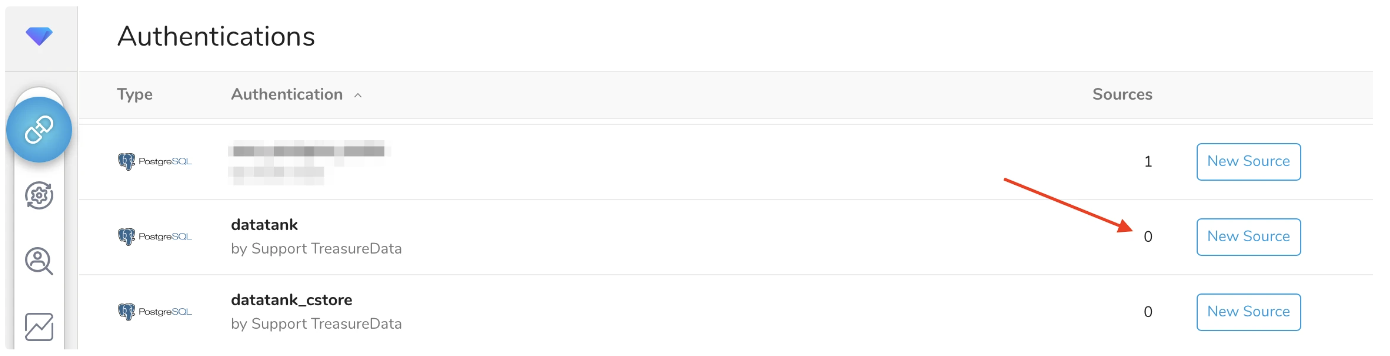
If you have existing Sources for Data Tank, you can see those Sources connected to the Authentication in the TD Console as follows. The red arrow in the image points to the number of Sources associated with the Authentication named databank.
If an existing Source imports from Data Tank 2.0, a new Source associated with the Authentication for Data Tank 2.0 is needed because each Source's authentication cannot be replaced. When you create a new Source that imports from Data Tank 2.0, it is recommended that the existing Source not be scheduled to run.
If you use CLI to import to Plazma DB using an Authentication, you use td_authentication_id option in your yaml file as follows. The Authentication ID set in this option must be changed to change the import source. In addition, you also need to change other options like database option.
in:
  type: postgresql
  td_authentication_id: <your_authentication_id>
  ...
If you don’t use td_authentication_id option in the yaml file, the credentials of Data Tank would be specified instead of Authentication as shown in the following example. If so, please replace them with one of Data Tank 2.0.
in:
  type: postgresql
  host: xx.xxx.xxx.xxx
  user: tank_integration_user
  password: xxxxx
... Either of the following features can exports the result of Hive/Trino job to Data Tank. If you are using these features to export to Data Tank, you will need to change the destination to export to Data Tank 2.0.
- Query Editor on TD Console
- td_run>: operator of Workflow
- td>: operator of Workflow
- CLI(Toolbelt)
- REST API
You can configure the export settings by selecting **Export Results** as shown below. Then, you need to configure it again with a new Authentication to replace the existing One. Once you have deleted the existing export settings, please use Authentication for Data Tank 2.0 to make new export settings.

If DDL is required, you need to set _owner_<database_name>_<schema_name> to Set Role option as follows

This workflow operator calls the existing Saved Query. Therefore, you need to do the same operation in the case of Query Editor.
For this Workflow operator, you specify your Authentication name for result_connection parameter as follows. Replace this parameter with the Authentication for Data Tank 2.0 as well as any other parameters.
+export_task:
  td>: queries/sample.sql
  result_connection: data_tank # Authentication Name
  result_settings:
    database: datatank
    table: ...
    ...
In addition, if DDL is required, you need to specifyset_role option as follows.
+export_task:
  td>: queries/sample.sql
  result_connection: <your_authentication_name>
  result_settings:
    database: aciddb
    table: ...
    schema: <schema_name>
    set_role: _owner_aciddb_<schema_name>
    ...
If you don’t specify your Authentication for result_connection, use result_urlparameter instead of result_connection and result_settingsas shown.
+export_task:
  td>: queries/sample.sql
  result_url: postgresql://tank_integration_user:xxx@......
In this case, please modify the value for result_url parameter.
In addition, add set_role=_owner_aciddb_<schema_name> as query parameter if DDL statement is required.
For CLI, you specify the information for export in URL format.
For example, you can export the result of the query to Data Tank by using td query command as follows. As you specify the information for export to -r option directly, please specify the setting for Data Tank 2.0.
$ td query -d kazzy_test -w -r "postgresql://tank_integration_user:<password>@<ip_address>/datatank/<table_name>?mode=replace" "SELECT 1 AS col1;" You can run any query statement in Data Tank from Workflow by using pg>: operator as shown in the following example.
_export:
  pg:
    host: ....
    port: 5432
    database: datatank
    user: tank_integration_user
    schema: public

+access_data_tank:
  pg>: queries/sample.sql
  ...
You need to change the values set for the options of pg>: operator in order to run the query statements in Data Tank 2.0. If you use DDL, you need to add SET ROLE statement before the DDL statements.
To connect to your Data Tank via any third-party tool, you specify the connection information in the tool. Replace them with one of Data Tank 2.0.