Management UI is a web application that enables you to configure, monitor, and control Data Tank 2.0. Management UI access requires administrator-level permission. Contact your Customer Success representative for access.
See also Understanding Data Tank 2.0 Maintenance.
Using the Management UI, you can perform the following:
- Management UI
- Managing Databases
- Managing Schemas
- Create New Schema
- Managing Access Keys
- Managing Access Policies
- Executing DDL Statements
- Managing Preferred Maintenance Windows
- Manage Changes
- Configure IP Whitelist
- Managing SSL and TLS Certificate Authority
- Updating the Certificate of Authority
You can manage Data Tanks 2.0 by using Management UI.
Sign in to TD Console before accessing these URLs. The user signing in should be an administrator or owner.
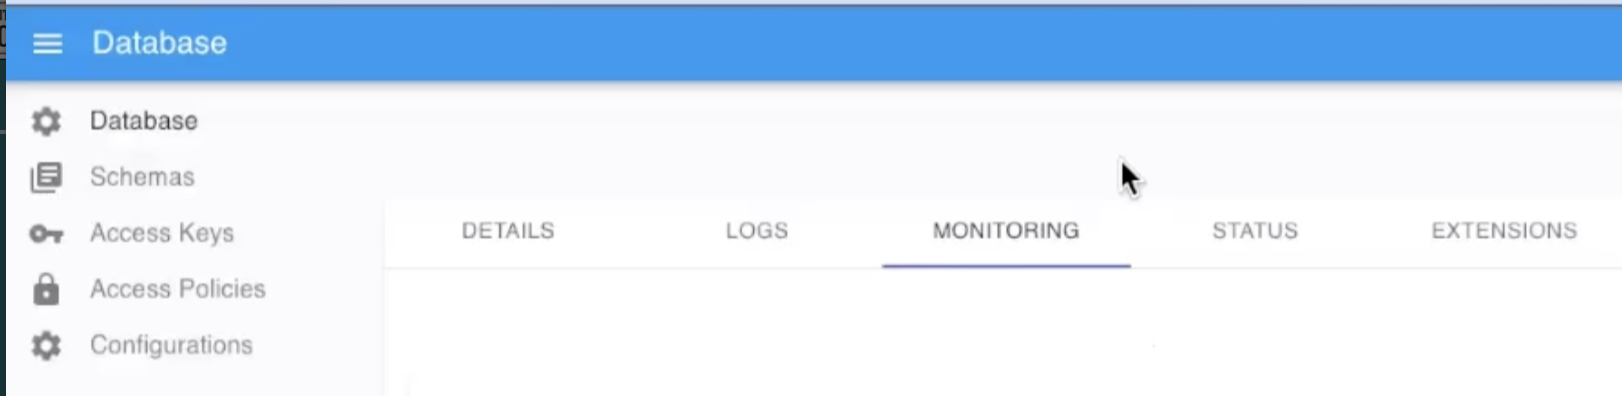
Use the Database page to view and configure database-related settings.
| Tab | Description |
|---|---|
| DETAILS | View database information. The Data Tank 2.0 connection setting is displayed. Use the details information to connect to Data Tank 2.0: Host: hostname Database: database name Port: port number |
| LOGS | View database logs. |
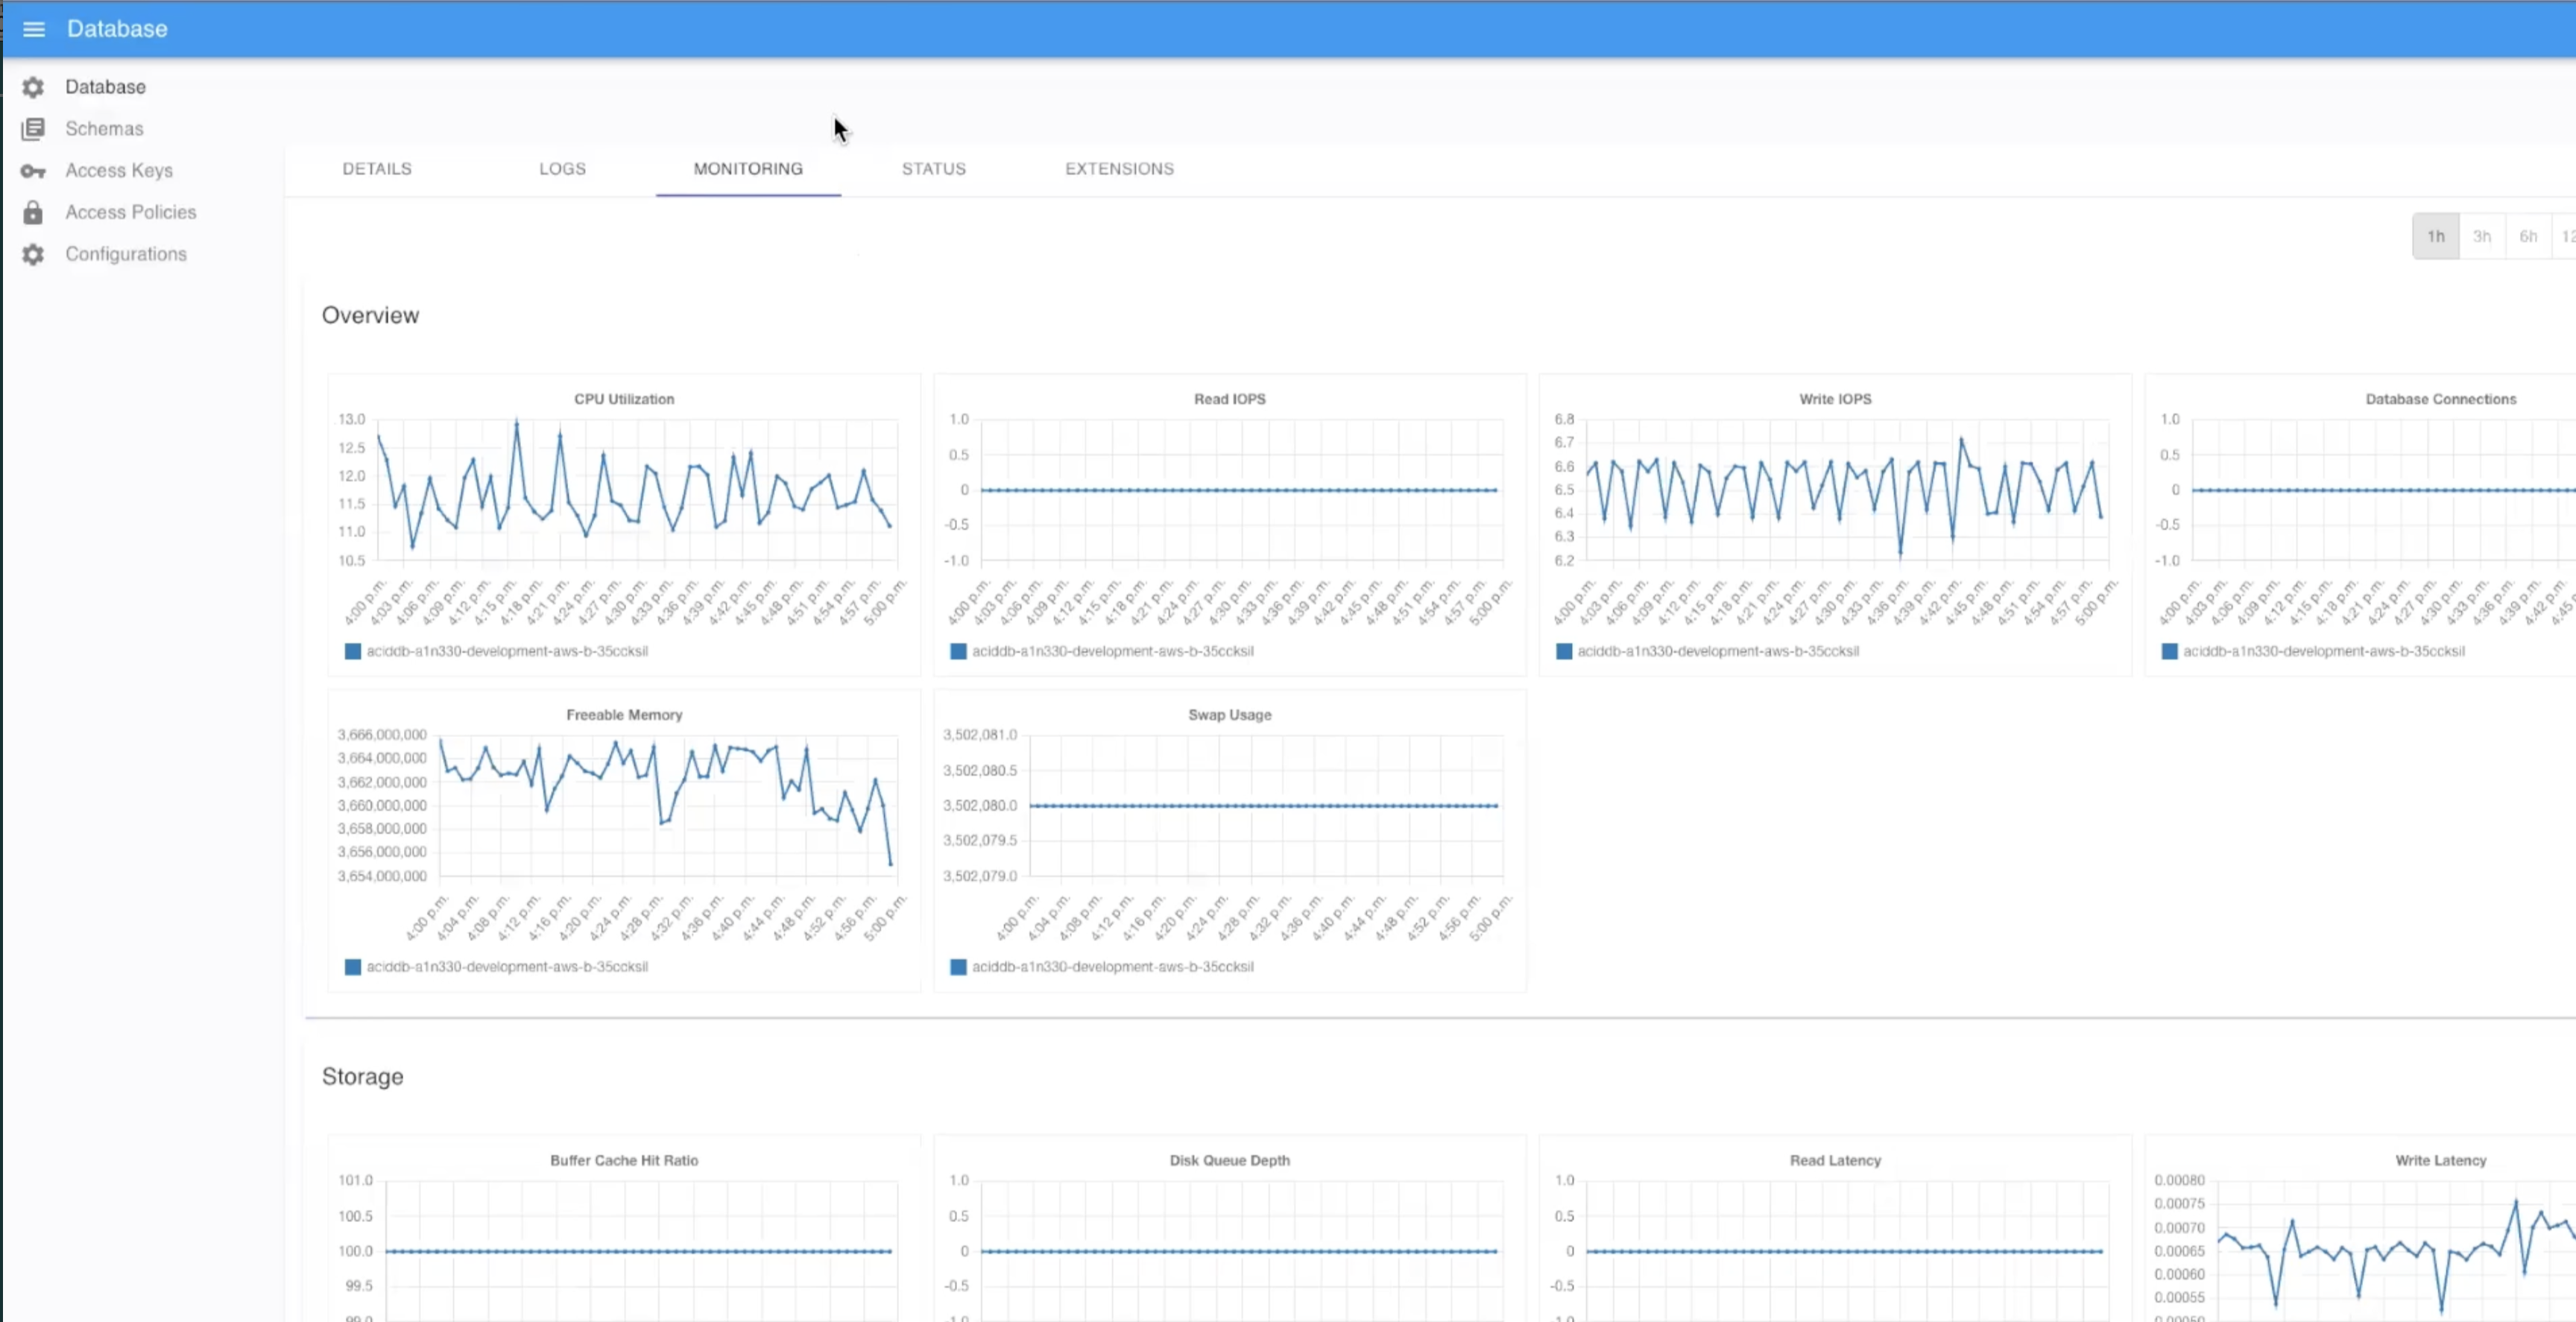
| MONITORING | The monitoring dashboard provides charts with detailed statistics covering a number of usage metrics such as CPU utilization Read and write operations Memory usage Storage capacity usage. Monitoring storage capacity is useful in identifying unexpected increases in usage and anticipating the need for potential future upgrades. |
| STATUS | View Data Tank 2.0 database and instance parameters. For example, to find the database version, select DISPLAY INSTANCE PARAMETERS. |
| EXTENSIONS | Enable/Disable PostgreSQL Extension modules. The following are supported: pg_stat_statements hstore intarray pgcrypto. |
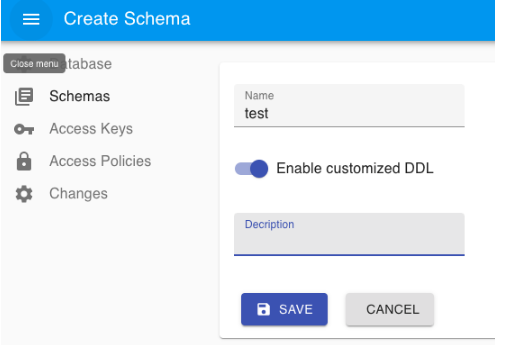
Use the Schemas page to view, create, and delete schemas.

Schema is a namespace that contains named database objects such as tables, views, indexes, data types, functions, stored procedures, and operators. Each database has a "public" schema automatically as the default. Management UI enables you to create a new schema and delete an empty schema. After the schema is created, the schema name is not editable. In addition, the "public" schema and its description is not deletable.
Here are some example scenarios where you might want to use schemas:
- Organizing database objects: For example, organizing tables into logical groups to make them more manageable.
- Enabling multiple users: To use one database without interfering with each other.
- To create a new schema, select NEW.
- Create the new schema. By default, a new schema doesn't permit the execution of DDL statements. To enable DDL for a specific user with the new schema, toggle Enable customized DDL.
Access Keys are required to access Data Tank 2.0. The Access Keys page allows you to view and edit an access key required to access Data Tank 2.0.
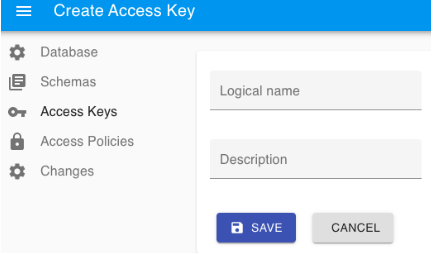
Creating a new Access Key generates a random username and password to access Data Tank 2.0. When creating an Access Key, ensure the Logical name is unique, and that it is not a Data Tank 2.0 username.
The username and password generated on this page are only displayed at creation and cannot be accessed afterward.
You can revoke permission to connect to Data Tank 2.0 by deactivating the access key. The access key itself is not deleted. Re-enabling the access key restores permission.
The Access Policies page enables you to grant access permission for a specific schema using an access key.
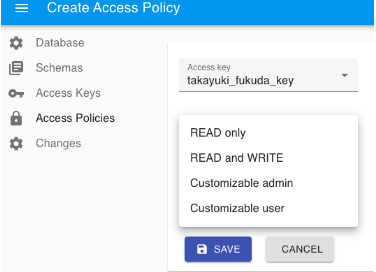
After a new access key is created, by default, the user has access permission to the system catalog. The following types of access policies can be set per user.
| Access policy type | Summary |
|---|---|
| READ_ONLY | Allow read-only access to tables and sequences in the schema Allow execution of functions in the schema |
| READ_WRITE | Allow read and write access to tables and sequences in the schema Allow execution of functions in the schema |
| CUSTOMIZABLE_ADMIN | Allow read and write access to tables and sequences in the schema Allow execution of functions in the schema Allow execution of DDL statements |
When the 'CUSTOMIZABLE_USER' policy is applied to an access key, the user has the ability to view and change access controls on a table-by-table basis for that access key. The access types that can be applied in combination with access keys and tables are as follows:
| Table access control type | Summary |
|---|---|
| READ_ONLY | Allow read-only access to the table and its arrays |
| READ_WRITE | Allow both read and write access to the table and its arrays |
The procedure for executing DDL statements such as CREATE, ALTER, DROP, GRANT, and REVOKE are explained in this section.
- Create a new Access Key.
- Create an Access Policy of type 'CUSTOMIZABLE_ADMIN' for the new Access Key.
- Connect to Data Tank 2.0 using the PostgreSQL client with the new Access Key.
- Execute the following statement: SET ROLE
_owner_<database name>_<schema name> - Execute the required DDL statements.
Thus, DDL statements can only be executed if "SET ROLE" is executed in the session.
The role name to switch to, _owner_<database name>_<schema name>, is determined based on the database name and schema name. For example, if the database name is aciddb and the schema name is public, the owner role name is _owner_aciddb_public.
When SET ROLE statement is executed, the access key can temporarily inherit the owner user's privileges. This inheritance lasts until the session ends. The access key is only allowed to execute SET ROLE is only permitted if the 'CUSTOMIZABLE_ADMIN' access policy is set.
You can configure a maintenance window in the Management UI.
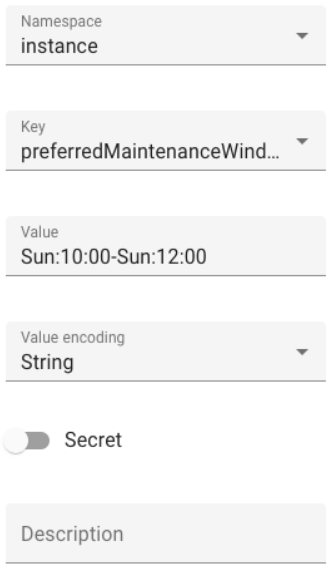
Use the following fields to configure a maintenance window in Management UI:
- Namespace: instance
- Key: preferredMaintenanceWindow
- Value:
- Format:
^(Mon|Tue|Wed|Thu|Fri|Sat|Sun):([01][0-9]|2[0-3]):[0-5][0-9]-(Mon|Tue|Wed|Thu|Fri|Sat|Sun):([01][0-9]|2[0-3]):[0-5][0-9]$ - Example:
- Sun:10:00-Sun:12:00 which is between Sunday 10:00 and 12:00 (GMT)
- Mon:23:00-Tue:01:00 which is between Monday 23:00 and Tuesday 01:00 (GMT)
- Format:
- The timezone is always GMT+00:00.
- A maintenance window must be one hour or more.
- Secret: unchecked
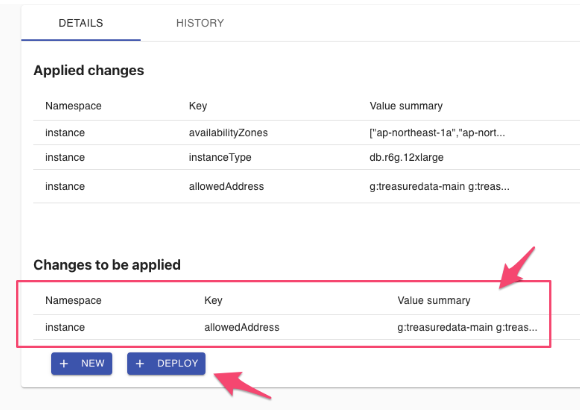
The Changes page lets you view and manage DB instances and their parameters and IP whitelist.
The IP whitelist feature enables you to grant Data Tank 2.0 access only to specific IP addresses.
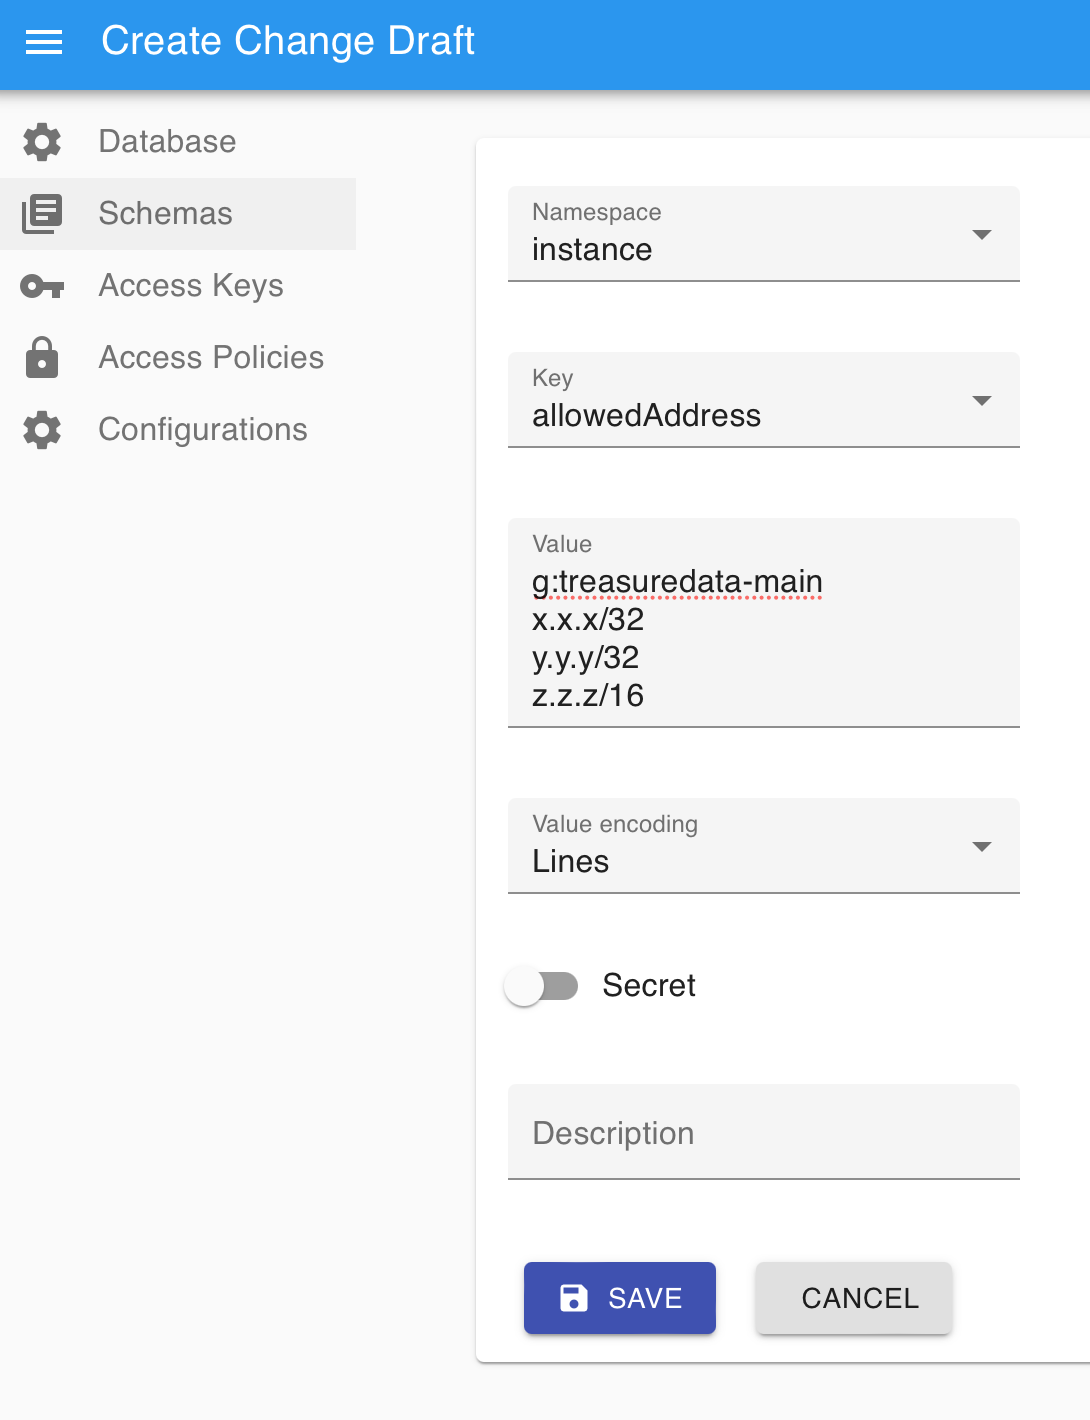
- On the configuration page, select Changes and then select the allowedAddress key.
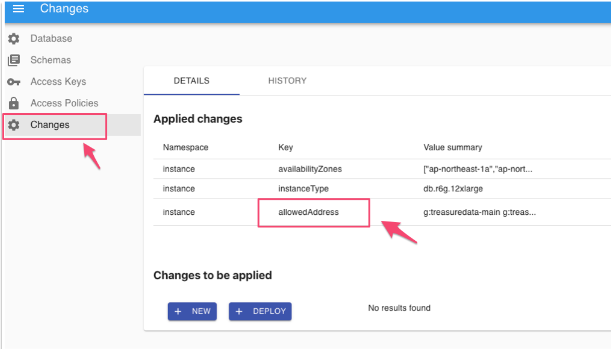
- Enter IP addresses you want to allow in the Value field with CIDR format. Here are the values for the fields in the example below:
- Namespace: instance
- Key: allowedAddress
- Value:
- g:treasuredata-main — This entry is the IP addresses of Treasure Data servers for the Management UI and Integration with PostgreSQL. Be careful not to delete it.
- IP addresses, with each IP address on a separate line
- Secret: toggled off
- Select SAVE.
The configuration is not yet applied at this time.
- Review the Change to be applied and then select DEPLOY.
Applying a change usually takes a few minutes until the processing status changes from APPLYING to SUCCESS
The connection to Data Tank 2.0 is encrypted with SSL/TLS. Treasure Data supports four options for encryption.
| Certificate Authority (CA) | Description |
|---|---|
| rds-ca-2019 [deprecated] Expires in August 2024. | Uses a certificate authority with RSA 2048 private key algorithm and SHA256 signing algorithm. This CA expires in 2024 and doesn't support automatic server certificate rotation. If you are using this CA and want to keep the same standard, we recommend that you switch to the rds-ca-rsa2048-g1 CA. |
| rds-ca-rsa2048-g1 | Uses a certificate authority with RSA 2048 private key algorithm and SHA256 signing algorithm in most AWS Regions. In the AWS GovCloud (US) Regions, this CA uses a certificate authority with RSA 2048 private key algorithm and SHA384 signing algorithm. This CA remains valid for longer than the rds-ca-2019 CA. This CA supports automatic server certificate rotation. |
| rds-ca-rsa4096-g1 | Uses a certificate authority with RSA 4096 private key algorithm and SHA384 signing algorithm. This CA supports automatic server certificate rotation. |
| rds-ca-ecc384-g1 | Uses a certificate authority with ECC 384 private key algorithm and SHA384 signing algorithm. This CA supports automatic server certificate rotation. |
To update the CA of your AWS cluster, you need to set up the certificate bundle on your client side and switch the certificate authority in the management UI.
- Identify your AWS region in the following table.
| Region of Treasure Data | AWS region |
|---|---|
| US | US East (N. Virginia) |
| Tokyo | Asia Pacific (Tokyo) |
| EU01 | Europe (Frankfurt) |
| AP02 | Asia Pacific (Seoul) |
- Locate the certificate bundle for your AWS Region, which is required for Data Tank 2.0 and based on Aurora PostgreSQL.
- Download the certificate bundle (PEM).
This bundle includes all of the CA certificates rds-ca-2019, rds-ca-rsa2048-g1, rds-ca-rsa4096-g1, and rds-ca-ecc384-g1. After you set it up on your client side with this bundle, no update is required next time you switch the certificate authority.
Transitioning the Certificate Authority typically causes a few minutes downtime of a cluster. During this time, you will lose connection to the cluster.
- Create a change draft named "certificateAuthority" as depicted in the following image.
- Run a deployment job on that cluster.
