This feature is in BETA version. For more information, contact your Customer Success Representative.
The Shopify Export Connector V2 is designed to create and update metafields for various Shopify resources using Shopify's GraphQL Admin API. By leveraging the more efficient and flexible GraphQL API, this version of the connector represents a significant upgrade from V1 which used REST API endpoints.
Key capabilities
- GraphQL API integration for improved performance and flexibility
- Support for creating and updating metafields across multiple resource types
- Batch processing capabilities
- Comprehensive error handling and validation
- Rate limiting compliance with Shopify's API guidelines
Supported Resource Types
The connector supports metafield operations for the following Shopify resources:
- Product
- MediaImage (replaces Product Image from V1)
- ProductVariant
- Collection
- Blog
- Page
- DraftOrder
- Customer
- Article
- Shop
- Basic knowledge of Treasure Data, including the TD Toolbelt.
- Basic knowledge of Shopify .
- MediaImage vs Product Image—A significant change from V1 to V2 is the handling of image-related metafields:
- Whereas V1 used Product Image IDs for creating/updating metafields on product images, V2 requires MediaImage IDs.
- MediaImage is a more versatile resource type that can reference various media types (not just product images).
- Existing metafields created with Product Image IDs in V1 will need to be migrated to use MediaImage IDs
- Metafield keys must be 3-64 characters long
- Namespace must be 3-255 characters long
If your security policy requires IP whitelisting, you must add Treasure Data's IP addresses to your allowlist to ensure a successful connection.
Please find the complete list of static IP addresses, organized by region, at the following document
Your first step is to create a new authentication with a set of credentials.
- Select Integrations Hub.
- Select Catalog.
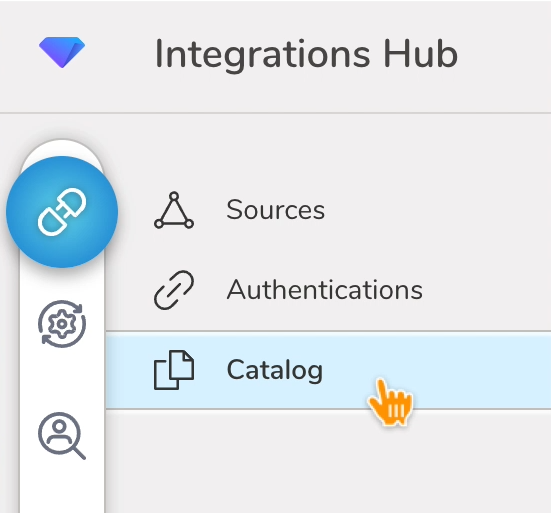
- Search for your Shopify in the Catalog; hover your mouse over the icon and select Create Authentication.
- Ensure that the Credentials tab is selected and then enter credential information for the integration.
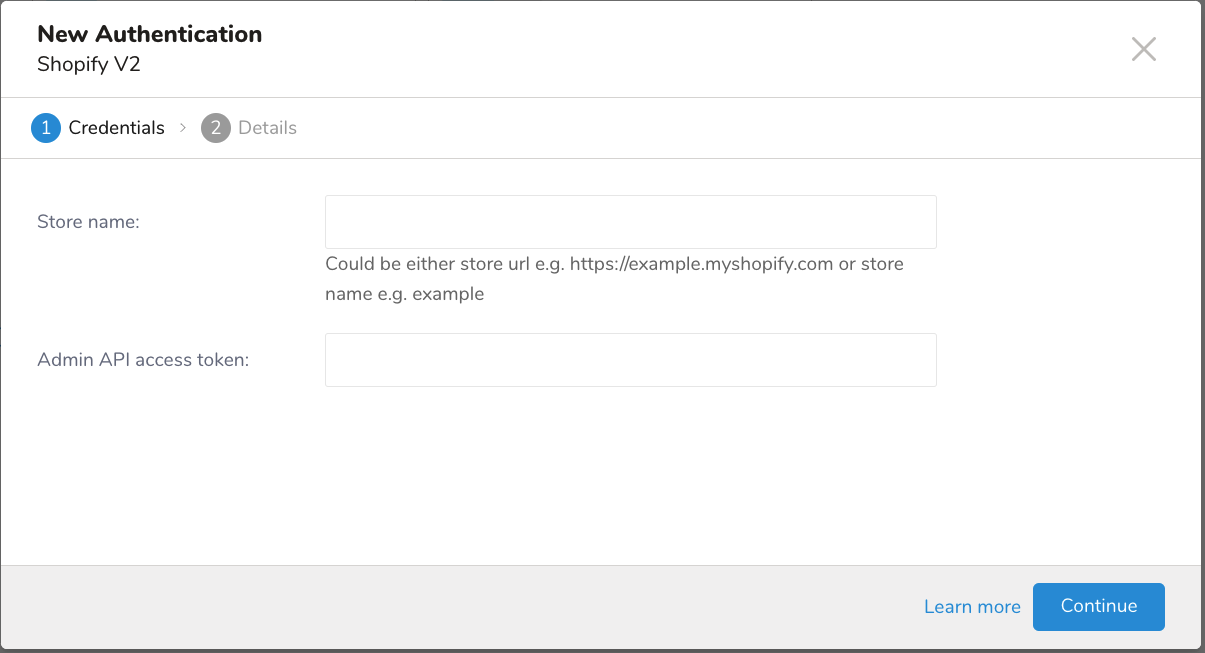
New Authentication Fields
| Parameter | Description |
|---|---|
| Store name | The store identifier for your Shopify store. This can be entered in two formats: - Full store URL: for example https://mountbaker.myshopify.com - Store name only: for example: mountbakerIf you’re using just the store name, it should be the unique identifier of your store without the .myshopify.com domain. |
| Admin API access token | The access token used to authenticate with Shopify’s Admin API. This token can be generated from your Shopify admin panel under Apps > Develop apps > Create an app > Configure Admin API scopes. The token needs the appropriate permissions to perform operations like managing metafields. |
- Select Continue.
- Enter a name for your authentication, and then select Done.
The TD Console supports multiple ways to export data. Please follow these steps to export data from the Data Workbench.
- Navigate to Data Workbench > Queries.
- Select New Query, and define your query.
- Select Export Results to configure the data exporting.
- Select an existing Shopify CAPI authentication or create a new one described previously.
- Configure the Export Results
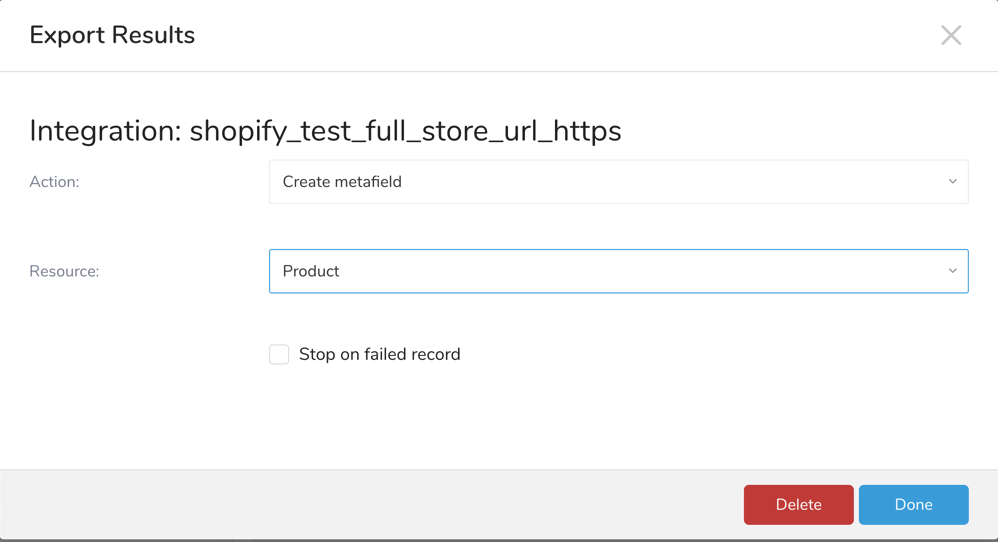
| Field | Description |
|---|---|
| Action | From the drop-down menu, specify the action to take:
|
Resource | From the drop-down menu, choose the Shopify resource you want to add metafields to: Available options:
|
| Stop on failed record | When selected, the connector will stop processing if it encounters any errors. When unselected, it will skip failed records and continue processing the remaining records. |
- Select Done.
For creating metafields in Shopify, you need to build a data export query that includes the necessary fields that adhere to Shopify’s guidelines. For default fields, ensure that the column names match those listed in the “Field/Column-Level Specifications” section. The connector automatically normalizes the column names to match Shopify’s required format, so you don’t need to worry about case sensitivity. For example, if a field name is “resource_id”, you can write it as “RESOURCE_ID”, “Resource_Id”, or “resource_id”, and the connector will standardize it to match Shopify’s requirements.
| Specification | Description |
|---|---|
| Conditionally Required Columns | Your query result must include either resource_id (e.g., product_id, variant_id) to identify the resource you're attaching the metafield to, along with key, namespace, and value columns |
| Null Value Columns | Any columns with NULL values will be ignored during the export |
| Duplicated Columns | Duplicate column names are not allowed in the export query |
| Maximum Value Length | Column values have specific length limits based on their type (detailed in the Field/Column-Level Specifications section) |
| Field | Required | Data Type | Description | Additional Specifications |
|---|---|---|---|---|
| resource_id | Yes | string | Identifier for the Shopify resource (product, variant, etc.) | Can be numeric ID or Global ID format. The connector will automatically handle the conversion to Global ID format if needed. |
| key | Yes | string | Unique identifier for the metafield within its namespace |
|
| namespace | Yes (Optional if using app-reserved namespace) | string | Group identifier for related metafields |
|
| value | Yes | string | The actual content of the metafield | Always stored as a string. See the Value Specifications by Type" section below for type-specific formatting requirements for:
|
| type | No | string | Defines how the value should be interpreted | If not provided, type will be automatically detected. See the Type Detection and Specification" section below. |
When you don’t include a type column in your query result, the connector automatically determines the metafield type based on the data type of your value column:
| Type | Automatically Detected As |
|---|---|
| Numbers without decimal places | number_integer type |
| Text values | single_line_text_field type |
| Numbers with decimal places | number_decimal type |
| Boolean values | boolean type |
| Other data types | converted to text and set as single_line_text_field type |
Basic Types
| Type | Description | Validation Rules | Examples |
|---|---|---|---|
| boolean | True/False values |
| true, false |
| color | Color codes |
| "#fff123", "#FF5733" |
| date | Date values |
| "2022-02-02" |
| date_time | Date and time values |
| "2024-01-01T12:30:00" |
| dimension | Dimensional measurements |
| {"value": 25.0, "unit": "cm"} |
| json | JSON-formatted data |
| {"ingredient": "flour", "amount": 0.3} |
| link | Links or references |
| {"text": "Learn more", "url": "https://shopify.com"} |
| money | Monetary values |
| {"amount": "5.99", "currency_code": "CAD"} |
| multi_line_text_field | Multi-line text content |
| "IngredientsnFlournWaternMilknEggs" |
| number_decimal | Numbers with decimal places |
| "10.4", "-123.456" |
| number_integer | Whole numbers |
| 10, -42 |
| rating | Rating values |
| {"value": "3.5", "scale_min": "1.0", "scale_max": "5.0"} |
| rich_text_field | Formatted text content |
| {"type": "root", "children": [{"type": "paragraph", "children": [{"type": "text", "value": "Bold text.", "bold": true}]}]} |
| single_line_text_field | Single-line text content |
| "VIP shipping method" |
| url | Web URLs |
| "https://www.shopify.com" |
| volume | Volume measurements |
| {"value": 20.0, "unit": "ml"} |
| weight | Weight measurements |
| {"value": 2.5, "unit": "kg"} |
Reference Types
| Type | Description | Validation Rules | Examples |
|---|---|---|---|
| collection_reference | Reference to a collection | - Must be valid Shopify Global ID format - Format: gid://shopify/Collection/{id} | "gid://shopify/Collection/1" |
| file_reference | Reference to a media file | - Must be valid Shopify Global ID format - Format: gid://shopify/MediaImage/{id} | "gid://shopify/MediaImage/123" |
| metaobject_reference | Reference to a metaobject | - Must be valid Shopify Global ID format - Format: gid://shopify/Metaobject/{id} - Must match specified metaobject definition | "gid://shopify/Metaobject/123" |
| mixed_reference | Reference to a metaobject | - Must be valid Shopify Global ID format - Format: gid://shopify/Metaobject/{id} | "gid://shopify/Metaobject/123" |
| page_reference | Reference to a page | - Must be valid Shopify Global ID format - Format: gid://shopify/Page/{id} | "gid://shopify/Page/1" |
| product_reference | Reference to a product | - Must be valid Shopify Global ID format - Format: gid://shopify/Product/{id} | "gid://shopify/Product/1" |
| variant_reference | Reference to a product variant | - Must be valid Shopify Global ID format - Format: gid://shopify/ProductVariant/{id} | "gid://shopify/ProductVariant/1" |
List Types
List types support arrays of basic types and reference types. List types are prefixed with list., and all list types support their base type’s validation rules applied to each array element. The examples below show common list types.
Note:
| Type | Description | Validation Rules | Examples |
|---|---|---|---|
| list.collection_reference | Array of collection references | - Must be array of valid collection references - Each item must follow collection_reference rules | ["gid://shopify/Collection/1", "gid://shopify/Collection/2"] |
| list.color | Array of color codes | - Must be array of valid color codes - Each item must follow color rules | ["#FFF123", "#E6E6FA"] |
| list.date | Array of dates | - Must be array of valid dates - Each item must follow date rules | ["2022-01-01", "2022-05-05"] |
| list.date_time | Array of timestamps | - Must be array of valid timestamps - Each item must follow date_time rules | ["2024-01-01T12:30:00", "2024-05-01T12:30:00"] |
| list.dimension | Array of dimension objects | - Must be array of valid JSON objects - Each item must follow dimension rules | [{"value": 25.0, "unit": "cm"}, {"value": 35.0, "unit": "cm"}] |
| list.number_integer | Array of integers | - Must be array of valid integers - Each item must follow number_integer rules | [10, 20, 30] |
| list.number_decimal | Array of decimals | - Must be array of valid decimals - Each item must follow number_decimal rules | ["10.4", "20.5", "30.6"] |
| list.single_line_text_field | Array of text strings | - Must be array of strings - Each item must follow single_line_text_field rules | ["VIP shipping method", "Standard shipping method"] |
| list.url | Array of URLs | - Must be array of valid URLs - Each item must follow url rules | ["https://www.shopify.com", "https://www.shopify.dev"] |
To update existing metafields in Shopify, you need to build a data export query that includes the necessary fields. The connector automatically handles the data validation and formatting requirements for each field.
Export Query Specifications
| Specification | Description |
|---|---|
| Required Columns | Your query result must include a metafield_id and value columns. |
| Optional Columns | You can include key, namespace, and type columns if you want to validate the metafield information before an update. |
| Null Value Columns | Any columns with NULL values will be ignored during the export. |
| Duplicated Columns | Duplicate column names are not allowed in the export query. |
| Field | Data Type | Description | Validation Rules | Notes |
|---|---|---|---|---|
| metafield_id | string | Identifier for the existing metafield | Must be a valid existing metafield ID |
|
| value | string | New value for the metafield |
|
|
These fields are not required for updates but can be included for validation purposes:
| Field | Data Type | Description | Validation Rules | Notes |
|---|---|---|---|---|
| key | string | Identifier for the metafield within its namespace |
| If provided, the connector will verify this matches the existing metafield before update. |
| namespace | string | Group identifier for related metafields |
| If provided, the connector will verify this matches the existing metafield before update. |
| type | string | Defines how the value should be interpreted | Must be one of supported types (see Create Metafield documentation) | If provided, the connector will verify this matches the existing metafield before update. |
You can use Scheduled Jobs with Result Export to periodically write the output result to a target destination that you specify.
Treasure Data's scheduler feature supports periodic query execution to achieve high availability.
When two specifications provide conflicting schedule specifications, the specification requesting to execute more often is followed while the other schedule specification is ignored.
For example, if the cron schedule is '0 0 1 * 1', then the 'day of month' specification and 'day of week' are discordant because the former specification requires it to run every first day of each month at midnight (00:00), while the latter specification requires it to run every Monday at midnight (00:00). The latter specification is followed.
Navigate to Data Workbench > Queries
Create a new query or select an existing query.
Next to Schedule, select None.

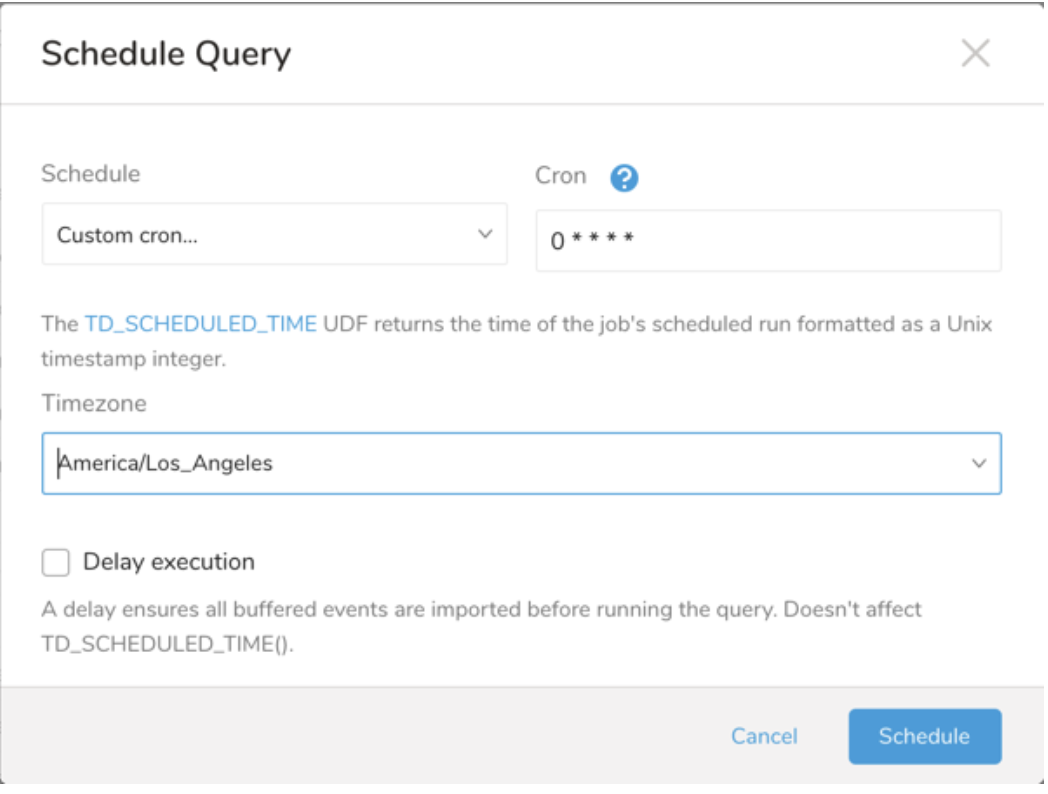
In the drop-down, select one of the following schedule options:
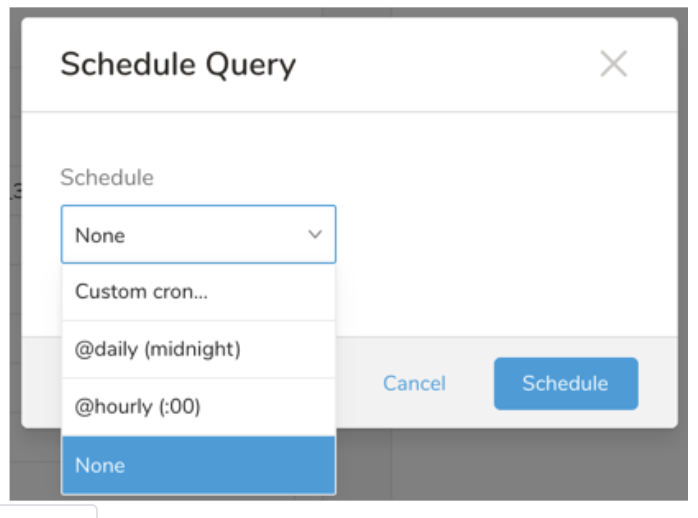
Drop-down Value Description Custom cron... Review Custom cron... details. @daily (midnight) Run once a day at midnight (00:00 am) in the specified time zone. @hourly (:00) Run every hour at 00 minutes. None No schedule.
| Cron Value | Description |
|---|---|
0 * * * * | Run once an hour. |
0 0 * * * | Run once a day at midnight. |
0 0 1 * * | Run once a month at midnight on the morning of the first day of the month. |
| "" | Create a job that has no scheduled run time. |
 *    *    *    *    *
 -    -    -    -    -
 |    |    |    |    |
 |    |    |    |    +----- day of week (0 - 6) (Sunday=0)
 |    |    |    +---------- month (1 - 12)
 |    |    +--------------- day of month (1 - 31)
 |    +-------------------- hour (0 - 23)
 +------------------------- min (0 - 59)
The following named entries can be used:
- Day of Week: sun, mon, tue, wed, thu, fri, sat.
- Month: jan, feb, mar, apr, may, jun, jul, aug, sep, oct, nov, dec.
A single space is required between each field. The values for each field can be composed of:
| Field Value | Example | Example Description |
|---|---|---|
| A single value, within the limits displayed above for each field. | ||
A wildcard '*' to indicate no restriction based on the field. | '0 0 1 * *' | Configures the schedule to run at midnight (00:00) on the first day of each month. |
A range '2-5', indicating the range of accepted values for the field. | '0 0 1-10 * *' | Configures the schedule to run at midnight (00:00) on the first 10 days of each month. |
A list of comma-separated values '2,3,4,5', indicating the list of accepted values for the field. | 0 0 1,11,21 * *' | Configures the schedule to run at midnight (00:00) every 1st, 11th, and 21st day of each month. |
A periodicity indicator '*/5' to express how often based on the field's valid range of values a schedule is allowed to run. | '30 */2 1 * *' | Configures the schedule to run on the 1st of every month, every 2 hours starting at 00:30. '0 0 */5 * *' configures the schedule to run at midnight (00:00) every 5 days starting on the 5th of each month. |
A comma-separated list of any of the above except the '*' wildcard is also supported '2,*/5,8-10'. | '0 0 5,*/10,25 * *' | Configures the schedule to run at midnight (00:00) every 5th, 10th, 20th, and 25th day of each month. |
- (Optional) You can delay the start time of a query by enabling the Delay execution.
Save the query with a name and run, or just run the query. Upon successful completion of the query, the query result is automatically exported to the specified destination.
Scheduled jobs that continuously fail due to configuration errors may be disabled on the system side after several notifications.
(Optional) You can delay the start time of a query by enabling the Delay execution.
You can also send segment data to the target platform by creating an activation in the Audience Studio.
- Navigate to Audience Studio.
- Select a parent segment.
- Open the target segment, right-mouse click, and then select Create Activation.
- In the Details panel, enter an Activation name and configure the activation according to the previous section on Configuration Parameters.
- Customize the activation output in the Output Mapping panel.
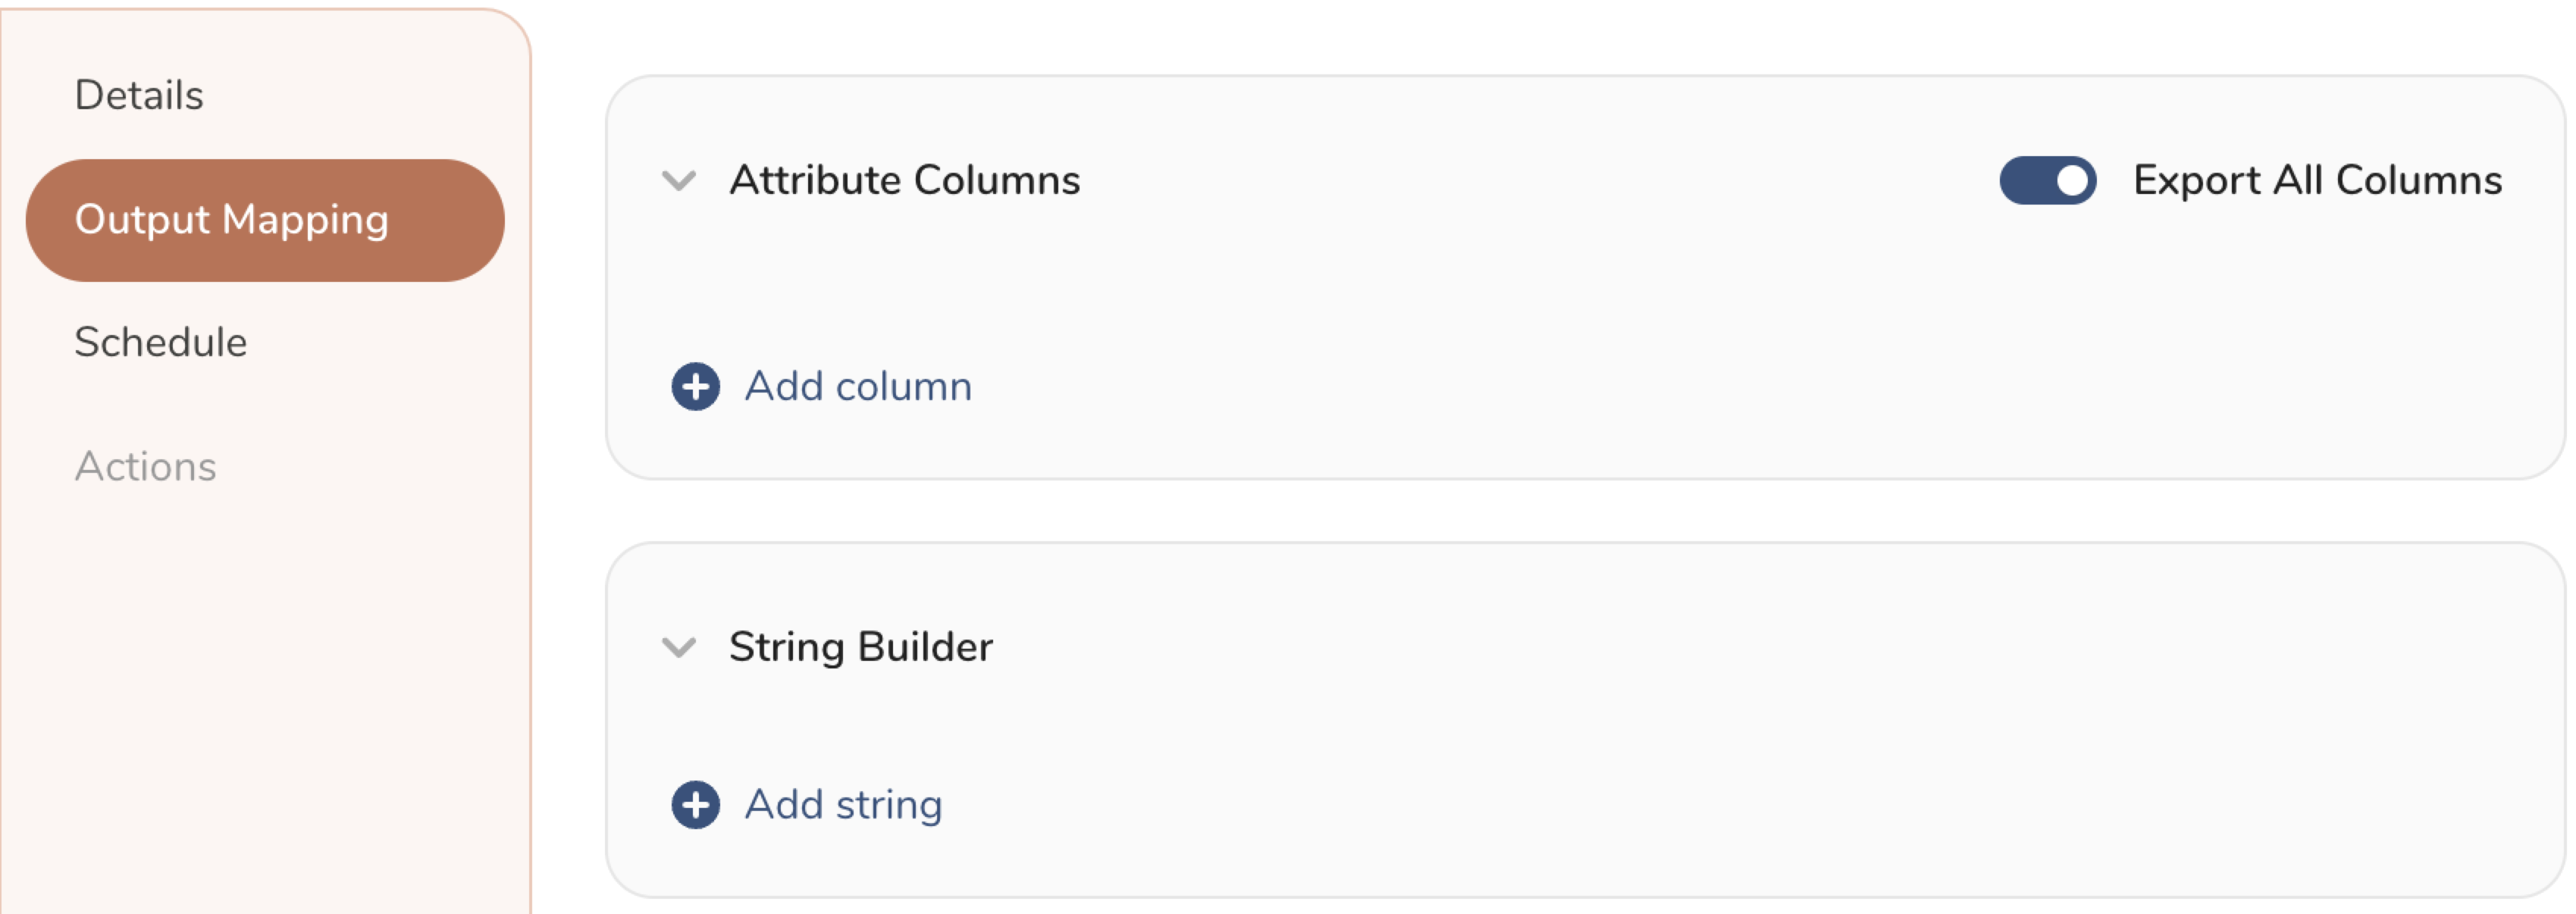
- Attribute Columns
- Select Export All Columns to export all columns without making any changes.
- Select + Add Columns to add specific columns for the export. The Output Column Name pre-populates with the same Source column name. You can update the Output Column Name. Continue to select + Add Columnsto add new columns for your activation output.
- String Builder
- + Add string to create strings for export. Select from the following values:
- String: Choose any value; use text to create a custom value.
- Timestamp: The date and time of the export.
- Segment Id: The segment ID number.
- Segment Name: The segment name.
- Audience Id: The parent segment number.
- + Add string to create strings for export. Select from the following values:
- Set a Schedule.
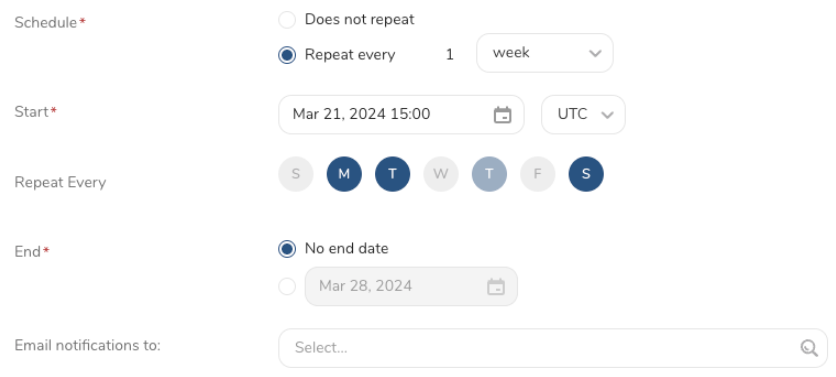
- Select the values to define your schedule and optionally include email notifications.
- Select Create.
If you need to create an activation for a batch journey, review Creating a Batch Journey Activation.
You can also use CLI (Toolbelt) to export results to Shopify by specifying the information you want to export to your Shopify server using the --result option of the td query command. For more information about the td query command, refer to TD Toolbelt: Query Commands.
Options for the .yml configuration files used for TD Toolbelt are formatted in JSON, and the general structure is as follows.
- For create metafields
out:
  type: 'shopify_v2'
  admin_api_access_token: {admin_api_access_token}
  store_name: {store_name}
  action: 'create'
  resource: 'product'
stop_on_failed_record: false- For update metafields
out:
  type: 'shopify_v2'
  admin_api_access_token: {admin_api_access_token}
  store_name: {store_name}
  action: 'update'
  stop_on_failed_record: false
Parameters
| Name | Description | Value | Default Value | Required |
|---|---|---|---|---|
| type | Connector type | shopify_v2 | N/A | Yes |
| admin_api_access_token | A Master API key to authenticate your export from TD | N/A | N/A | Yes |
| store_name | Shopify store name | N/A | N/A | Yes |
| action | Operation on Shopify metafields | Supported values:
| Create | Yes |
| resource | The object the metafields should create | Supported values:
| Shop | Yes if action is create |
| stop_on_failed_record | Stop the job if record invalid data | True or False | False | N/A |
Create Metafields
td query --result '{"type":"shopify_v2","admin_api_access_token":"admin_api_access_token","store_name":"store_name","action":"create,"resource":"shop", "stop_on_failed_record":true}' -d sample_database "select shop_id,key,namespace,value from tbl_shop" -T prestoUpdate Metafields
td query --result '{"type":"shopify_v2","admin_api_access_token":"admin_api_access_token","store_name":"store_name","action":"update, "stop_on_failed_record":true}' -d sample_database "select metafield_id,value from tbl_metafield" -T presto- The Result Export can be scheduled to periodically upload data to a target destination. See Scheduling Jobs Using TD Console.
- All import and export integrations can be added to a TD Workflow. The td>: data operator can export a query result to a specified integration. For more information, see Reference for Treasure Workflow Operators.