Treasure DataからSnapchatにジョブ結果を直接書き込むことができます。このデータコネクタを使用して、ユーザーセグメントを作成し、既存のセグメントにデータをアップロードし、セグメントからユーザーを削除します。コネクタは次の機能をサポートします:
- 複数のセグメントからユーザーを追加、置換、または削除
- セグメントが存在しない場合、新しいセグメントを自動作成
- セグメントからすべてのユーザーをクリア
- 値がハッシュ化されていない場合、ユーザーID(email、phone、またはmobile_ad_id)を自動検出してハッシュ化
- 無効な値をスキップまたは停止するオプションを指定
- TD toolbeltを含むTreasure Dataの基本知識
- 有効なSnapchat Ad Accountアカウント
- Snapchat MarketingアカウントへのTreasure Dataアカウントアクセスの承認
エクスポートする前に、使用するデータ接続を作成して設定する必要があります。データ接続の一部として、統合にアクセスするための認証を提供します。
Catalogに移動し、Snapchatを検索して選択します。
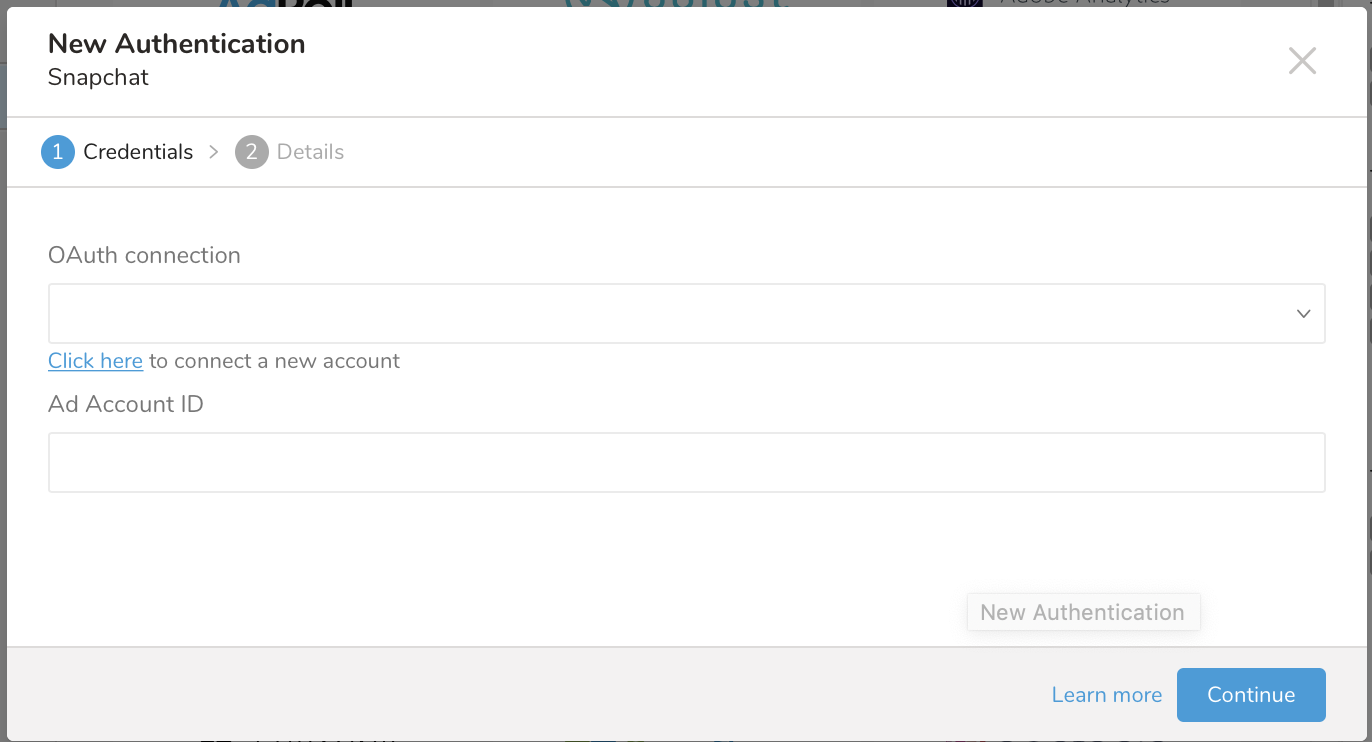
次のダイアログが開きます。
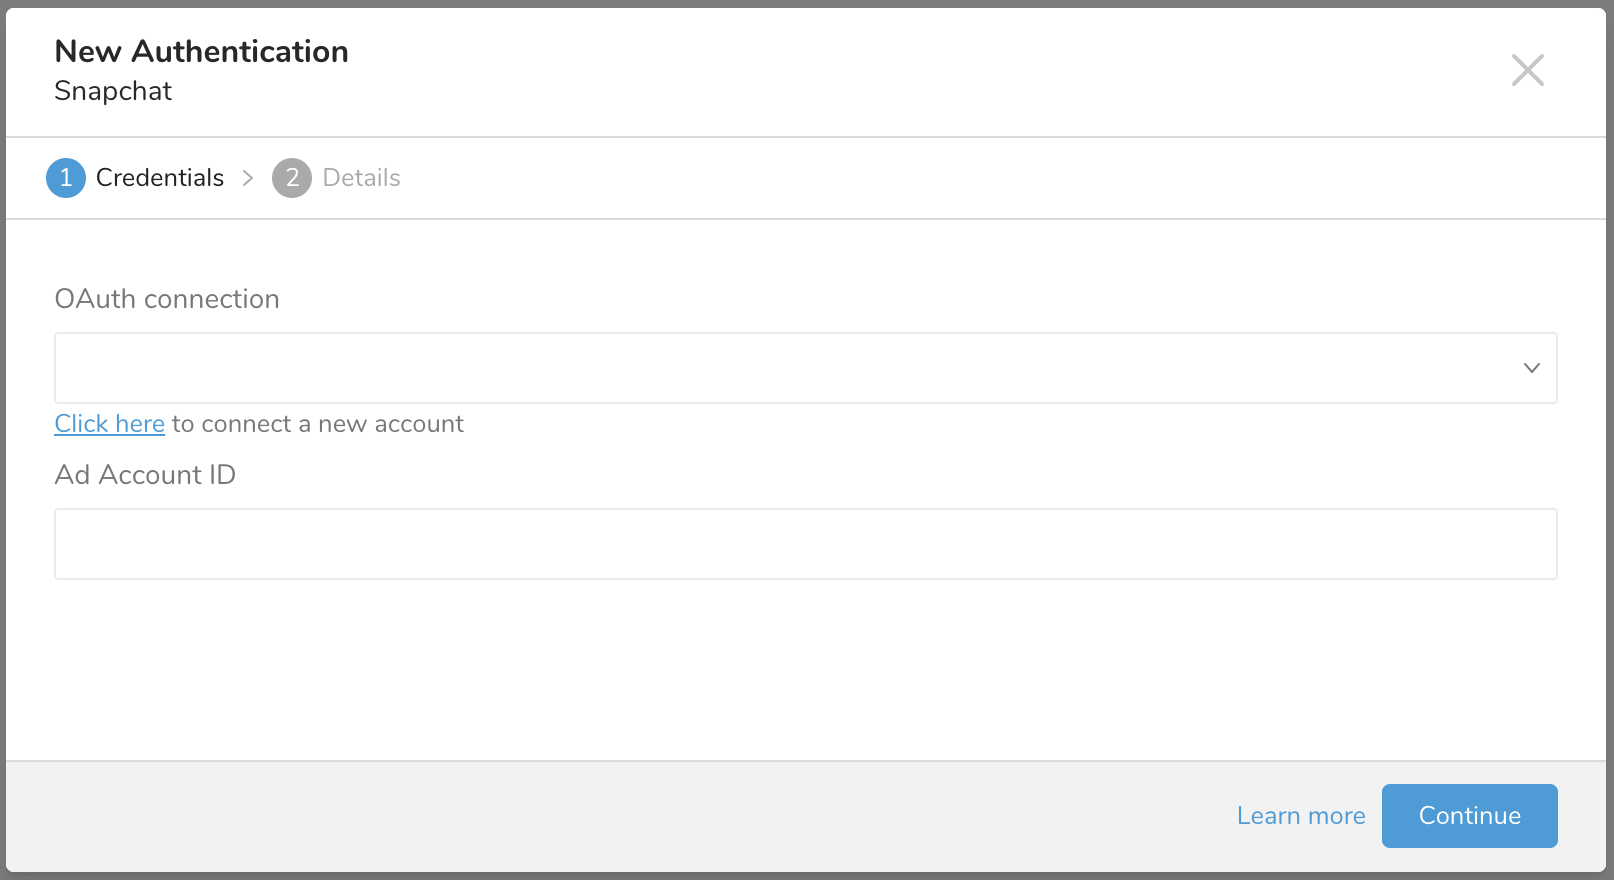
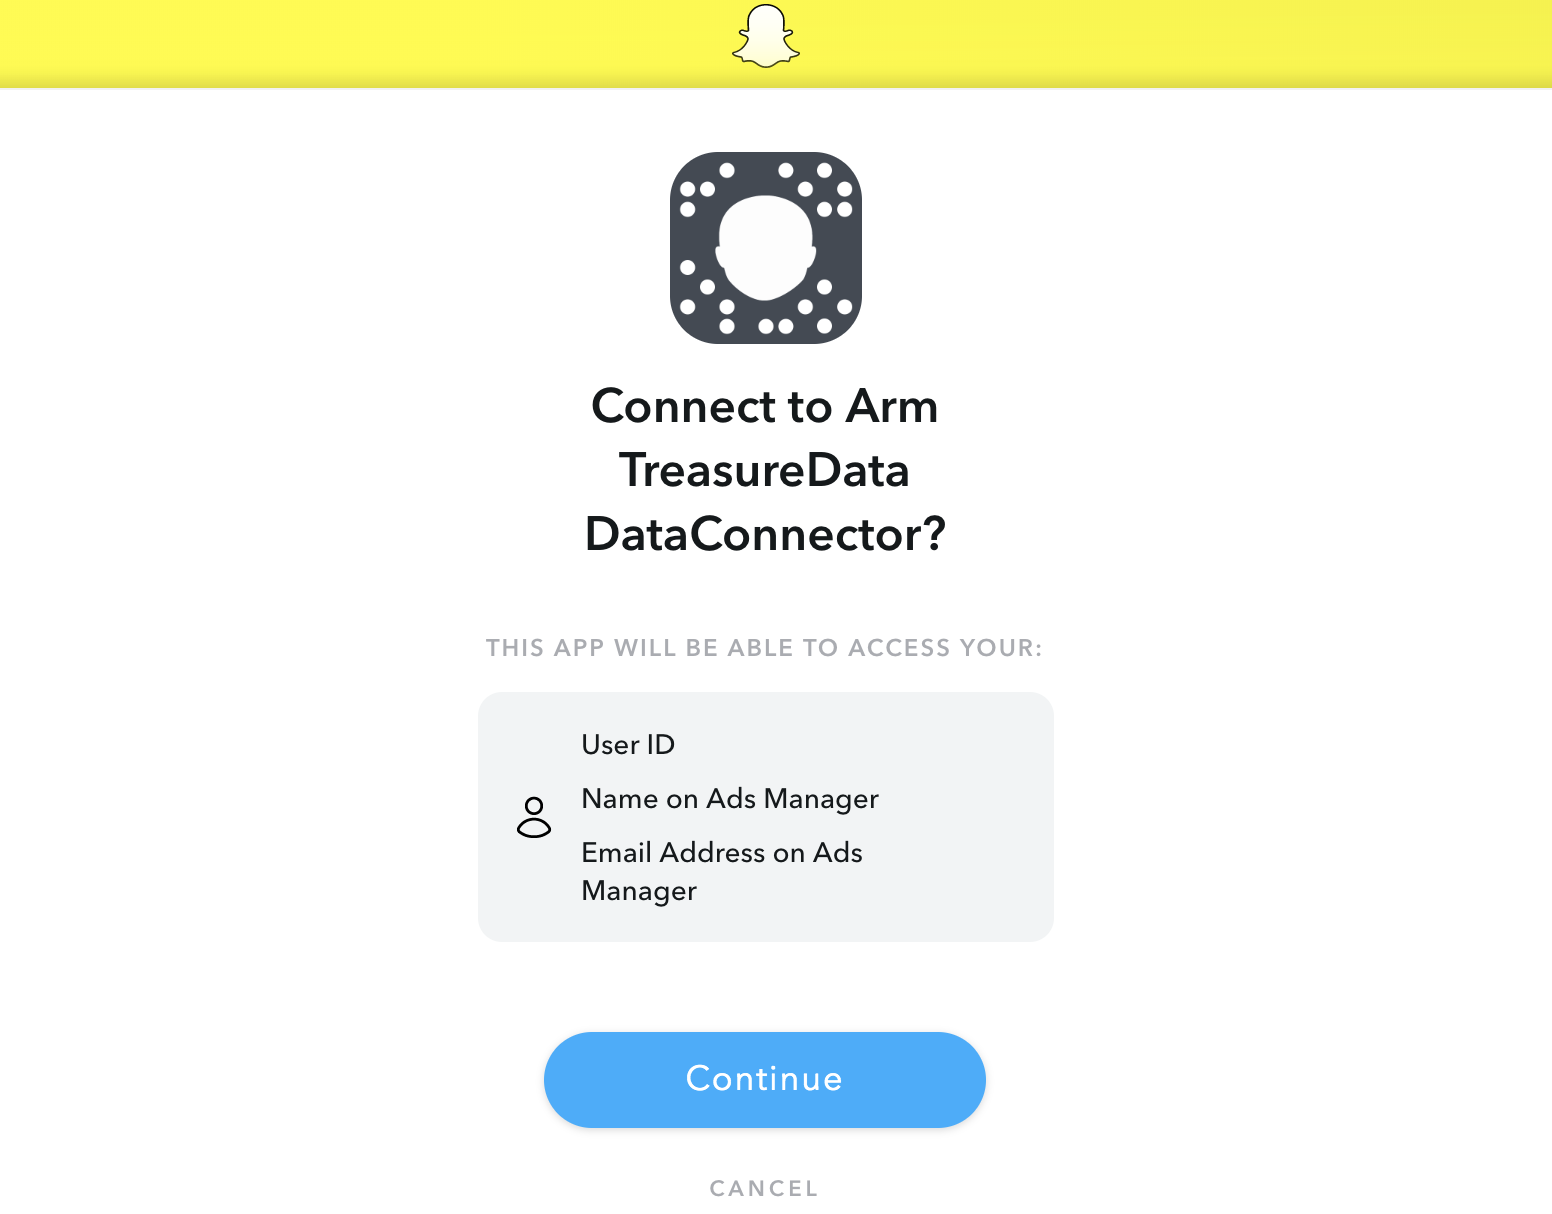
Click here to connect to a new accountを選択します。まだログインしていない場合はSnapchatにログインするためにリダイレクトされるか、Treasure Dataへのアクセスを許可するための同意ページにリダイレクトされます。
TD Consoleにリダイレクトされます。最初のステップ(新しい接続を作成)を繰り返し、新しいOAuth接続を選択します。
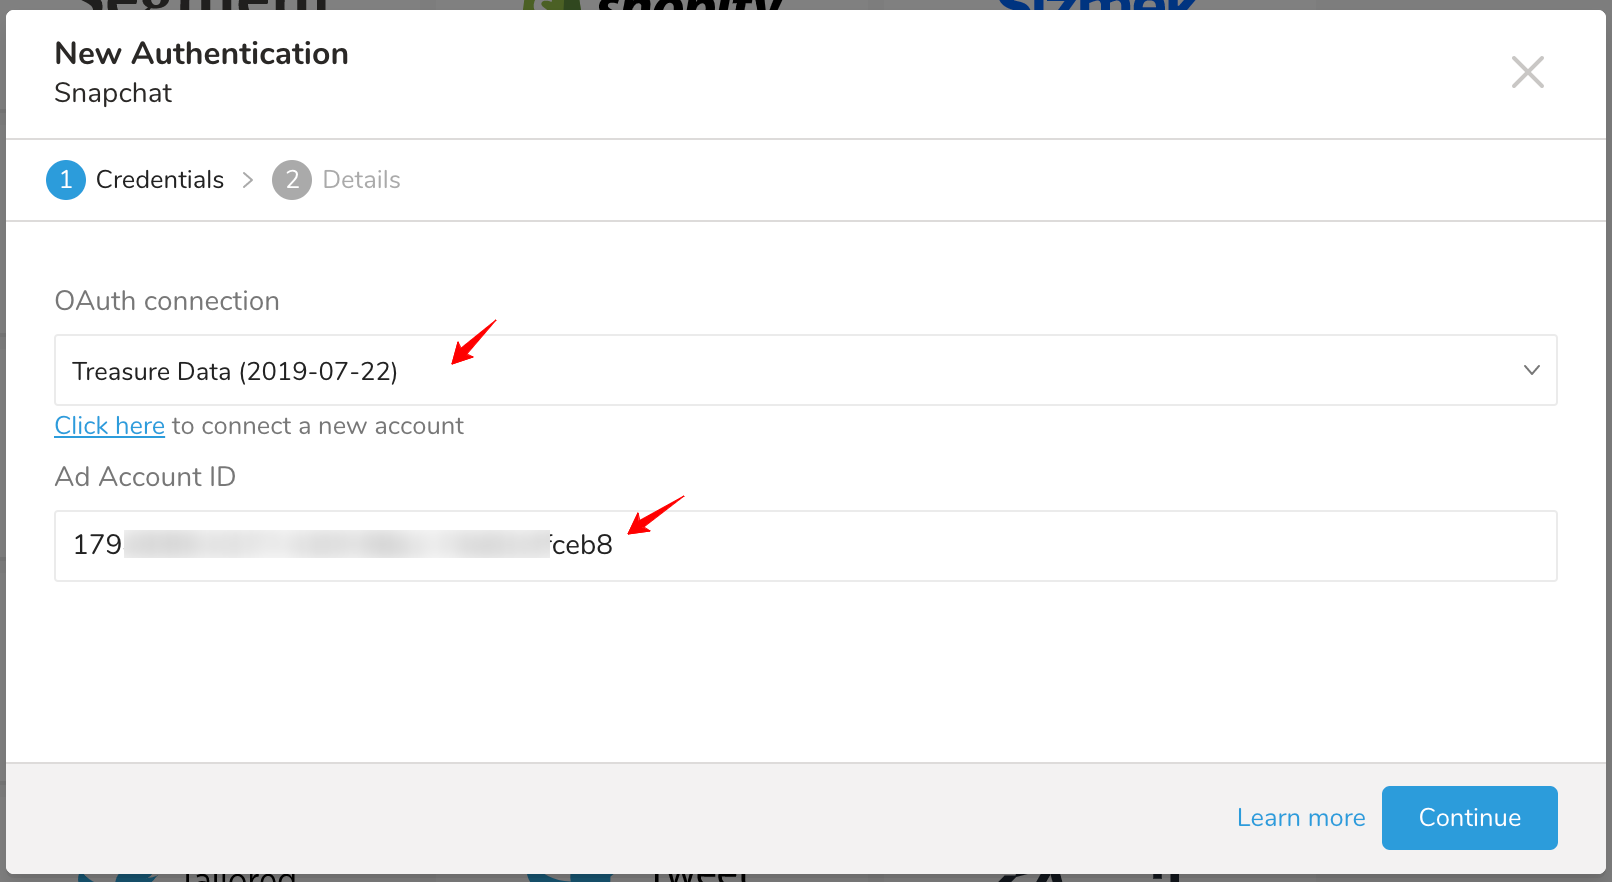
Ad Account IDを入力します。付録: Ad Account IDとは何かを参照してください。
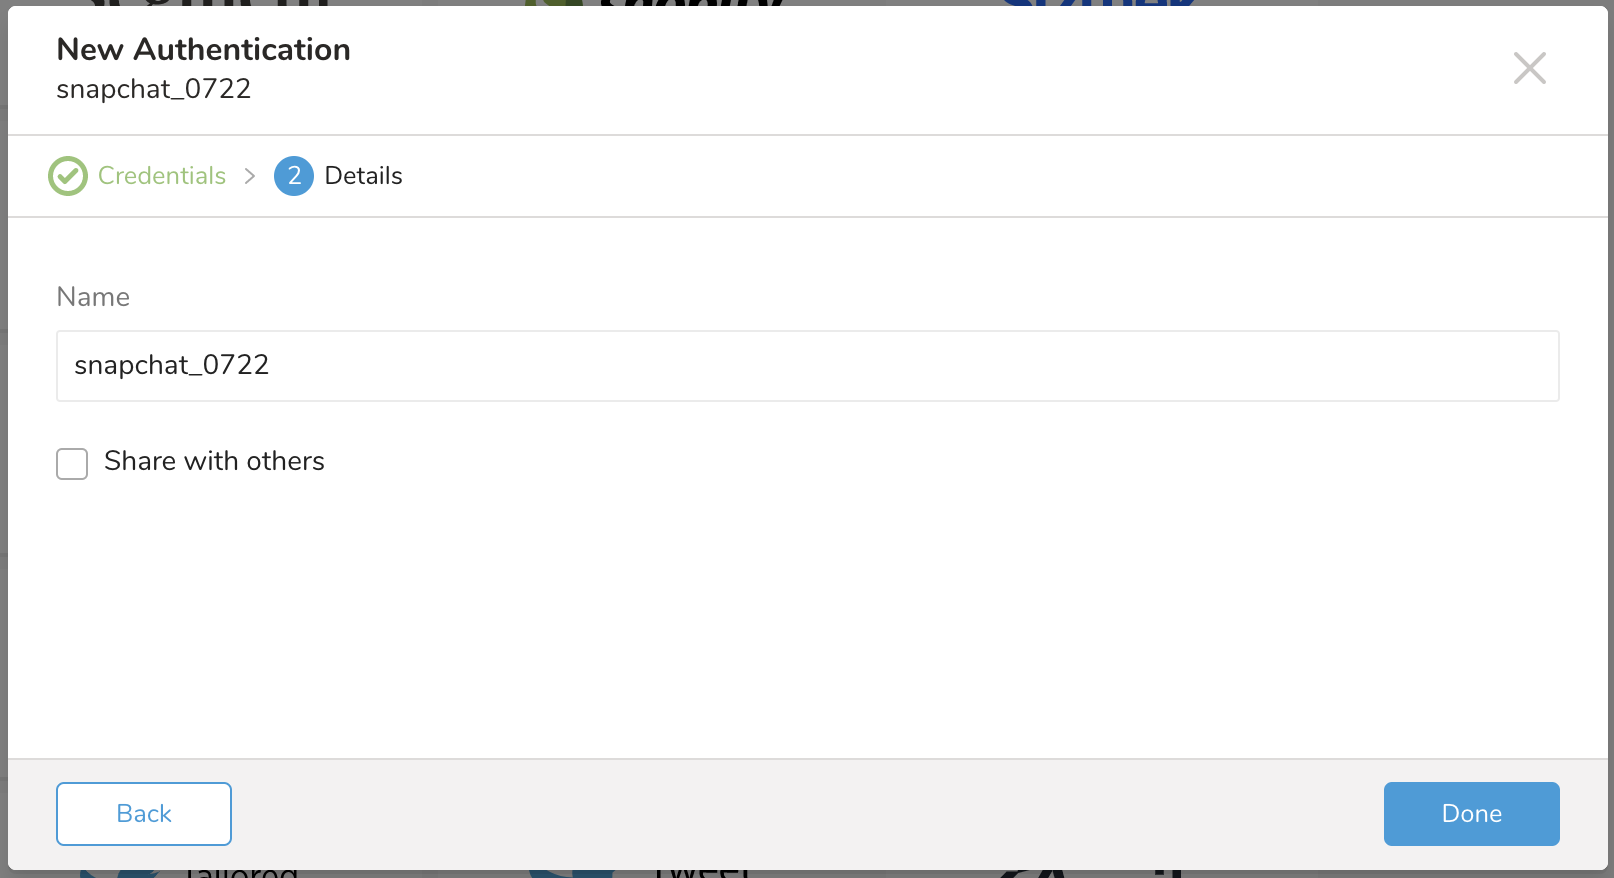
Continueを選択し、新しいSnapchat接続に名前を付けます。Doneを選択します。
このステップでは、クエリを作成または再利用し、クエリでデータ接続を設定します。 場合によっては、クエリで列マッピングを定義する必要があります。
TD Consoleに移動します。Data Workbench > Queriesに移動します。データをエクスポートするために使用する予定のクエリにアクセスします。
クエリエディタの上部にあるExport Resultsを選択します。
Choose Integrationダイアログが開きます。結果をエクスポートするために使用する接続を選択する場合、2つのオプションがあります:
既存の接続を使用 検索ボックスに接続名を入力して、接続をフィルタリングして選択します。
ダイアログが開きます
新しいSnapchat接続を作成。 New Integrationを選択し、TypeドロップダウンからSnapchatを選択します。次のように表示されます:
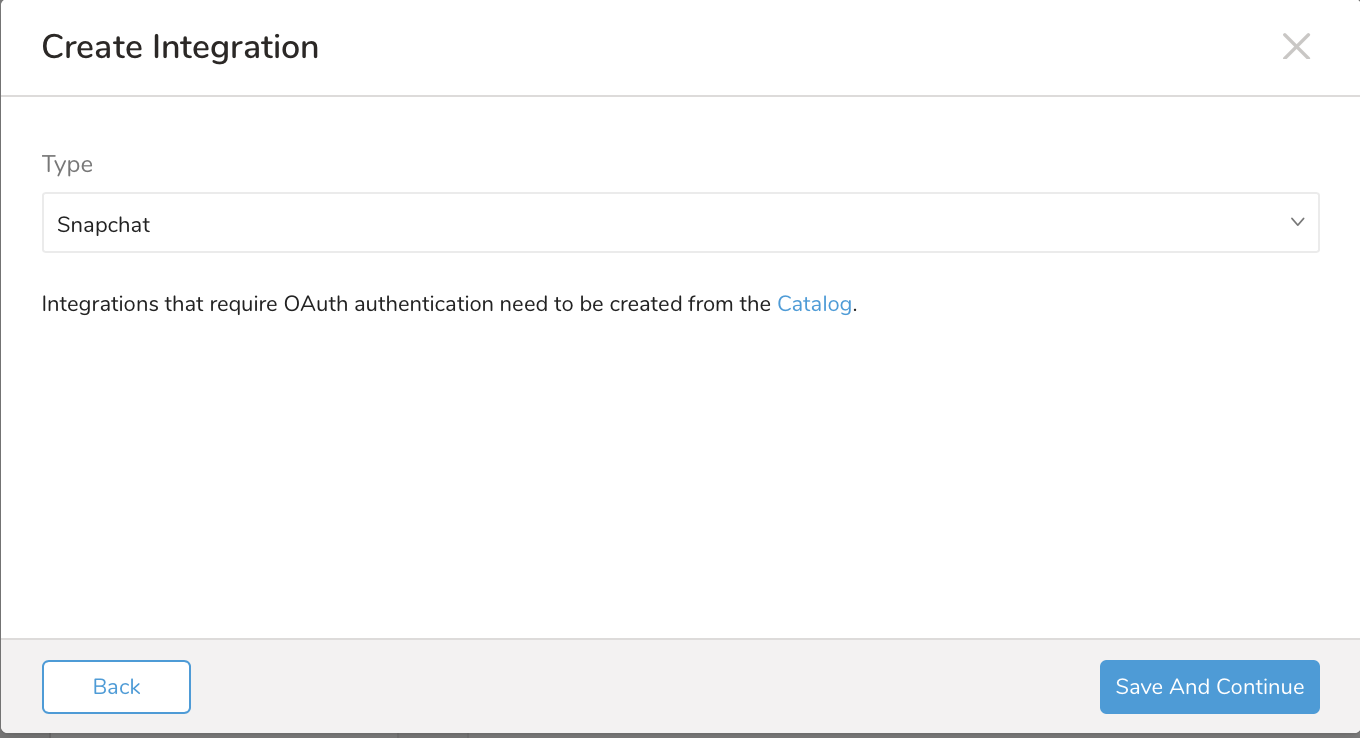
Save and Continueを選択します。次のように表示されます:
OAuth接続の作成を含む、新しい接続を作成で説明されているステップを完了します。
新しいSnapChat接続に必要な資格情報を入力します。
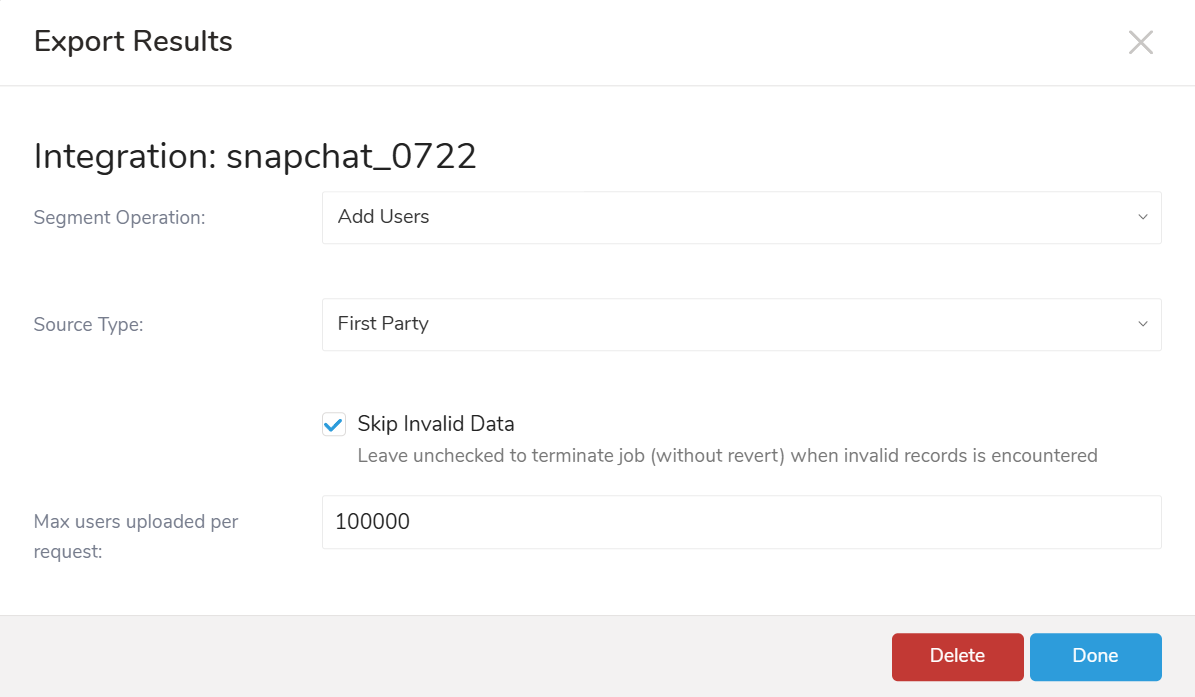
次のパラメータを設定します。
Segment Operation(必須): Add Users、Remove Users、Replace Users(すべてのユーザーを削除して新しいユーザーを追加)
セグメントから、またはClear Segments Data(セグメントからすべてのユーザーを削除)
Source Type: エクスポートソースタイプ。サポートされる値は次のとおりです
- First Party(デフォルト)
- Pixel
- Mobile
- Foot Traffic Insights
Skip Invalid Data: 無効な行とセグメントをスキップして他のインポートを続行するオプション。無効な行はジョブログにリストされます。このオプションが選択されていない場合、無効なレコードが検出されるとジョブは終了し、アップロードされたデータは元に戻されません。
Max users uploaded per request(必須): 単一のリクエストでアップロードされるユーザーの最大数。デフォルトは100000です。1〜200000の値を受け入れます。リクエストごとに100000人を超えるユーザーを指定すると、リクエストごとにアップロードされるユーザーの制限により、Snapchatからエラーメッセージが表示される場合があります。ジョブは、このパラメータに基づいてアップロードデータを複数のリクエストに分割します。クエリリクエストは完了するまで処理され、すべてのデータがアップロードされます。
Snapchatデータコネクタは、次の列とデータタイプのみを理解して解釈します。エイリアス列名を次の指定された列に一致するように変更する必要があります:
| Column name | Type | Required | Default | Description |
|---|---|---|---|---|
| segment_id | string | optional | segment_idとsegment_nameの両方が指定されている場合、segment_idが使用されます。 | |
| segment_name | string | optional | segment_nameがSnapchatに存在しない場合。
| |
| segment_description | string | optional | ||
| retention_in_days | integer | optional | 9999 | 0または指定されていない場合、デフォルトを9999として設定します。1〜9999の値を受け入れます |
| id_type | string | required | 次のいずれかである必要があります
| |
| id_value | string | required | email、phone、mobile_ad_idのSHA256ハッシュ化または生の値 |
クエリにsegment_idまたはsegment_name列のいずれかを含める必要があります。含めない場合、ジョブは失敗します。
Treasure Dataから、次のクエリをSnapchatの接続にエクスポート結果として実行します:
次のクエリ例では、Segment OperationがAdd Usersとして指定されている場合、segment_idで指定された既存のセグメントにすべてのメールをアップロードします。
SELECT
 segment_id AS segment_id,
 'email' AS id_type,
 email AS id_value
FROM
 my_table;
次のクエリ例では、Segment OperationがAdd Usersとして指定されている場合、セグメントFootball fansをチェックするか、Retentionが30日の新しいセグメントを作成します。
SELECT
 'Football fans' AS segment_name,
 30 AS retention_in_days,
 'phone' AS id_type,
 mobile_phone AS id_value
FROM
my_tableYou can use Scheduled Jobs with Result Export to periodically write the output result to a target destination that you specify.
Treasure Data's scheduler feature supports periodic query execution to achieve high availability.
When two specifications provide conflicting schedule specifications, the specification requesting to execute more often is followed while the other schedule specification is ignored.
For example, if the cron schedule is '0 0 1 * 1', then the 'day of month' specification and 'day of week' are discordant because the former specification requires it to run every first day of each month at midnight (00:00), while the latter specification requires it to run every Monday at midnight (00:00). The latter specification is followed.
Navigate to Data Workbench > Queries
Create a new query or select an existing query.
Next to Schedule, select None.

In the drop-down, select one of the following schedule options:
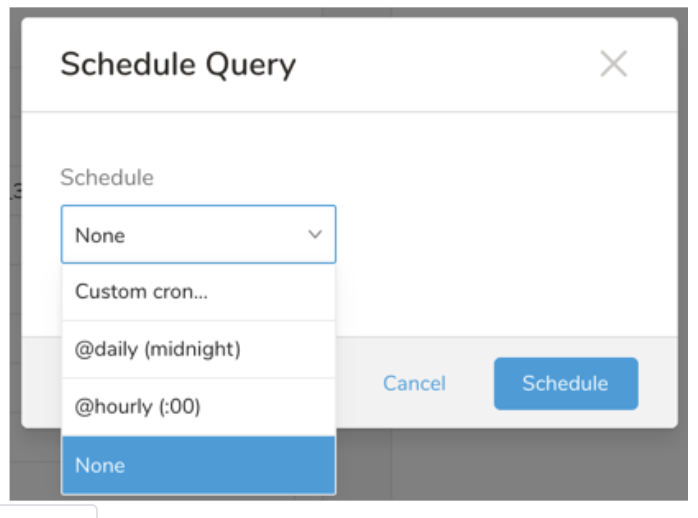
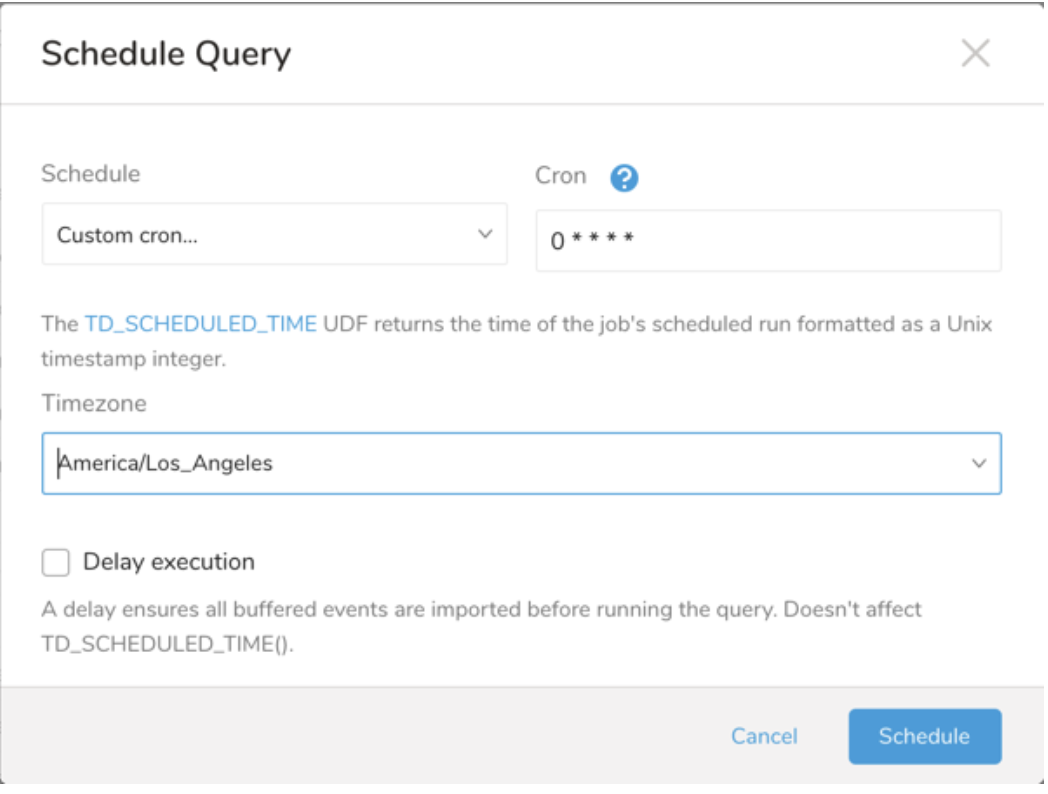
Drop-down Value Description Custom cron... Review Custom cron... details. @daily (midnight) Run once a day at midnight (00:00 am) in the specified time zone. @hourly (:00) Run every hour at 00 minutes. None No schedule.
| Cron Value | Description |
|---|---|
0 * * * * | Run once an hour. |
0 0 * * * | Run once a day at midnight. |
0 0 1 * * | Run once a month at midnight on the morning of the first day of the month. |
| "" | Create a job that has no scheduled run time. |
 *    *    *    *    *
 -    -    -    -    -
 |    |    |    |    |
 |    |    |    |    +----- day of week (0 - 6) (Sunday=0)
 |    |    |    +---------- month (1 - 12)
 |    |    +--------------- day of month (1 - 31)
 |    +-------------------- hour (0 - 23)
 +------------------------- min (0 - 59)
The following named entries can be used:
- Day of Week: sun, mon, tue, wed, thu, fri, sat.
- Month: jan, feb, mar, apr, may, jun, jul, aug, sep, oct, nov, dec.
A single space is required between each field. The values for each field can be composed of:
| Field Value | Example | Example Description |
|---|---|---|
| A single value, within the limits displayed above for each field. | ||
A wildcard '*' to indicate no restriction based on the field. | '0 0 1 * *' | Configures the schedule to run at midnight (00:00) on the first day of each month. |
A range '2-5', indicating the range of accepted values for the field. | '0 0 1-10 * *' | Configures the schedule to run at midnight (00:00) on the first 10 days of each month. |
A list of comma-separated values '2,3,4,5', indicating the list of accepted values for the field. | 0 0 1,11,21 * *' | Configures the schedule to run at midnight (00:00) every 1st, 11th, and 21st day of each month. |
A periodicity indicator '*/5' to express how often based on the field's valid range of values a schedule is allowed to run. | '30 */2 1 * *' | Configures the schedule to run on the 1st of every month, every 2 hours starting at 00:30. '0 0 */5 * *' configures the schedule to run at midnight (00:00) every 5 days starting on the 5th of each month. |
A comma-separated list of any of the above except the '*' wildcard is also supported '2,*/5,8-10'. | '0 0 5,*/10,25 * *' | Configures the schedule to run at midnight (00:00) every 5th, 10th, 20th, and 25th day of each month. |
- (Optional) You can delay the start time of a query by enabling the Delay execution.
Save the query with a name and run, or just run the query. Upon successful completion of the query, the query result is automatically exported to the specified destination.
Scheduled jobs that continuously fail due to configuration errors may be disabled on the system side after several notifications.
(Optional) You can delay the start time of a query by enabling the Delay execution.
You can also send segment data to the target platform by creating an activation in the Audience Studio.
- Navigate to Audience Studio.
- Select a parent segment.
- Open the target segment, right-mouse click, and then select Create Activation.
- In the Details panel, enter an Activation name and configure the activation according to the previous section on Configuration Parameters.
- Customize the activation output in the Output Mapping panel.
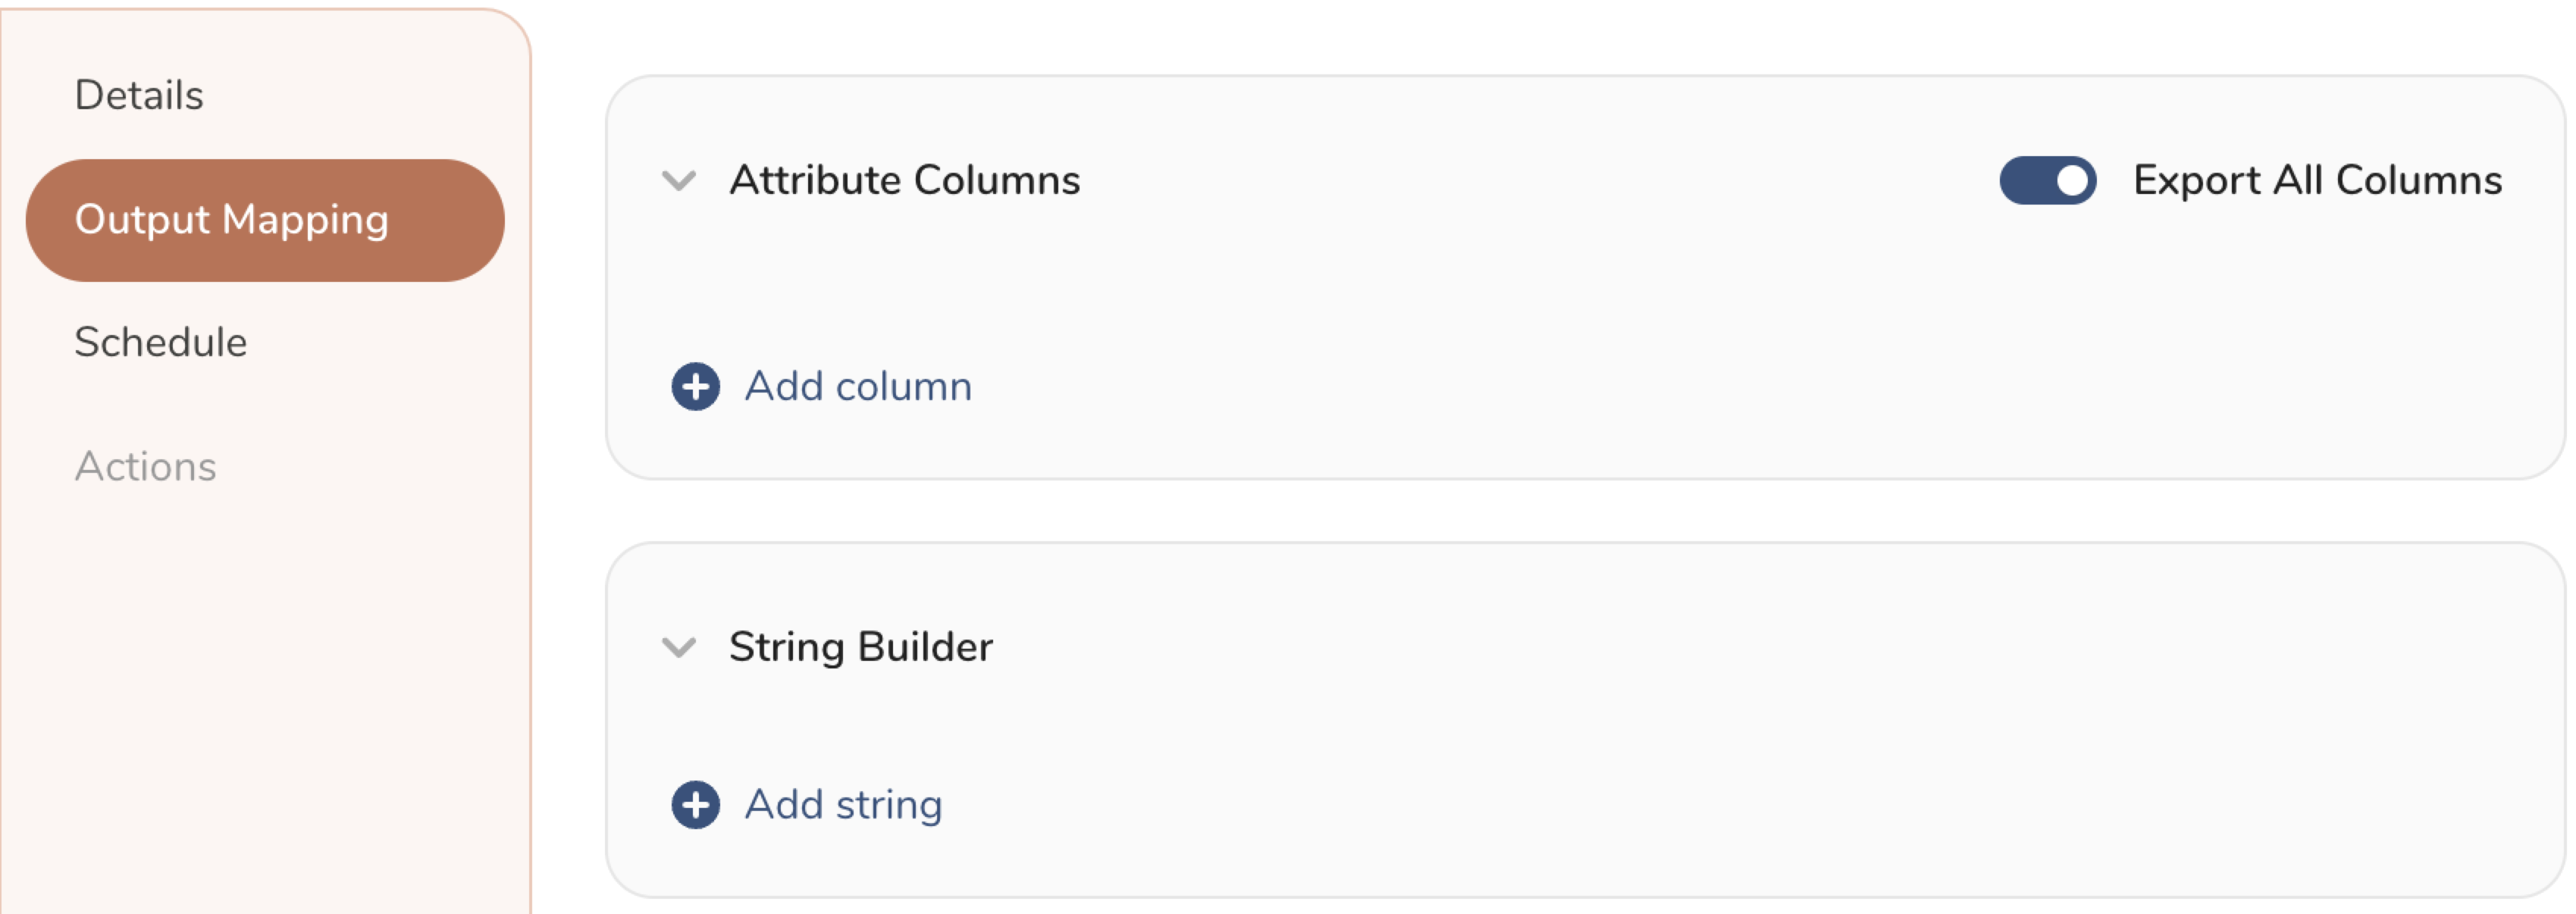
- Attribute Columns
- Select Export All Columns to export all columns without making any changes.
- Select + Add Columns to add specific columns for the export. The Output Column Name pre-populates with the same Source column name. You can update the Output Column Name. Continue to select + Add Columnsto add new columns for your activation output.
- String Builder
- + Add string to create strings for export. Select from the following values:
- String: Choose any value; use text to create a custom value.
- Timestamp: The date and time of the export.
- Segment Id: The segment ID number.
- Segment Name: The segment name.
- Audience Id: The parent segment number.
- + Add string to create strings for export. Select from the following values:
- Set a Schedule.
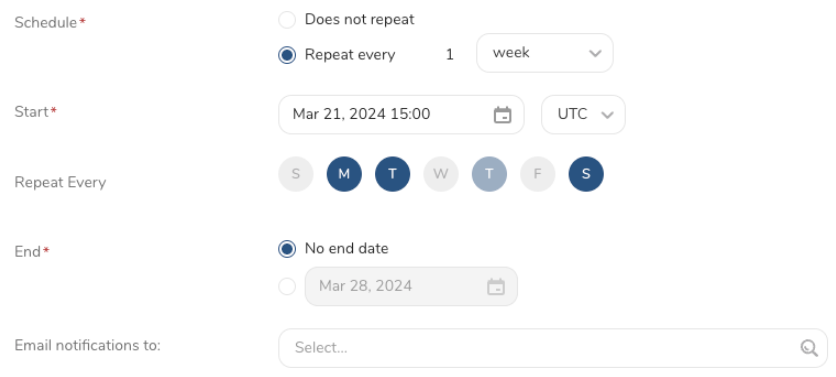
- Select the values to define your schedule and optionally include email notifications.
- Select Create.
If you need to create an activation for a batch journey, review Creating a Batch Journey Activation.
- Snapchatは、アップロードされたユーザーをデータベースと照合して処理するのに最大72時間かかります。プロセスが完了すると、オーディエンス番号が更新され、ステータスがReadyに設定されます。
- Audienceリストからユーザーを削除するリクエストを送信した後、Snapchatは一時的にアップロードされたユーザーを表示する場合があります。Snapchatが照合と削除のプロセスを完了するまで待つ必要があります。プロセスには最大72時間かかる場合があります。ステータスがReadyに設定されると、プロセスが完了します。
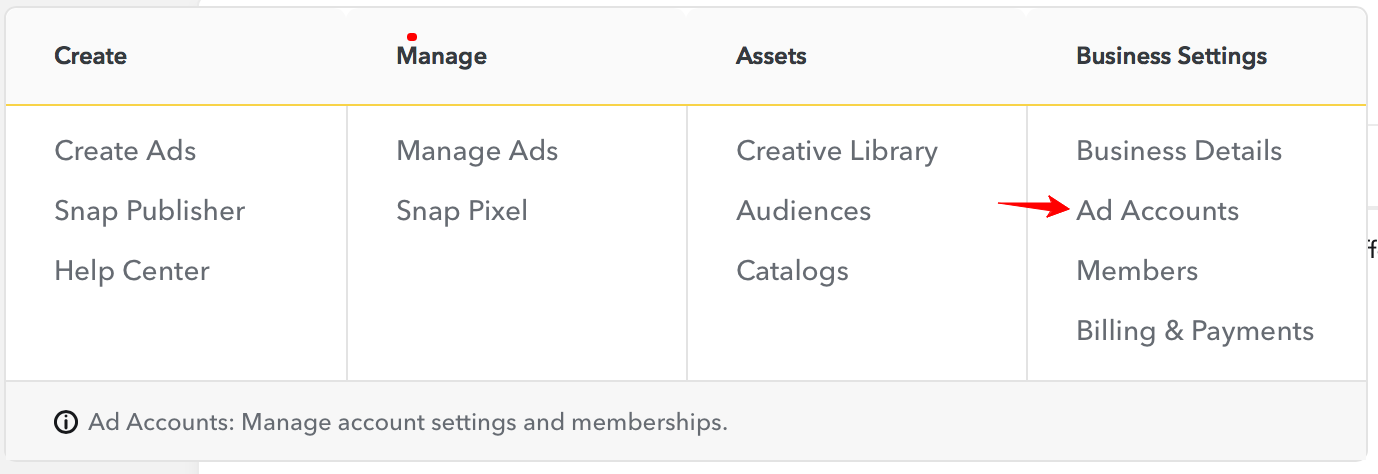
Ad Account IDを見つけるには、Businessアカウントにログインし、次の画像に示すようにAd Accountに移動します。そこから、Ad Account IDを確認できます。
セグメントを操作する場合、セグメント名またはセグメントIDのいずれかが必要です。ブラウザからセグメントIDを見つける方法は次のとおりです:
- Snapchat Ad Accountにログインします
- Audiencesセクションに移動します。
- 既存のセグメントを選択します
- セグメントIDは、次のようにブラウザのアドレスバーにあります:
