Magentoは、顧客向けにカスタマイズされたショッピング体験を作成するのに役立ちます。MagentoはPHPで書かれたオープンソースのeコマースプラットフォームです。
Treasure Dataからクエリジョブの結果を直接Magento(v2)に書き込むことができます。
- Treasure Dataの基本知識
- Magento 2の基本知識(Treasure Dataはv. 2.4.6をサポート)
- Bulk API Magento 2の基本知識
- JSON形式のクエリとPOST API形式の理解
このインテグレーションは、次の仕様を持つAPIをサポートします。
- POST API
- Bulk API 例えば、非同期読み込みをサポート - https://devdocs.magento.com/guides/v2.4/rest/bulk-endpoints.html
- オブジェクトの配列を使用します。 例:
[{"column1":"v1_1", "column2":"v2_1"},{"column1":"v1_2", "column2":"v2_2"},...]デフォルトでは、管理者トークンは4時間有効です。ジョブの実行に長時間かかる場合は、管理者ページからこれらの値を変更できます。
セルフホスト型のMagentoインスタンスでは、次の環境例でパフォーマンスベンチマークが実行されました。
- EC2インスタンス: T2.medium
- RAM: 4GB
- ストレージ: 50 GB EBSおよびインストールされたコンポーネント
- https://github.com/clean-docker/Magento2/blob/master/docker-compose.yml + rabbitMQ
デフォルト設定を使用した場合、次のパフォーマンスベンチマーク結果が得られました。
- 1000レコード、2カラム、26 KB → 1分
- 1500レコード、2カラム、43 KB → 1分
- 10000レコード、2カラム、279 KB → 12分
- 1000000レコード、2カラム、29.3 MB → 12時間16分
POST APIリクエストのJSONフィールドは、TDクエリ結果でJSONまたはStringとして指定する必要があります。
POST APIエンドポイントのMagentoリファレンスドキュメント:
以下は、異なるエンドポイントのクエリの例です。
POST APIエンドポイント: /async/bulk/V1/products
SELECT
'{
	"id": 45638,
	"sku": "39887-speaker-XL",
	"name": "39887-speaker-XL",
	"attribute_set_id": 9,
	"price": 450,
	"status": 1,
	"visibility": 1,
	"type_id": "virtual",
	"created_at": "2016-04-05 23:04:09",
	"updated_at": "2016-04-05 23:04:09",
	"product_links": [],
	"options": [],
	"tier_prices": [],
	"custom_attributes": [{
			"attribute_code": "description",
			"value": "pPrecise Long-Sleeve Shirt in Black, Denim, or White.</p>"
		},
		{
			"attribute_code": "meta_title",
			"value": "Precise Long-Sleeve Shirt"
		},
		{
			"attribute_code": "meta_keyword",
			"value": "Precise Long-Sleeve Shirt"
		},
		{
			"attribute_code": "meta_description",
			"value": "Precise Long-Sleeve Shirt pPrecise Long-Sleeve Shirt in Black, Denim, or White.</p>"
		},
		{
			"attribute_code": "color",
			"value": "11"
		},
		{
			"attribute_code": "options_container",
			"value": "container2"
		},
	},
	{
		"attribute_code": "required_options",
		"value": "0"
	},
	{
		"attribute_code": "has_options",
		"value": "0"
	},
	{
		"attribute_code": "url_key",
		"value": "10090-white-xl"
	},
	{
		"attribute_code": "msrp_display_actual_price_type",
		"value": "0"
	},
	{
		"attribute_code": "tax_class_id",
		"value": "2"
	},
	{
		"attribute_code": "size",
		"value": "8"
	}
]
}' AS product,
TRUE AS saveOptions
POST API Endpoint: /async/bulk/V1/customers
SELECT '{
  "email":"dummyuser@example.com",
  "firstname":"test",
  "lastname":"user",
  "addresses":[
     {
        "region":{
           "region_code":"MI",
           "region":"Michigan",
           "region_id":33
        },
        "region_id":33,
        "country_id":"US",
        "street":[
           "6146 Honey Bluff Parkway"
        ],
        "telephone":"(555) 229-3326",
        "postcode":"49628-7978",
        "city":"Calder",
        "firstname":"Veronica",
        "lastname":"Costello",
        "default_shipping":true,
        "default_billing":true
     }
  ]
}' as customer,
'dummy!@@#A_pass' as password;
Treasure Dataから、以下のクエリを実行し、結果をMagento用のコネクションにエクスポートします:
SELECT
  '{"email":"demo@example.com","firstname":"demo Shaw","lastname":"Doe","addresses":[{"region":{"region_code":"MI","region":"Michigan","region_id":33},"region_id":33,"country_id":"US","street":["6146 Honey Bluff Parkway"],"telephone":"(555) 229-3326","postcode":"49628-7978","city":"Calder","firstname":"Veronica","lastname":"Costello","default_shipping":true,"default_billing":true}]}' AS customer,
  'Strong-Password' AS password
サンプルパラメータ設定:
データコネクションを設定する際、統合にアクセスするための認証情報を提供します。Treasure Dataでは、認証を設定してからソース情報を指定します。
TD Consoleを開く
Integrations Hub > Catalogに移動します。
Magentoを検索します。
Create Authenticationを選択します。
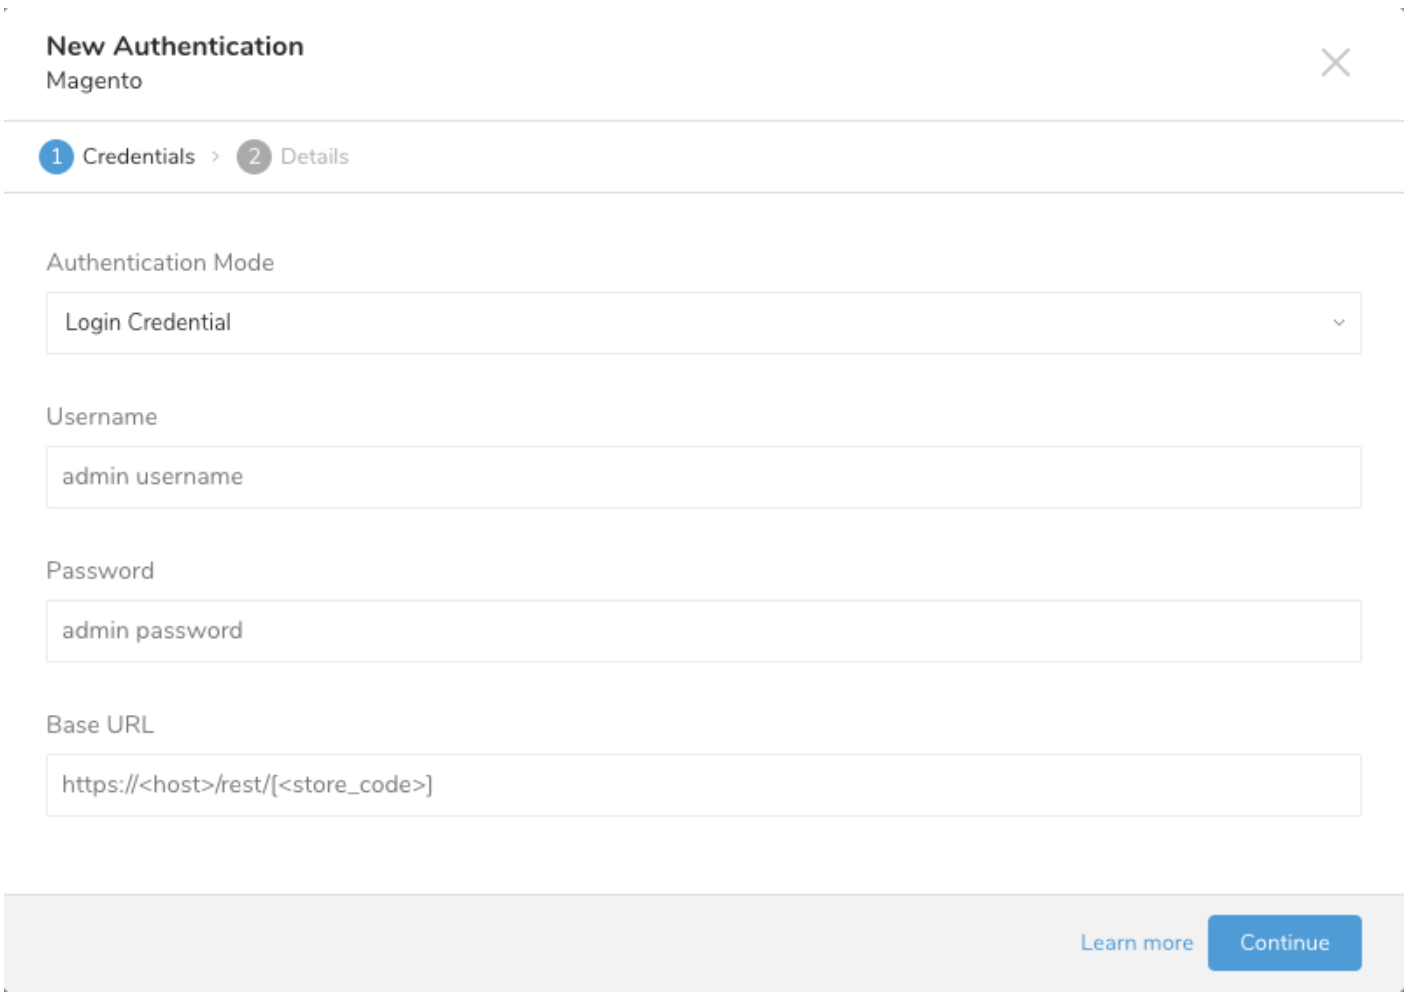
以下のダイアログが開きます。認証モードの1つを選択します。必要な認証情報を編集します。
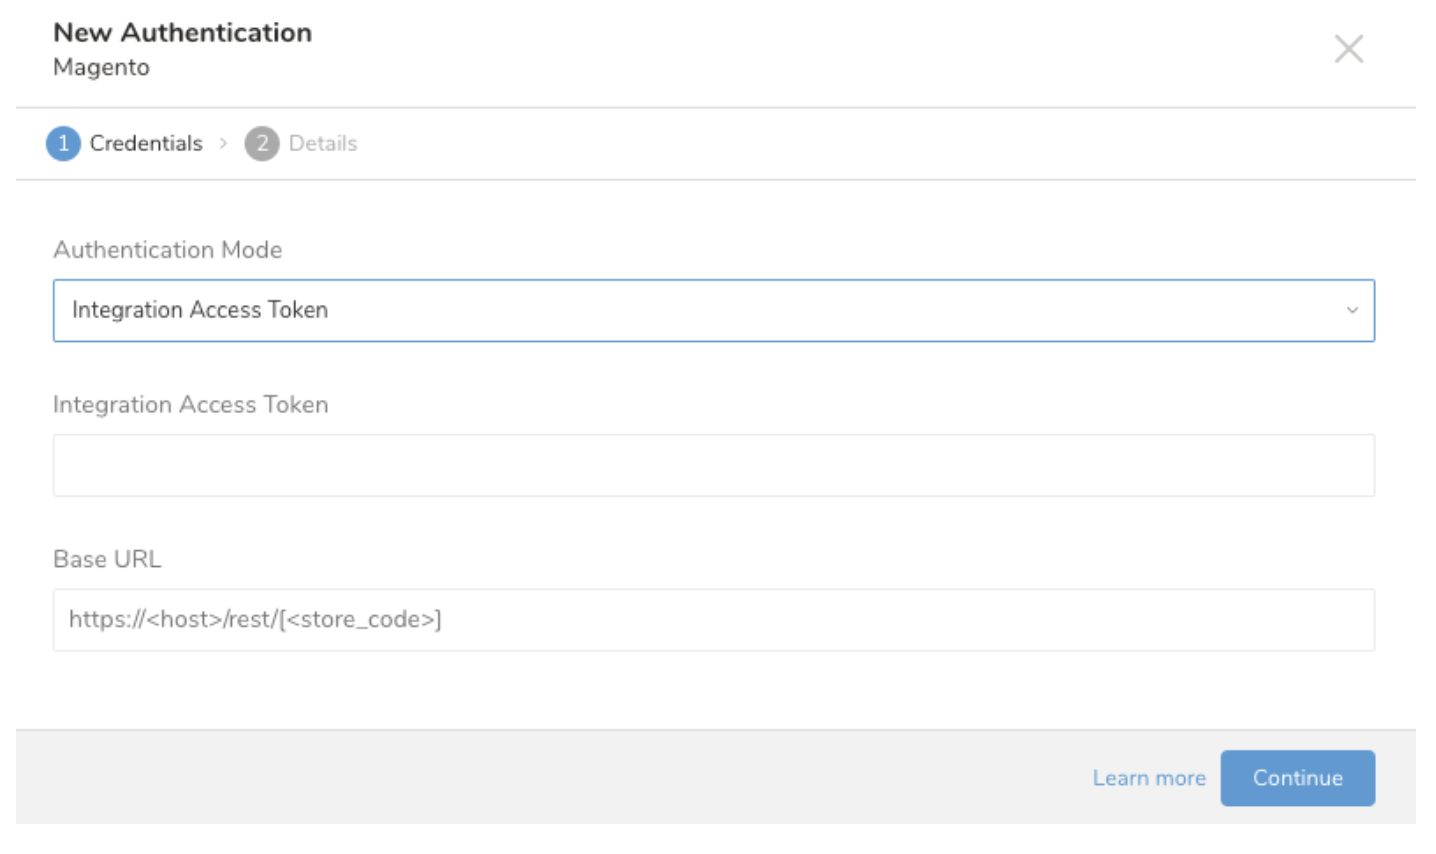
Continueを選択します。
- Login Credentialを選択し、管理者レベルのユーザー名とパスワードを入力します。
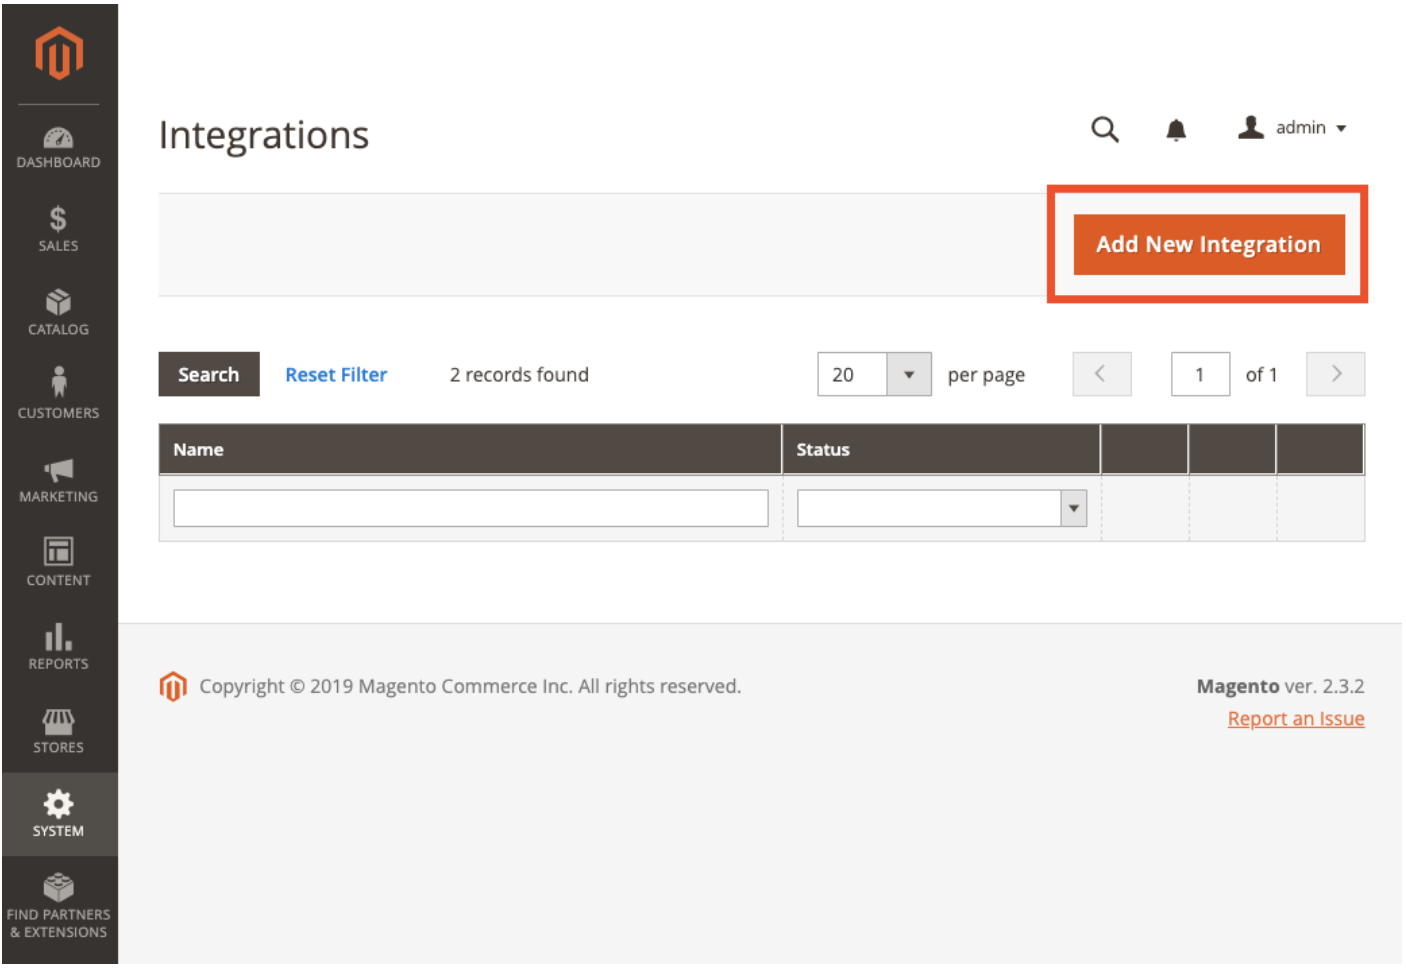
アクセストークンを取得するには、Magento管理画面で、System > Integrations > Add New Integrationに移動します(または既存のものを開きます)。
ターゲットリソースに適切な権限を選択します。
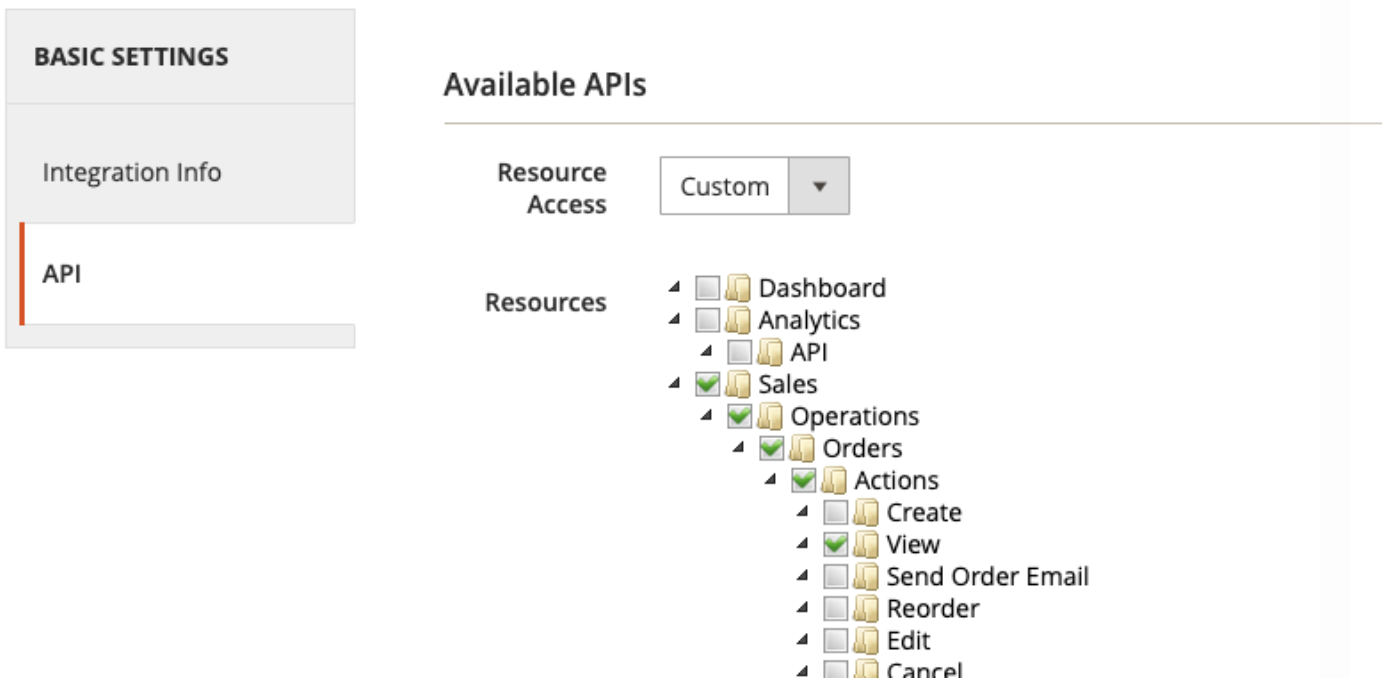
インテグレーションをアクティベートします。
Access Tokenをコピーします。
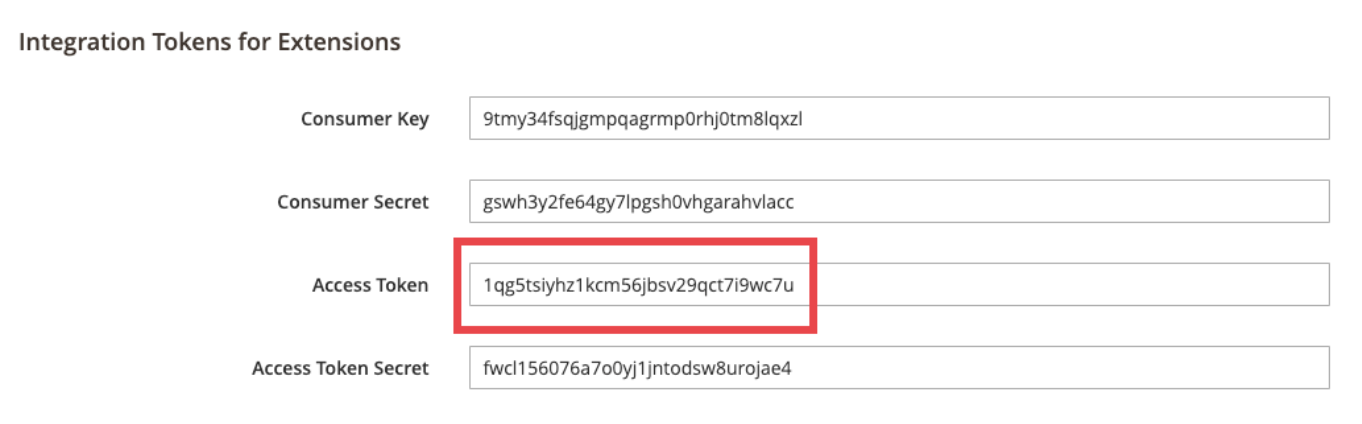
Treasure Dataで、アクセストークンの名前を貼り付けます。Base URLには、Magento 2 REST APIエンドポイントの値を設定します。例:
http://my-magento-server/rest/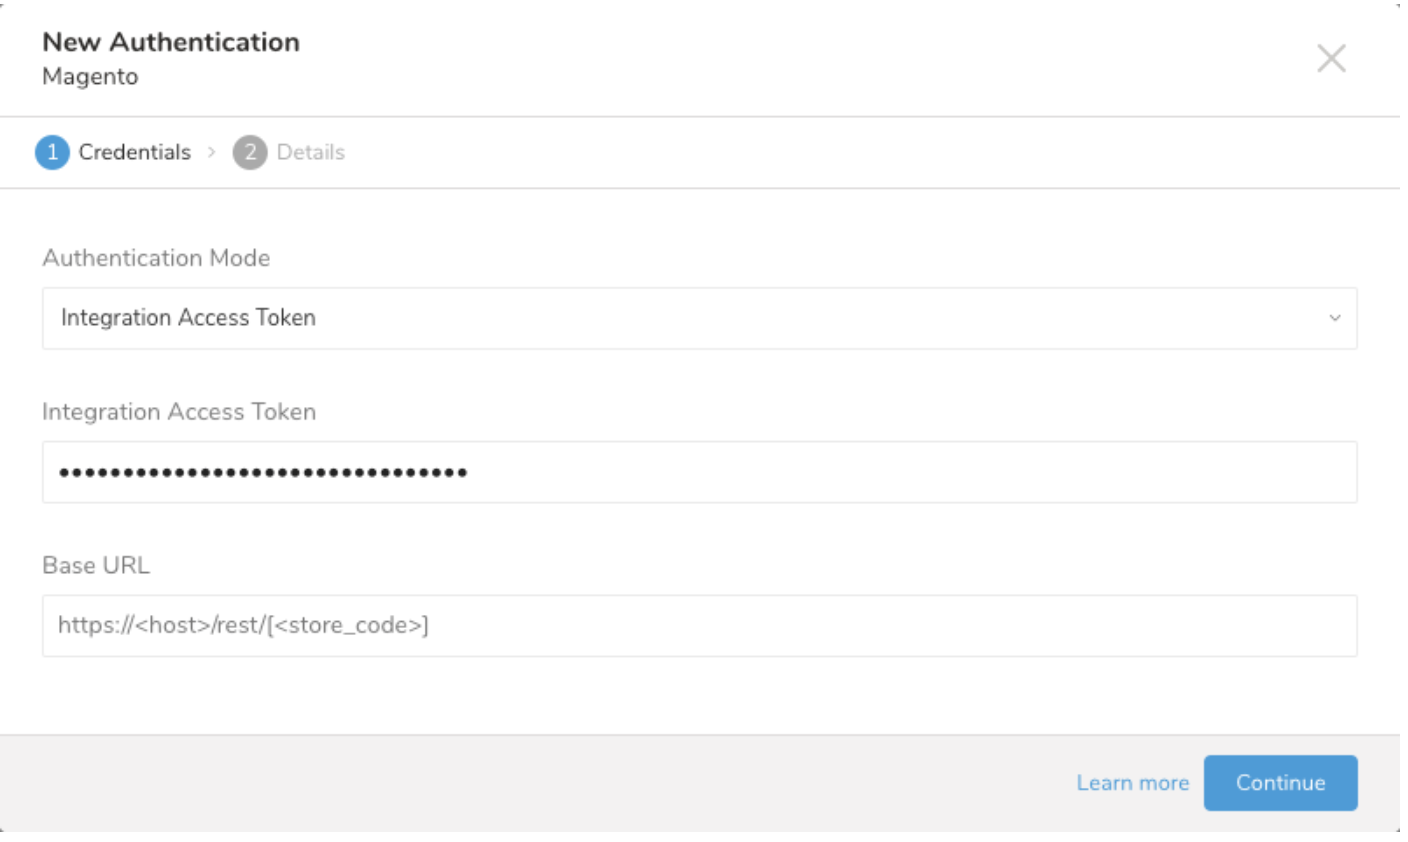
Continueを選択します。
Authenticationに名前を付けます。
Doneを選択します。
このステップでは、クエリを作成または再利用します。クエリで、データコネクションを設定します。
- TD Consoleを開きます。
- Data Workbench > Queriesに移動します。
- データのエクスポートに使用する予定のクエリを選択します。 例:
SELECT
   '{"email":"demo@example.com","firstname":"demo Shaw","lastname":"Doe","addresses":[{"region":{"region_code":"MI","region":"Michigan","region_id":33},"region_id":33,"country_id":"US","street":["6146 Honey Bluff Parkway"],"telephone":"(555) 229-3326","postcode":"49628-7978","city":"Calder","firstname":"Veronica","lastname":"Costello","default_shipping":true,"default_billing":true}]}' as customer,
'Strong-Password' as password;クエリエディタの上部にあるExport Resultsを選択します。 Choose Integrationダイアログが開きます。
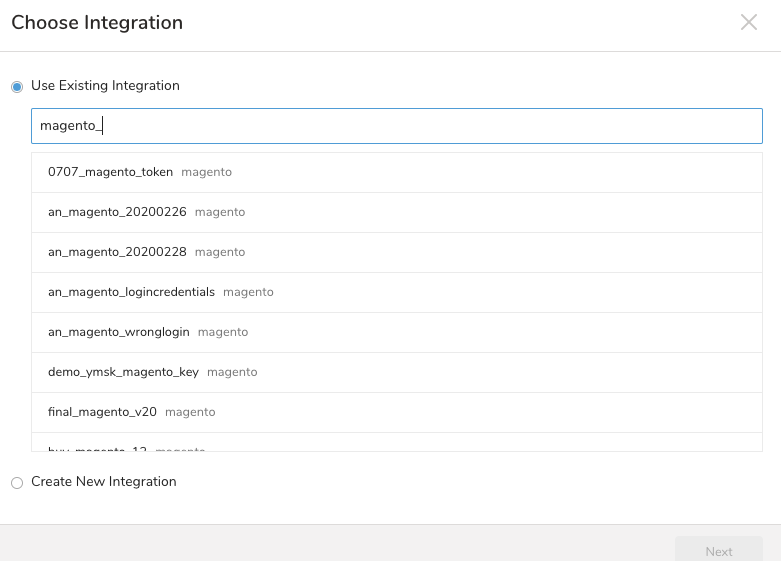
以下のいずれかを選択します:
- 既存のコネクションを使用する
- Use Existing Integrationを選択します。
- 検索ボックスにコネクション名を入力してフィルタリングします。
- コネクションを選択します。
- 新しいインテグレーションを作成する
- Create New Integrationを選択します。
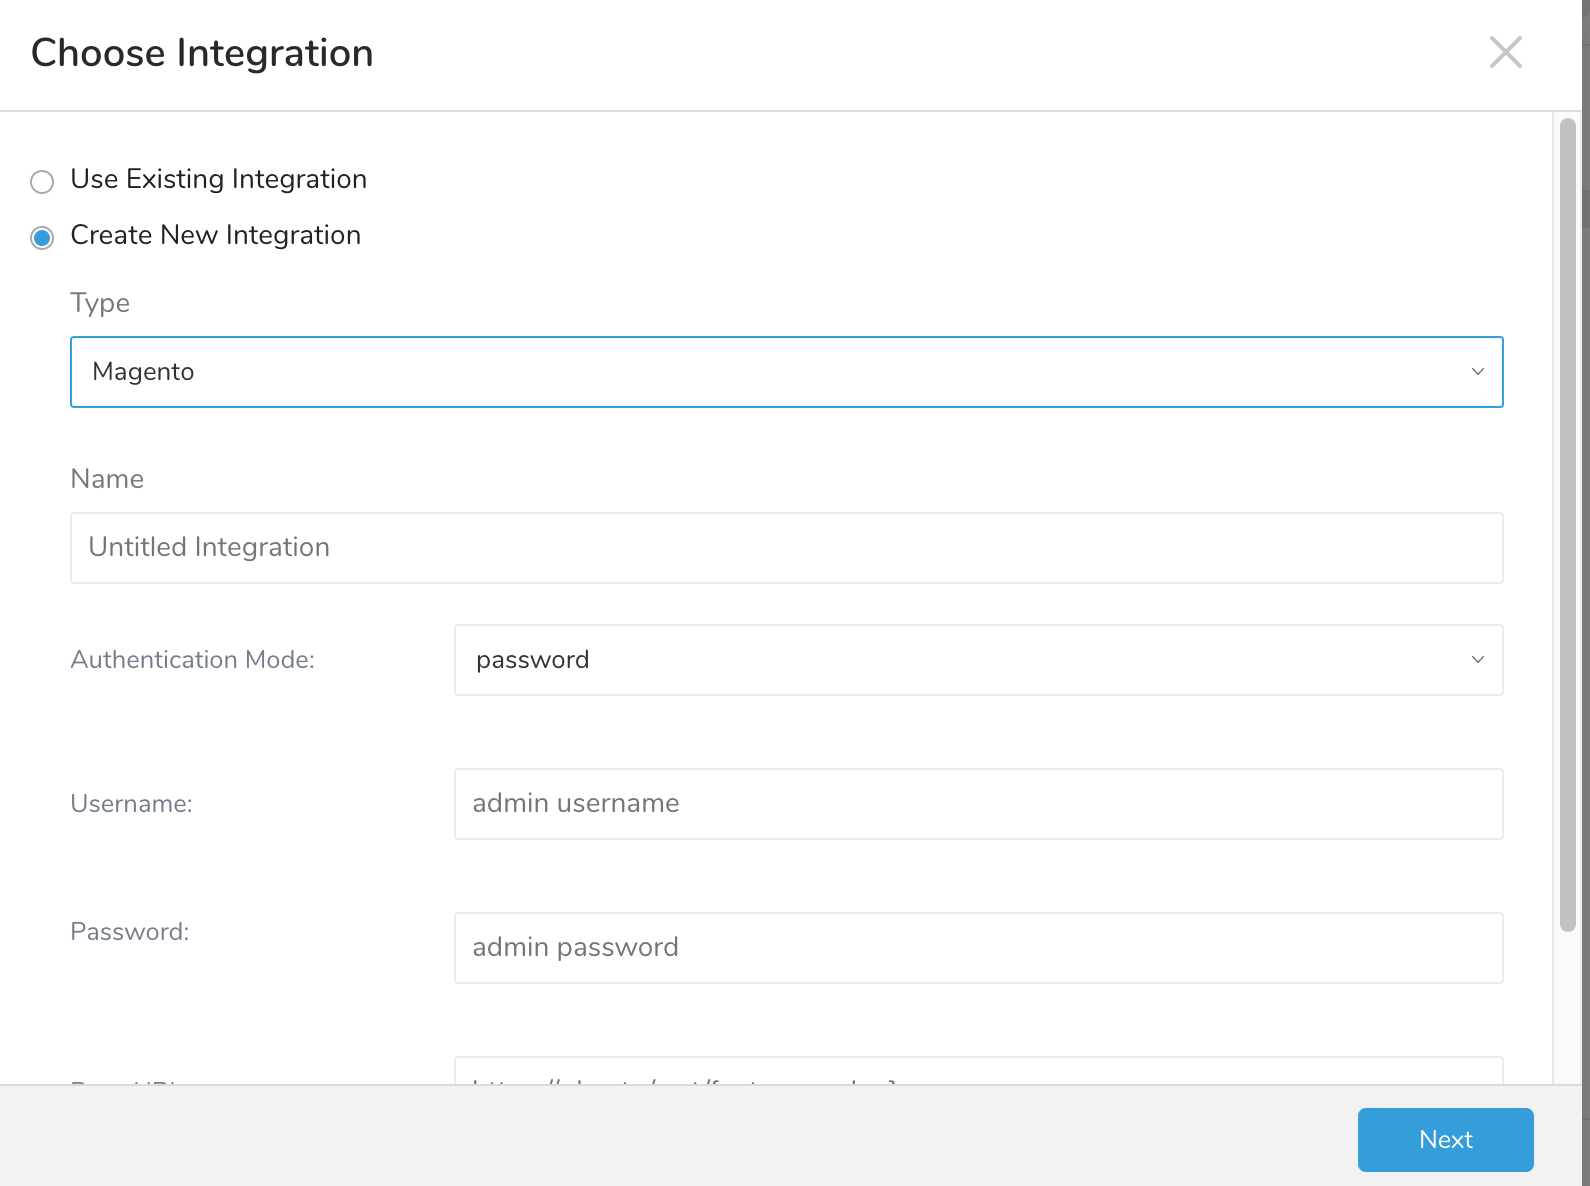 2. TD Consoleを使用して接続するのステップ5-7に従います。 3. インテグレーションアクセストークンを使用して認証するのすべてのステップに従います。
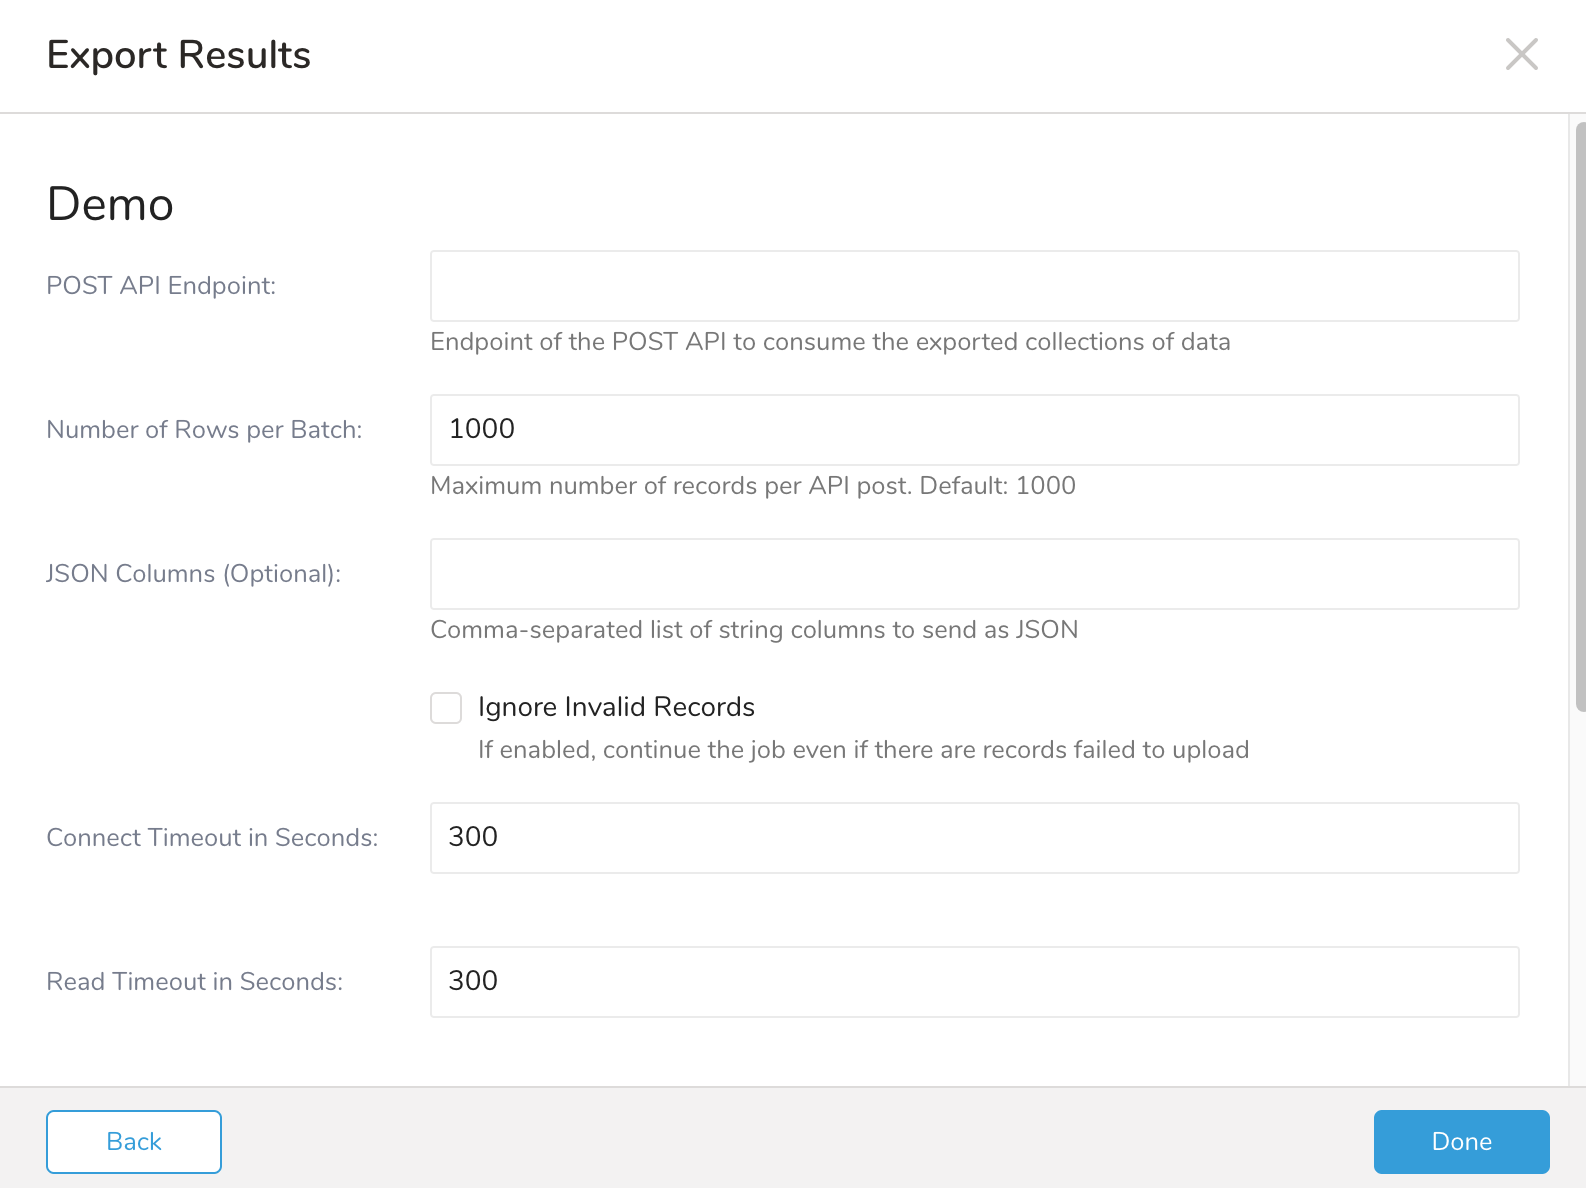
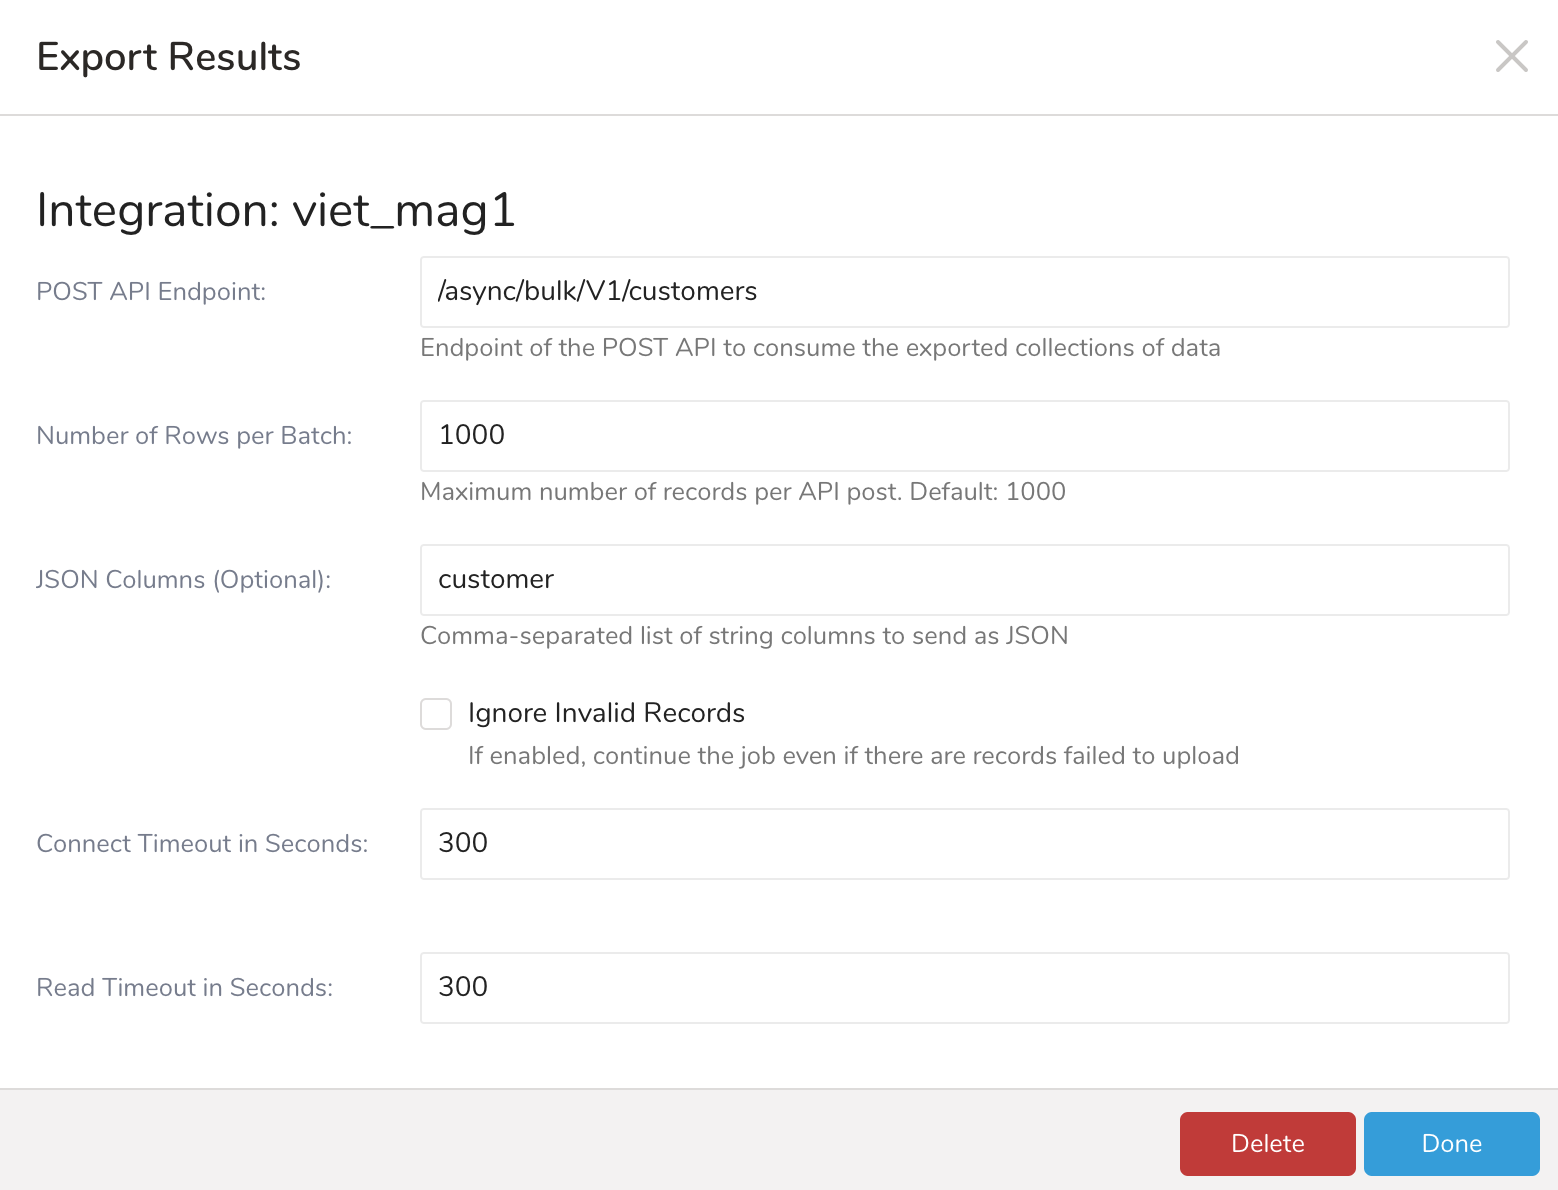
- エクスポートのパラメータを定義します:
| フィールド | 必須/任意 | 説明 |
|---|---|---|
| Post API Endpoint | 必須 | エクスポートされたデータのコレクションを消費するbulk POST APIのエンドポイント |
| Number of Rows per Batch | 任意 | API投稿あたりの最大レコード数。デフォルト: 1000 |
| JSON Columns | 任意 | JSONとして送信する文字列カラムのカンマ区切りリスト |
| Ignore Invalid Records | 任意 | 有効にすると、無効なJSON形式のためにアップロードに失敗したレコードがある場合でもジョブを続行します |
| Connect Timeout in Seconds | 任意 | 接続操作を中止するまでの待機時間(秒)。デフォルト: 300(5分に相当)。最大: 1800 |
| Read Timeout in Seconds | 任意 | 読み取り操作を中止するまでの待機時間(秒)。デフォルト: 300(5分に相当)。最大: 1800 |
| Write Timeout in Seconds | 任意 | 書き込み操作を中止するまでの待機時間(秒)。デフォルト: 300(5分に相当)。最大: 1800 |
| Retry Limit | 任意 | システムが諦めるまでの再試行回数。デフォルト: 7。最大: 10 |
| Initial retry time wait in milliseconds | 任意 | 1回目と2回目の試行の間の時間(ミリ秒)。デフォルト: 500(0.5秒に相当)。最大: 900000 |
| Max retry wait in milliseconds | 任意 | 2回目以降のすべての試行の間の時間(ミリ秒)。デフォルト: 300000(5分に相当)。最大: 900000 |
Scheduled Jobs と Result Export を使用して、指定したターゲット宛先に出力結果を定期的に書き込むことができます。
Treasure Data のスケジューラー機能は、高可用性を実現するために定期的なクエリ実行をサポートしています。
2 つの仕様が競合するスケジュール仕様を提供する場合、より頻繁に実行するよう要求する仕様が優先され、もう一方のスケジュール仕様は無視されます。
例えば、cron スケジュールが '0 0 1 * 1' の場合、「月の日」の仕様と「週の曜日」が矛盾します。前者の仕様は毎月 1 日の午前 0 時 (00:00) に実行することを要求し、後者の仕様は毎週月曜日の午前 0 時 (00:00) に実行することを要求するためです。後者の仕様が優先されます。
Data Workbench > Queries に移動します
新しいクエリを作成するか、既存のクエリを選択します。
Schedule の横にある None を選択します。

ドロップダウンで、次のスケジュールオプションのいずれかを選択します:
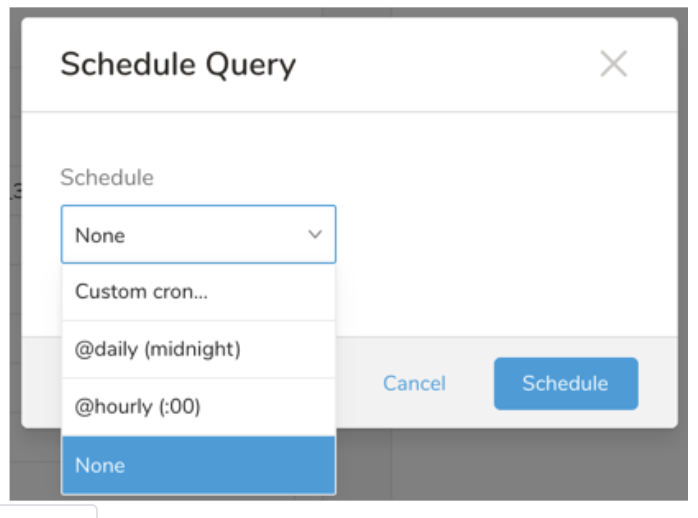
ドロップダウン値 説明 Custom cron... Custom cron... の詳細を参照してください。 @daily (midnight) 指定されたタイムゾーンで 1 日 1 回午前 0 時 (00:00 am) に実行します。 @hourly (:00) 毎時 00 分に実行します。 None スケジュールなし。
| Cron 値 | 説明 |
|---|---|
0 * * * * | 1 時間に 1 回実行します。 |
0 0 * * * | 1 日 1 回午前 0 時に実行します。 |
0 0 1 * * | 毎月 1 日の午前 0 時に 1 回実行します。 |
| "" | スケジュールされた実行時刻のないジョブを作成します。 |
 *    *    *    *    *
 -    -    -    -    -
 |    |    |    |    |
 |    |    |    |    +----- day of week (0 - 6) (Sunday=0)
 |    |    |    +---------- month (1 - 12)
 |    |    +--------------- day of month (1 - 31)
 |    +-------------------- hour (0 - 23)
 +------------------------- min (0 - 59)
次の名前付きエントリを使用できます:
- Day of Week: sun, mon, tue, wed, thu, fri, sat.
- Month: jan, feb, mar, apr, may, jun, jul, aug, sep, oct, nov, dec.
各フィールド間には単一のスペースが必要です。各フィールドの値は、次のもので構成できます:
| フィールド値 | 例 | 例の説明 |
|---|---|---|
| 各フィールドに対して上記で表示された制限内の単一の値。 | ||
フィールドに基づく制限がないことを示すワイルドカード '*'。 | '0 0 1 * *' | 毎月 1 日の午前 0 時 (00:00) に実行するようにスケジュールを設定します。 |
範囲 '2-5' フィールドの許可される値の範囲を示します。 | '0 0 1-10 * *' | 毎月 1 日から 10 日までの午前 0 時 (00:00) に実行するようにスケジュールを設定します。 |
カンマ区切りの値のリスト '2,3,4,5' フィールドの許可される値のリストを示します。 | 0 0 1,11,21 * *' | 毎月 1 日、11 日、21 日の午前 0 時 (00:00) に実行するようにスケジュールを設定します。 |
周期性インジケータ '*/5' フィールドの有効な値の範囲に基づいて、 スケジュールが実行を許可される頻度を表現します。 | '30 */2 1 * *' | 毎月 1 日、00:30 から 2 時間ごとに実行するようにスケジュールを設定します。 '0 0 */5 * *' は、毎月 5 日から 5 日ごとに午前 0 時 (00:00) に実行するようにスケジュールを設定します。 |
'*' ワイルドカードを除く上記の いずれかのカンマ区切りリストもサポートされています '2,*/5,8-10' | '0 0 5,*/10,25 * *' | 毎月 5 日、10 日、20 日、25 日の午前 0 時 (00:00) に実行するようにスケジュールを設定します。 |
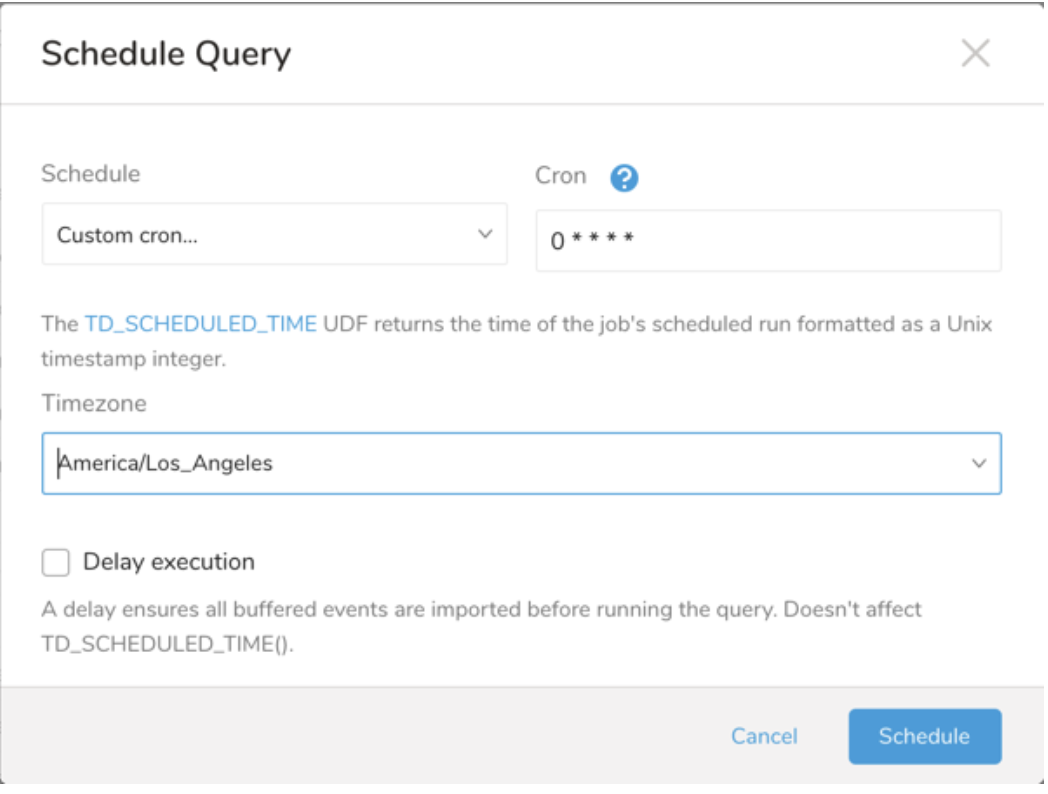
- (オプション) Delay execution を有効にすることで、クエリの開始時刻を遅延させることができます。
クエリに名前を付けて保存して実行するか、単にクエリを実行します。クエリが正常に完了すると、クエリ結果は指定された宛先に自動的にエクスポートされます。
設定エラーにより継続的に失敗するスケジュールジョブは、複数回通知された後、システム側で無効化される場合があります。
(オプション) Delay execution を有効にすることで、クエリの開始時刻を遅延させることができます。
Audience Studio で activation を作成することで、segment データをターゲットプラットフォームに送信することもできます。
- Audience Studio に移動します。
- parent segment を選択します。
- ターゲット segment を開き、右クリックして、Create Activation を選択します。
- Details パネルで、Activation 名を入力し、前述の Configuration Parameters のセクションに従って activation を設定します。
- Output Mapping パネルで activation 出力をカスタマイズします。
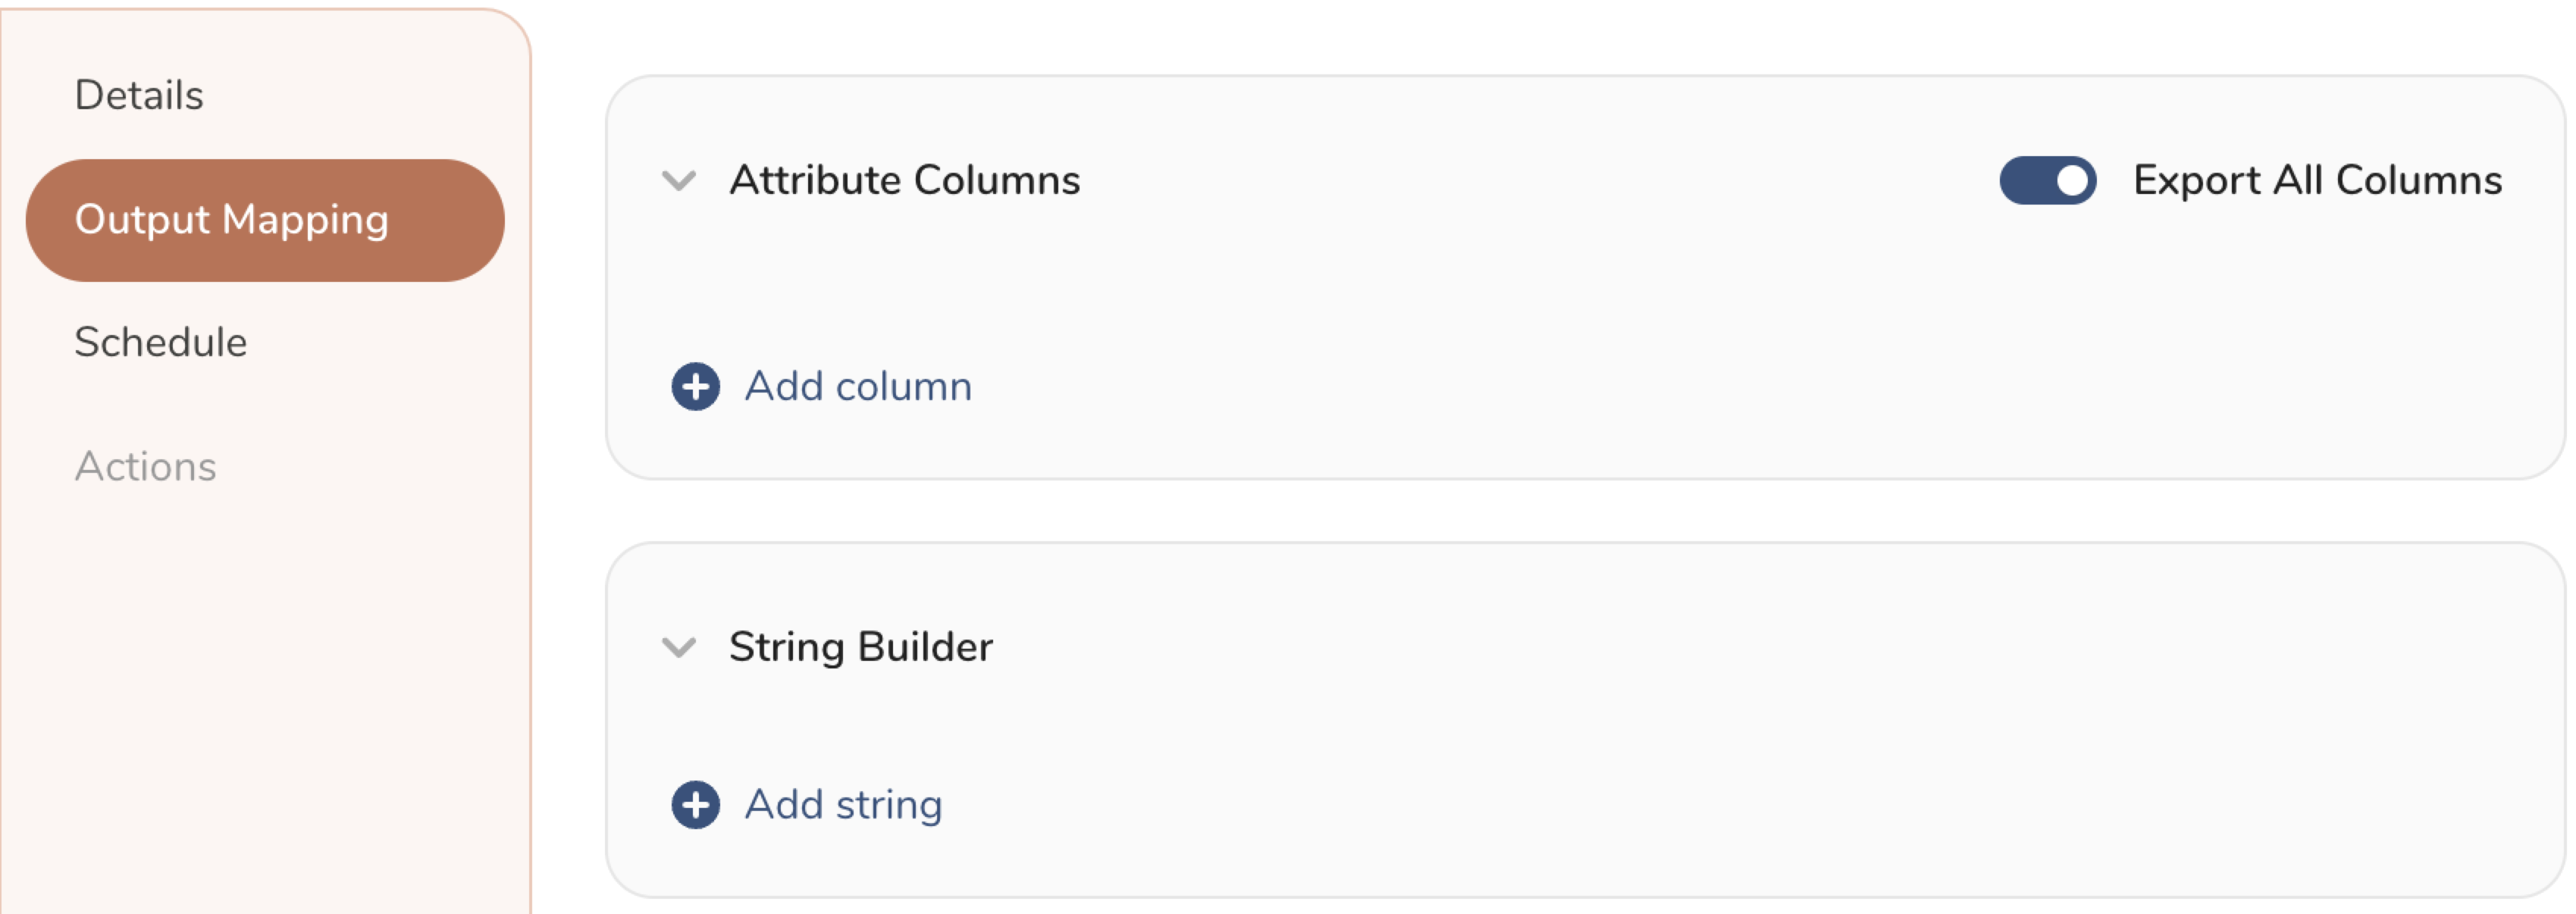
- Attribute Columns
- Export All Columns を選択すると、変更を加えずにすべての列をエクスポートできます。
- + Add Columns を選択して、エクスポート用の特定の列を追加します。Output Column Name には、Source 列名と同じ名前があらかじめ入力されます。Output Column Name を更新できます。+ Add Columns を選択し続けて、activation 出力用の新しい列を追加します。
- String Builder
- + Add string を選択して、エクスポート用の文字列を作成します。次の値から選択します:
- String: 任意の値を選択します。テキストを使用してカスタム値を作成します。
- Timestamp: エクスポートの日時。
- Segment Id: segment ID 番号。
- Segment Name: segment 名。
- Audience Id: parent segment 番号。
- + Add string を選択して、エクスポート用の文字列を作成します。次の値から選択します:
- Schedule を設定します。
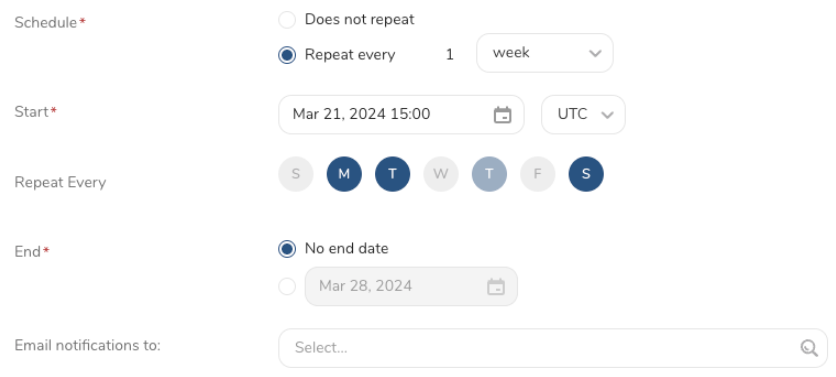
- スケジュールを定義する値を選択し、オプションでメール通知を含めます。
- Create を選択します。
batch journey の activation を作成する必要がある場合は、Creating a Batch Journey Activation を参照してください。
Treasure Workflow内で、このデータコネクタを使用してデータをエクスポートするように指定できます。
timezone: UTC

_export:
  td:
    database: sample_datasets

+td-result-into-target:
  td>: queries/sample.sql
  result_connection: your_connections_name
  result_settings:
    base_url: http://base_url.com/rest
    api_endpoint: /all/async/bulk/V1/customers
    username: admin
    password: **xyz***
    #auth_method: token
    #token: **xyz***
    json_columns: customer
    ignore_invalid_records: true
    retry_count: 7
    retry_initial_wait_millis: 500
    max_retry_wait_millis: 300000
    request_connect_timeout: 300
    request_read_timeout: 300
    request_write_timeout: 300