Use Treasure Data’s data.ai connector to import data.ai (formerly AppAnnie) data source objects into Treasure Data.
- Basic knowledge of Treasure Data
- Basic knowledge of data.ai (formerly AppAnnie)
There are 2 different rate limits in data.ai:
- call per minute
- call per user per day rate limits
The call-per-minute limit auto-refreshes after a certain amount of seconds, while the daily call limit is refreshed on a daily basis at 00:00 PST.
If you have multiple transfers under the same data.ai account, you can control the rate limit usage of each data.ai transfer via both calls_per_minute_limit and calls_per_day_limit settings as long as the total limits are lower than or equal to your account quota. For example, assume that your account has quotas as 100 calls/minute and 10000 calls/day, if you create 2 transfers, for example, product sales & product usage data, you can use 50 cpm & 5000 cpd for product sales transfer and the rest (50 cpm & 5000 cpd) for product usage transfer.
- Create a New Connection
In Treasure Data, you must create and configure the data connection prior to running your query. As part of the data connection, you provide authentication to access the integration.
- Open TD Console.
- Navigate to Integrations Hub > Catalog.
- Click the search icon on the far right of the Catalog screen, and enter data.ai.
- Hover over the data.ai connector and select Create Authentication.
The following dialog opens. 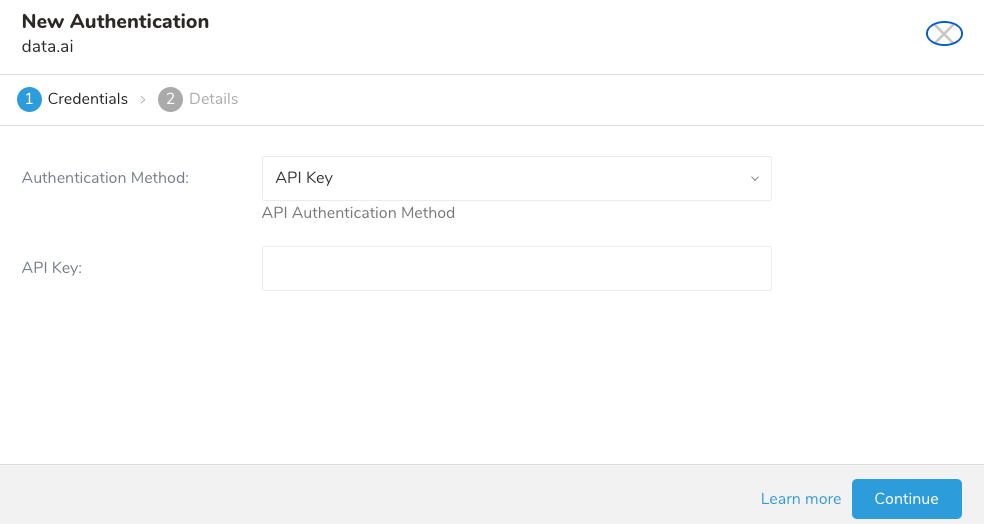
The method you use to authenticate Treasure Data with data.ai affects the steps you take to enable the data connector to import from data.ai.
Treasure Data supports:
- API Key
- OAuth
Provide your data.ai API key information and select Continue.
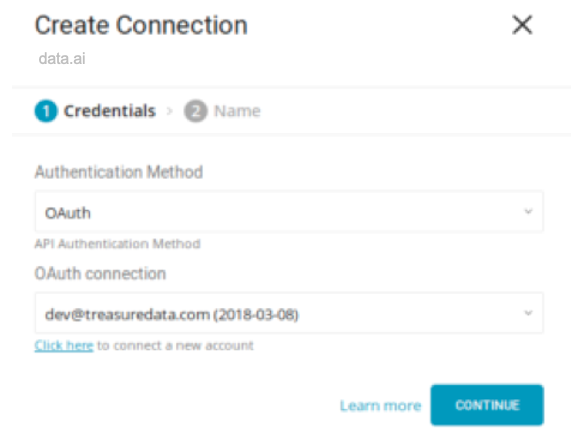
OAuth is only available in the US region.
- Select “OAuth” from the “Authentication Method” dropdown to connect your data.ai account using OAuth 2.
- When you select the OAuth authentication method, select Click hereto connect a new account. Log into your data.ai account from the new window:
- And grant access to the Data Connector and Treasure Data app:
- You will be redirected back to the Catalog. Repeat the Create a new connection step and choose your new OAuth connection.
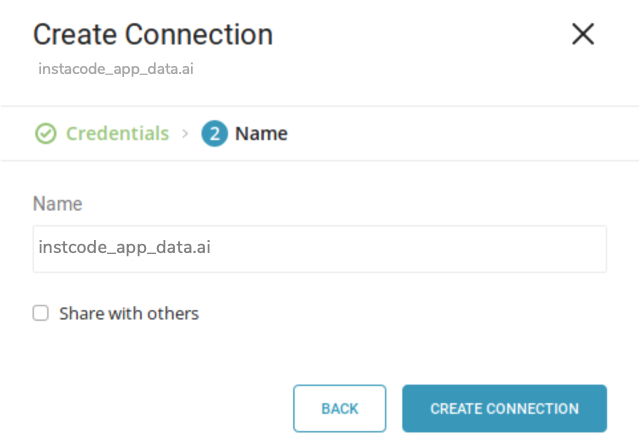
When you complete the connection form, select Continue and give your connection a name:
After creating the connection, you are automatically taken to the Authentications tab. Look for the connection you created and select New Transfer.
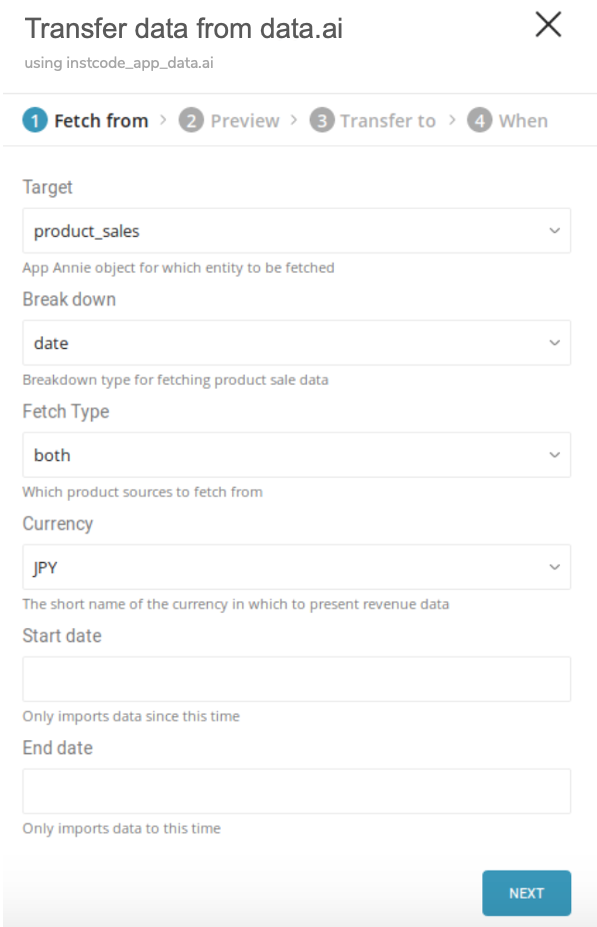
The following dialog opens. Complete the details and select Next.
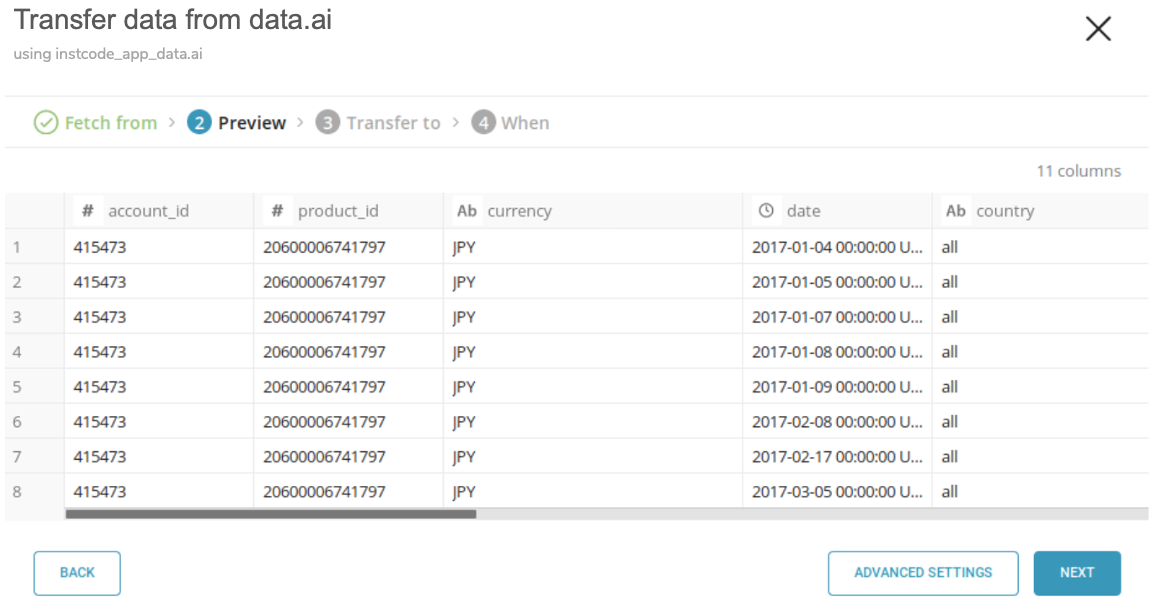
Next, you see a Preview of your data similar to the following dialog. If you want to change any settings, select Advanced Settings otherwise, select Next.
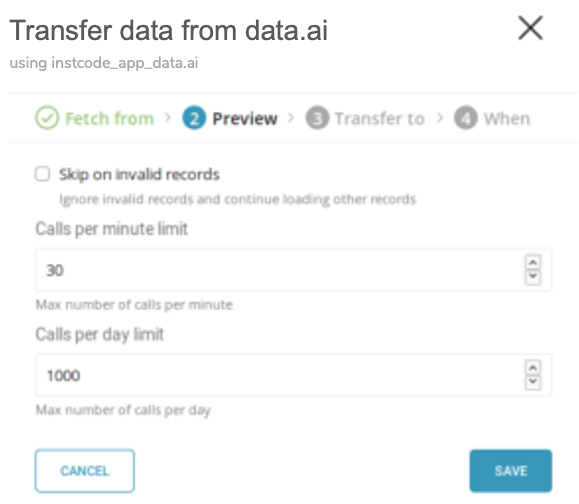
If you want to change some options, such as skipping on errors or rate limits, you do so in Advanced Settings:
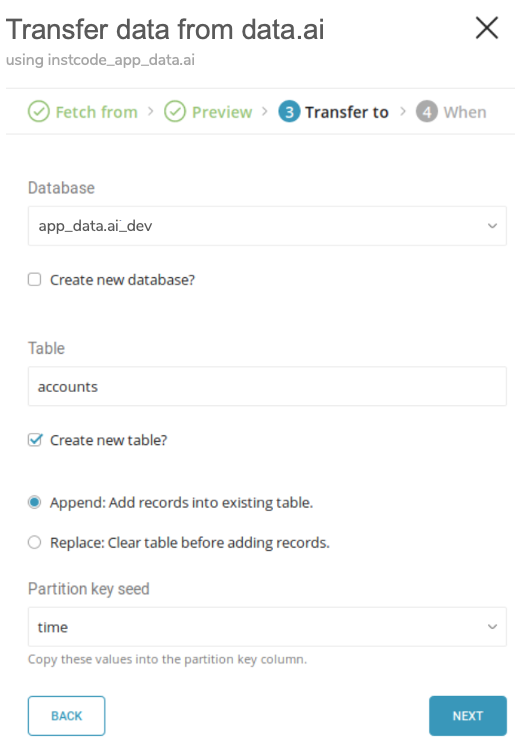
Select the database and table where you want to transfer the data, as shown in the following dialog:
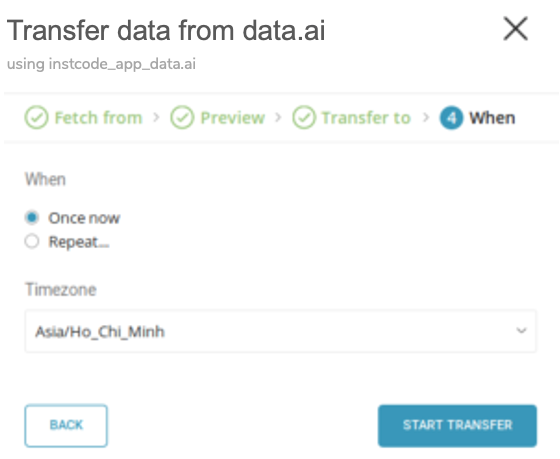
Specify the schedule of the data transfer using the following dialog and select Start Transfer:
You see the new data transfer in progress listed under the My Input Transfers tab and a corresponding job is listed in the Jobs section.
You can install the newest TD Toolbelt.
$ td --version
0.15.0Prepare a configuration file (for eg: load.yml) with your data.ai account access information, as follows:
in:
  type: app_data.ai
  apikey: xxxxxxxx
  target: product_sales (required, see Appendix B)
  breakdown_sales: date+country+iap (optional, see Appendix C)
  fetch_type: shared_products (optional, default: `both`, see Appendix D)
  start_date: 2017-01-01 (optional but required here as breakdown contains `iap`)
  end_date: 2017-02-01 (optional, default: current date)
  currency: USD (optional, default: USD, see Appendix E)
  skip_on_invalid_records: true (optional, default: false)
  calls_per_minute_limit: 15 (optional, 30 by default, see Appendix F)
  calls_per_day_limit: 800 (optional, 1000 by default, see Appendix F)
out:
  mode: replace
This example dumps data.ai Account Data Source:
apikey: data.ai apiKey.
target: data.ai entity object to be imported.
- See Appendix: Appendix: Available Targets for the list of available targets.
breakdown: Breakdown type for which product sale or usage data is fetched.
- This field name is changed according to which target is selected, either breakdown_sales or breakdown_usage.
- See Appendix: Available Breakdowns for usage and the list of available breakdowns.
fetch_type: The source of products to pull (any products from connected accounts or via sharing or both) to be imported.
- See Appendix: Available Fetch Types for usage and the list of available fetch_type.
start_date: From which date (yyyy-MM-dd) product data is to be imported. This field is required if either fetching product usage (target is product_usage) or product sale (target is product_sales) with an in-app-purchase breakdown (breakdown has iap).
end_date: Until what date (yyyy-MM-dd) product data is to be imported? This field is optional and is automatically adjusted to a maximum of 60 days since start_date based on the current date.
currency: The monetary currency in which the data is presented.
- See Appendix: Available Currencies for the list of available currencies.
skip_on_invalid_records: Ignore errors (such as invalid JSON, unsupported data) and continue fetching record. (false by default)
calls_per_minute_limit / calls_per_day_limit: Limit number of API calls per minute / per day
- See Appendix: Rate Limits for how to use these options
For more details on available out modes, see the Appendix: Modes for out Plugin
| Target | Description |
|---|---|
| account_connections | Connected accounts |
| connected_products | Products from connected accounts |
| shared_products | Shared products from external accounts |
| product_sales | Product sales data |
| product_usage | Product usage data |
| app_details | Application details |
This field is available for importing only product sales or product usages.
- If the target is product_sales, the breakdown field name is breakdown_sales
- If the target is product_usage, the breakdown field name is breakdown_usage
| Breakdown | Product Sales | Product Usage |
|---|---|---|
| country | x | x |
| country+iap | x | |
| country+device | x | |
| date | x | x |
| date+country | x | x |
| date+country+device | x | |
| date+country+iap | x | |
| date+device | x | |
| date+iap | x | |
| date+type+iap | x | |
| device | x | |
| iap | x |
This field is available for importing product sales, product usage and app details.
| Source | Description |
|---|---|
| connected_products | Import only data of products from connected accounts |
| shared_products | Import only data of products from sharing list |
| both | Import both product sources |
This field is available for importing only product sales. Contact data.ai support for more detail if needed.
| Currency Code | Symbol | Full Name of Currency |
|---|---|---|
| AUD | A$ | Australian Dollar |
| BGN | > лв | Bulgarian lev |
| BRL | R$ | Brazilian real |
| CAD | C$ | Canadian Dollar |
| CHF | CHF | Swiss Franc |
| CNY | ¥ | Chinese Yuan |
| CZK | Kč | Czech koruna |
| DKK | kr | Danish krone |
| EEK | kr | Estonian kroon |
| EUR | € | Euro |
| GBP | £ | Pound sterling |
| HKD | HK$ | Hong Kong dollar |
| HRK | kn | Croatian kuna |
| HUF | Ft | Hungarian forint |
| IDR | Rp | Indonesian rupiah |
| ILS | ₪ | Israeli new shekel |
| INR | ₹ | Indian rupee |
| JPY | ¥ | Japanese yen |
| KRW | ₩ | South Korean won |
| LTL | Lt | Lithuanian litas |
| LVL | Ls | Latvian lats |
| MXN | Mex$ | Mexican peso |
| MYR | RM | Malaysian ringgit |
| NOK | kr | Norwegian krone |
| NZD | $ | New Zealand dollar |
| PHP | ₱ | Philippine peso |
| PLN | zł | Polish złoty |
| RON | lei | Romanian new leu |
| RUB | p. | Russian rouble |
| SEK | kr | Swedish krona/kronor |
| SGD | S$ | Singapore dollar |
| THB | ฿ | Thai baht |
| TRY | TL | Turkish lira |
| TWD | NT$ | New Taiwan dollar |
| USD | $ | United States dollar |
| ZAR | R | South African rand |
You can preview data to be imported using the command td connector:preview.
$ td connector:preview load.yml
+-----------------+---------------------+-----------------+----
| account_id:long | account_name:string | vertical:string | ...
+-----------------+---------------------+-----------------+----
| 42023           | "Hello"             | apps            |
| 42045           | "World"             | apps            |
+-----------------+---------------------+-----------------+----Submit the load job. It may take a couple of hours depending on the data size. Users need to specify the database and table where their data are stored.
It is recommended to specify --time-column option, since Treasure Data’s storage is partitioned by time (see also Data Partitioning in Treasure Data) If the option is not given, the Data Connector will choose the first long or timestamp column as the partitioning time. The type of the column specified by --time-column must be either of long or timestamp type.
If your data doesn’t have a time column you can add it using the add_time filter option. More details at add_time Filter Plugin for Integrations.
$ td connector:issue load.yml --database td_sample_db --table td_sample_table --time-column updated_dateThe preceding command assumes that you have already created database(td_sample_db) and table(td_sample_table). If the database or the table do not exist in TD, this command will not succeed, so create the database and table manually or use --auto-create-table option with td connector:issue command to auto create the database and table:
$ td connector:issue load.yml --database td_sample_db --table td_sample_table --time-column updated_date --auto-create-tableYou can assign the Time Format column to the "Partitioning Key" by the "--time-column" option.
You can schedule periodic Data Connector execution for periodic data.ai import. We configure our scheduler carefully to ensure high availability. By using this feature, you no longer need a cron daemon on your local data center.
A new schedule can be created using the td connector:create command. The name of the schedule, cron-style schedule, the database and table where their data will be stored, and the Data Connector configuration file are required.
$ td connector:create \
    daily_dataai_import \
    "10 0 * * *" \
    td_sample_db \
    td_sample_table \
    load.yml
The cron parameter also accepts these three options: @hourly, @daily, and @monthly. |