You can import Tweets, Retweets, Follower IDs, Follower List, or User Timeline from Twitter into Treasure Data.
- Basic knowledge of Treasure Data, including the Toolbelt
- A Twitter developer application with the consumer key and consumer secret.
- Treasure Data configured in the Twitter dev environment. Refer to:
- Authorized Treasure Data account access
- Our Connector uses Twitter API v1.1 that requires Elevated access as Twitter API access level.
- https://developer.twitter.com/en/docs/twitter-api/getting-started/about-twitter-api
- If you were approved for a developer account before November 15th, 2021, you were automatically converted to Elevated access. This means that your existing Apps can continue to be used to make requests to standard v1.1, premium v1.1, and enterprise endpoints, and that all of your user Access Tokens are still valid.
In Twitter, you specify the apps used to import into Treasure Data.
The Twitter-to-Treasure Data authentication flow generally is as follows:
- Treasure Data makes a request to the POST oauth2 / token endpoint to exchange credentials for a bearer token.
- When accessing the REST API, Treasure Data uses the bearer token to authenticate.
Log into your Twitter account name. Go to Apps to retrieve your consumer key and consumer secret.

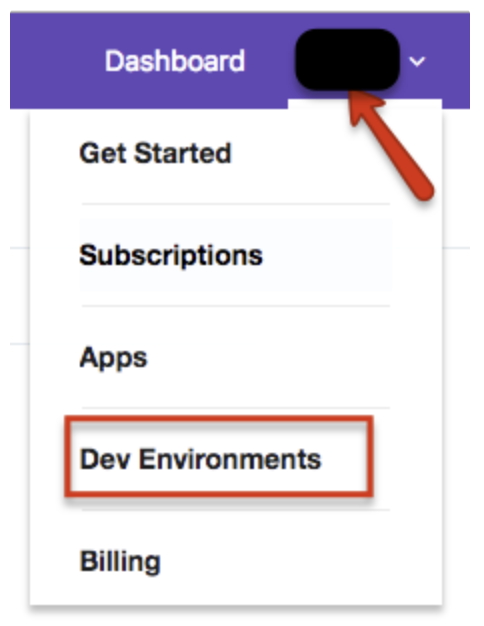
Go back to the dashboard. Select Account > Dev Environments.
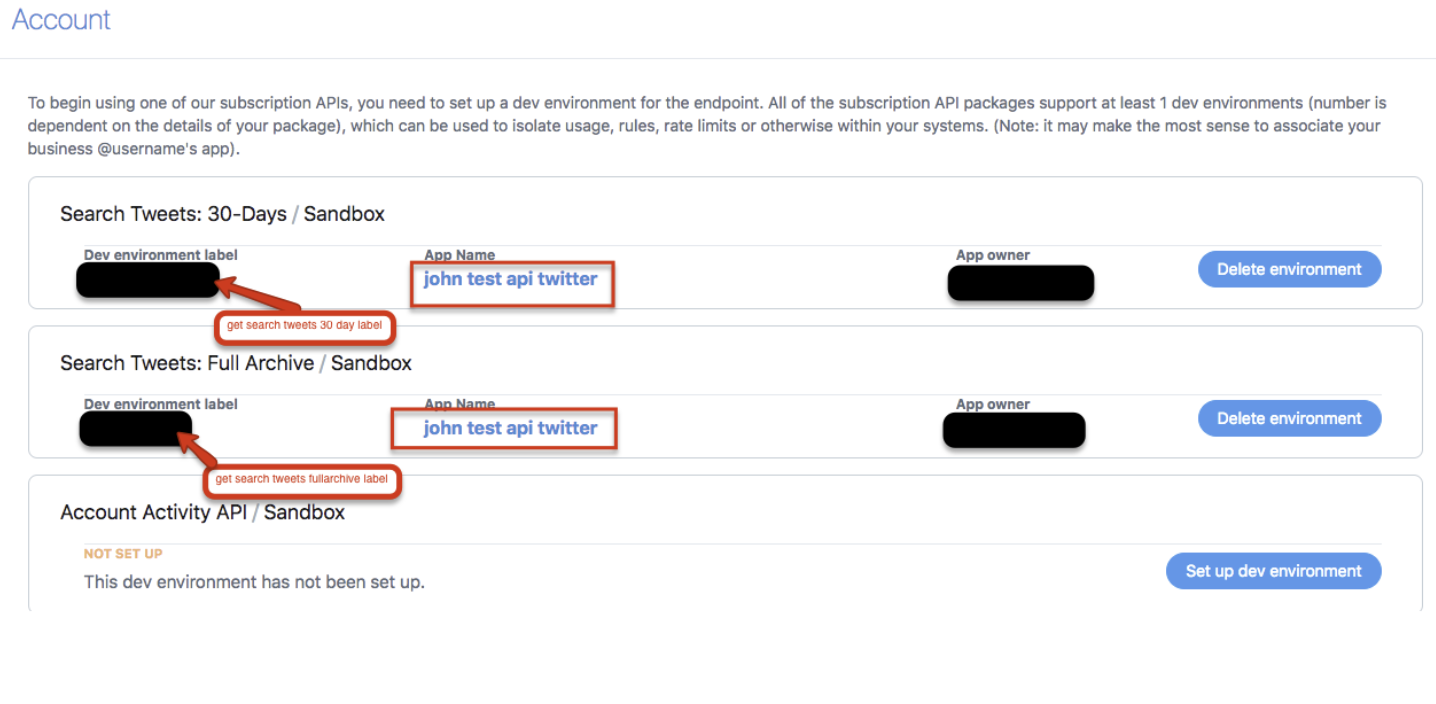
Select the Search Tweets 30-Days label and the Search Tweets Full-Archive label. You are specifying the Twitter search endpoint APIs used to import data. For more information, see Twitter documentation about 30 day and Full-Archive searches.
Go to Treasure Data Connections and search and select Tweet Insights.
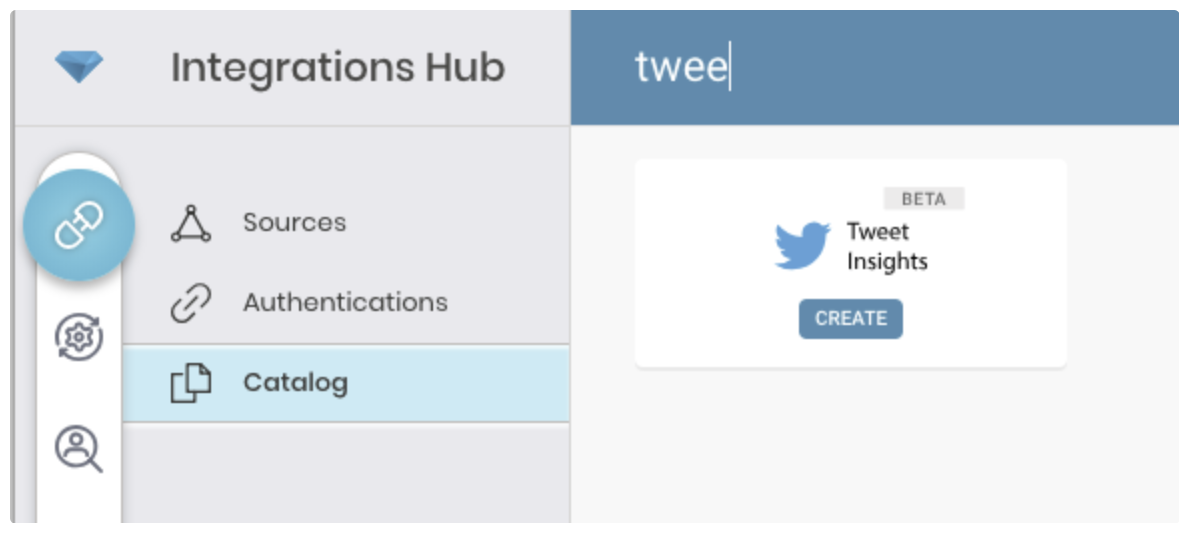
Select Create to create an authenticated connection.
The following dialog opens.

Edit the consumer key and consumer secret that you retrieved from the Twitter App. Indicate if you are Twitter Paid Premium Account.
Select Continue.
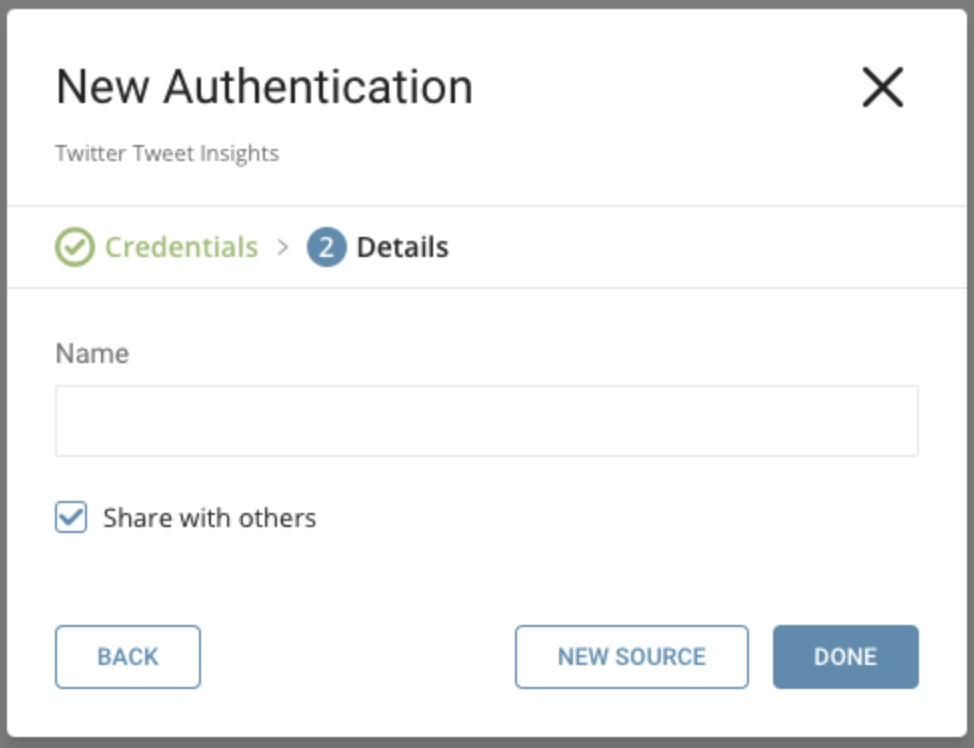
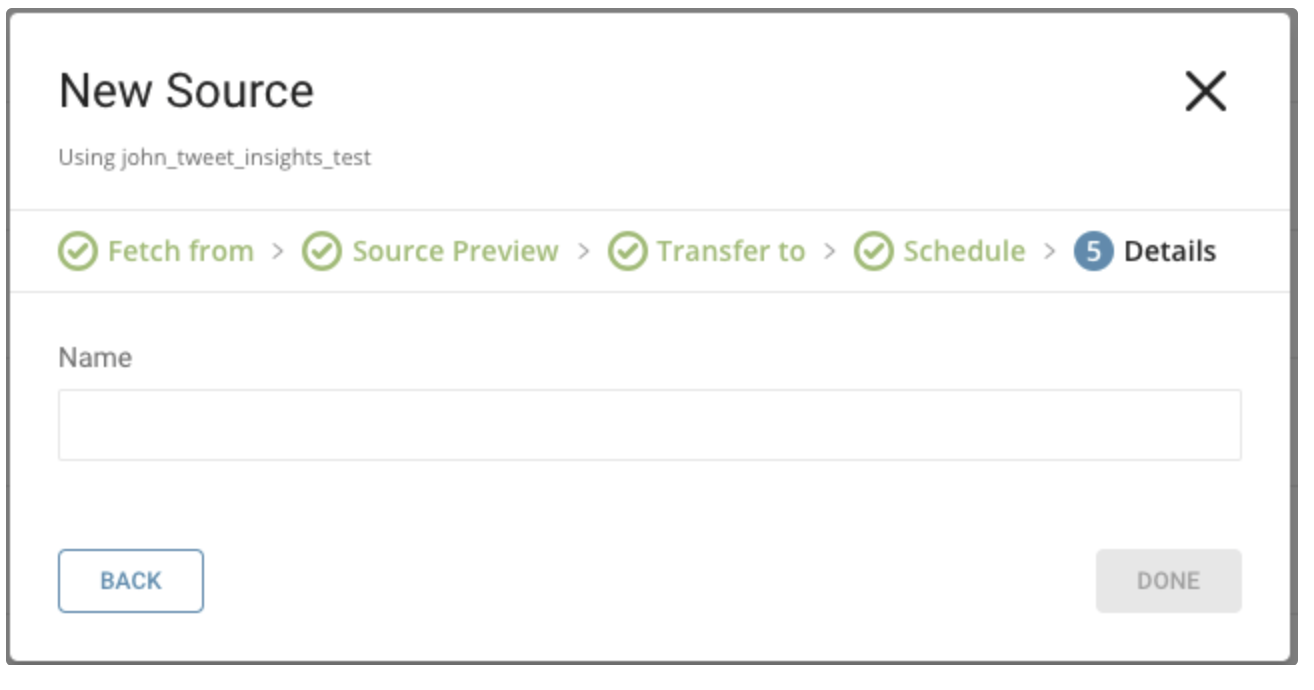
Name your new Twitter Tweet Insights Connection. Select Done.
After creating the connection, you are automatically taken to the Authentications tab. Look for the connection you created and select New Source.
Specify the data that you want to import.
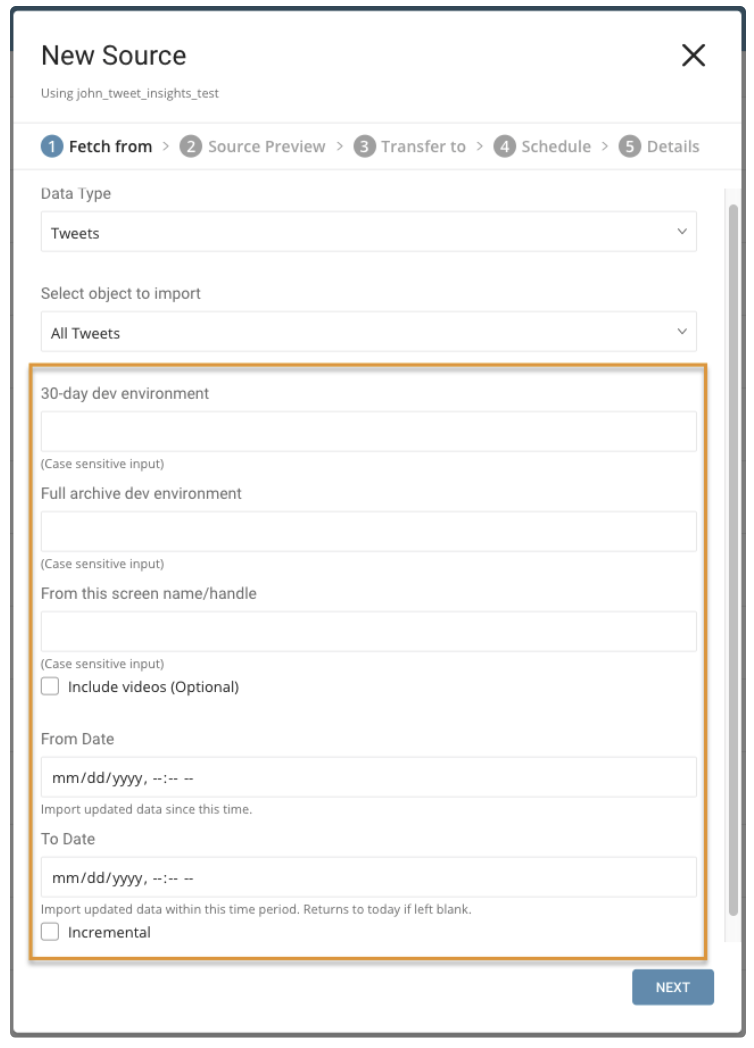
Parameters:
- Data Type: Tweets (default) or Account
- Object to Import: If the data type is Tweets: All Tweets or Retweets. If the data type is Account: User Timeline, Follower IDs, or Follower List
- 30-day dev environment: the Twitter dev environment API label for a search of Tweets or Retweets from the last 30-days. Not applicable for the Account data type.
- Full archive dev environment: dev environment API label for a full search of archived Tweets or Retweets. Not applicable for the Account data type.
- From this screen name or handle: Required. The value must be the user’s Twitter numeric Account ID or username of Twitter Account. Use to specify the data to be queried.
- Include videos: Only import Tweets that include a video link.
- From Date: Import Tweets created from this time. Time is set in UTC.
- To Date: Import Tweets created until this time. Time is set in UTC.
- Incremental: When importing based on a schedule, the time window of the fetched data automatically shifts forward on each run. For example, if the initial config is January 1, with ten days in duration, the first run fetches data modified from January 1 to January 10, the second run fetches from January 11 to January 20, and so on.
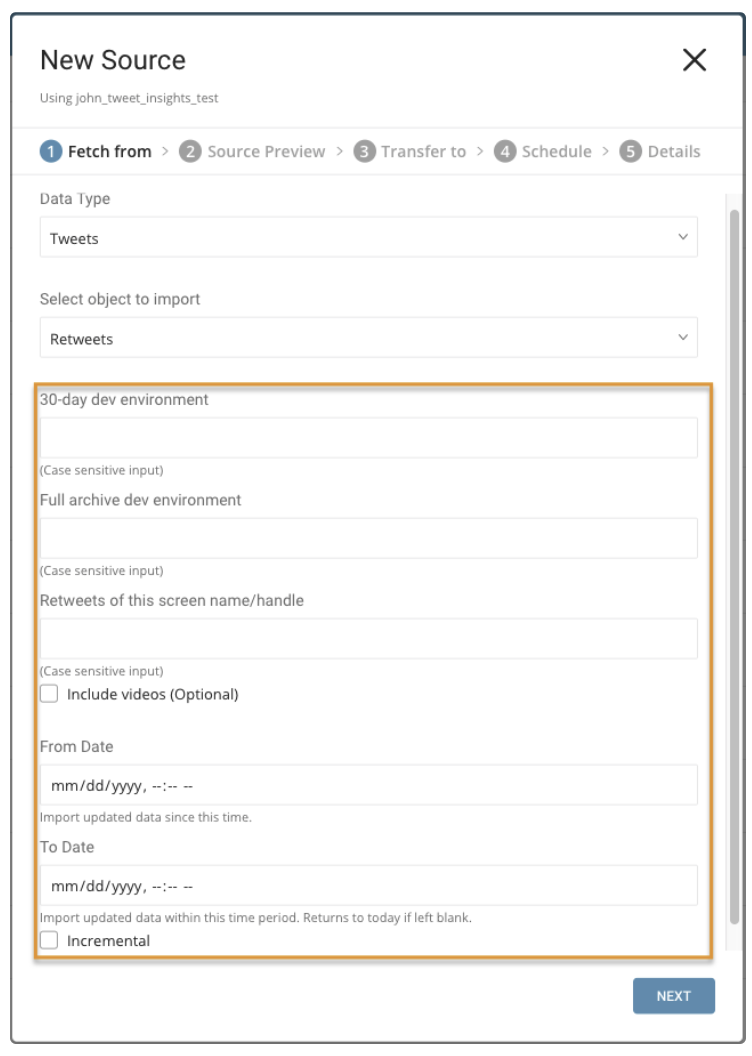
Parameters:
- Retweets of this screen name/handle: username of Twitter Account
- Include videos: Only import Retweets that have video.
- From Date: Import Retweets created from this time. Time is set in UTC.
- To Date: Import Retweets created until this time. Time is set in UTC.
- Incremental: When importing based on a schedule, the time window of the fetched data automatically shifts forward on each run. For example, if the initial config is January 1, with ten days in duration, the first run fetches data modified from January 1 to January 10, the second run fetches from January 11 to January 20, and so on.
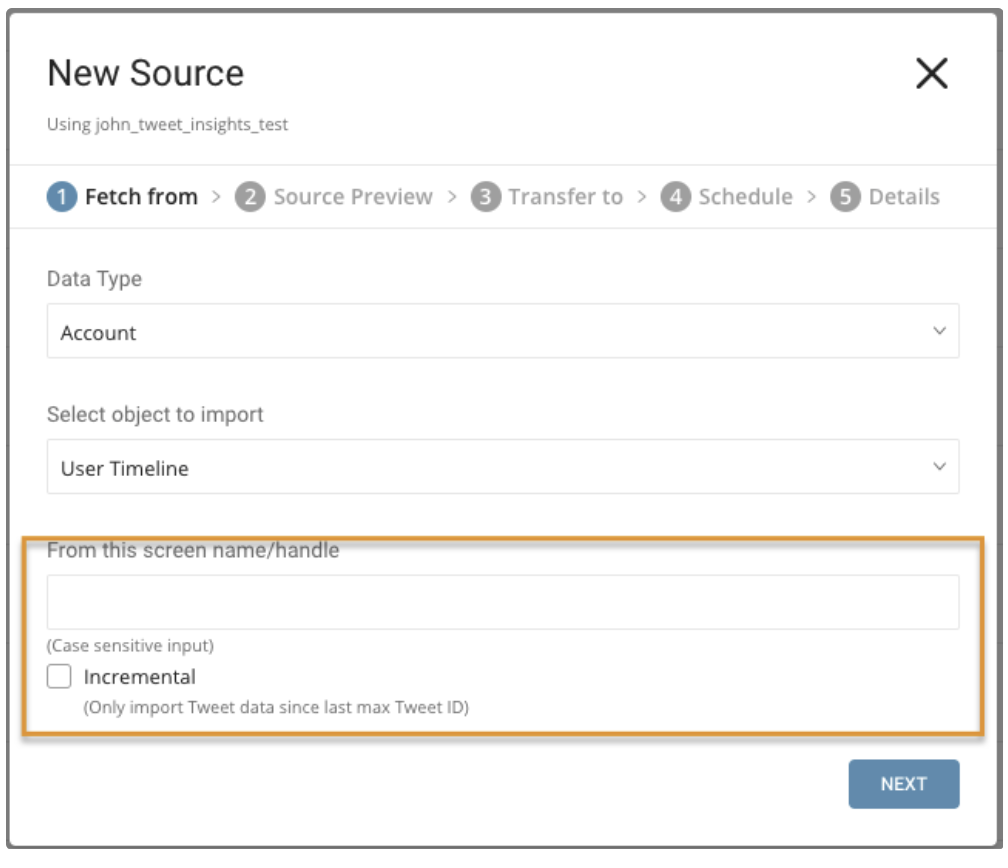
Parameters:
- From this screen name/handle: username of Twitter Account
- Incremental: When importing based on a schedule, the max ID of Tweets of the fetched data automatically shifts forward on each run. For example, if the initial config max ID is 1, the first run fetches data and max ID of Tweets return is 100, the second run fetches from ID 100 and set ID with max ID return in the second run, and so on.
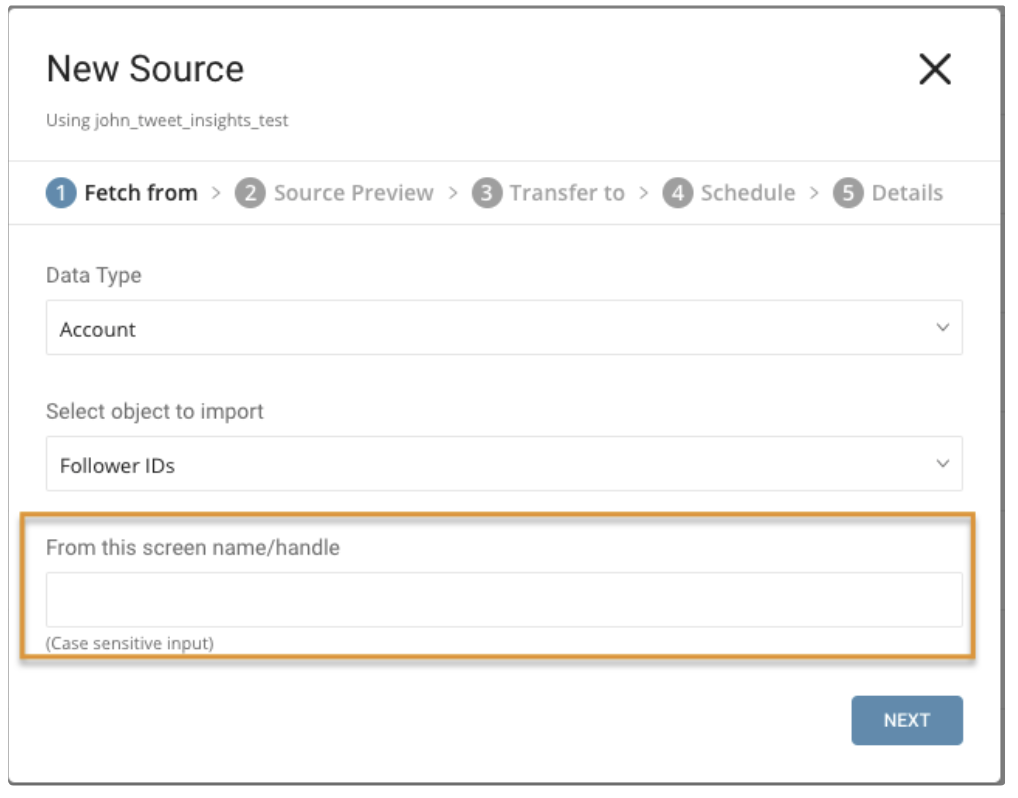
Parameters:
- From this screen name/handle: username of Twitter Account
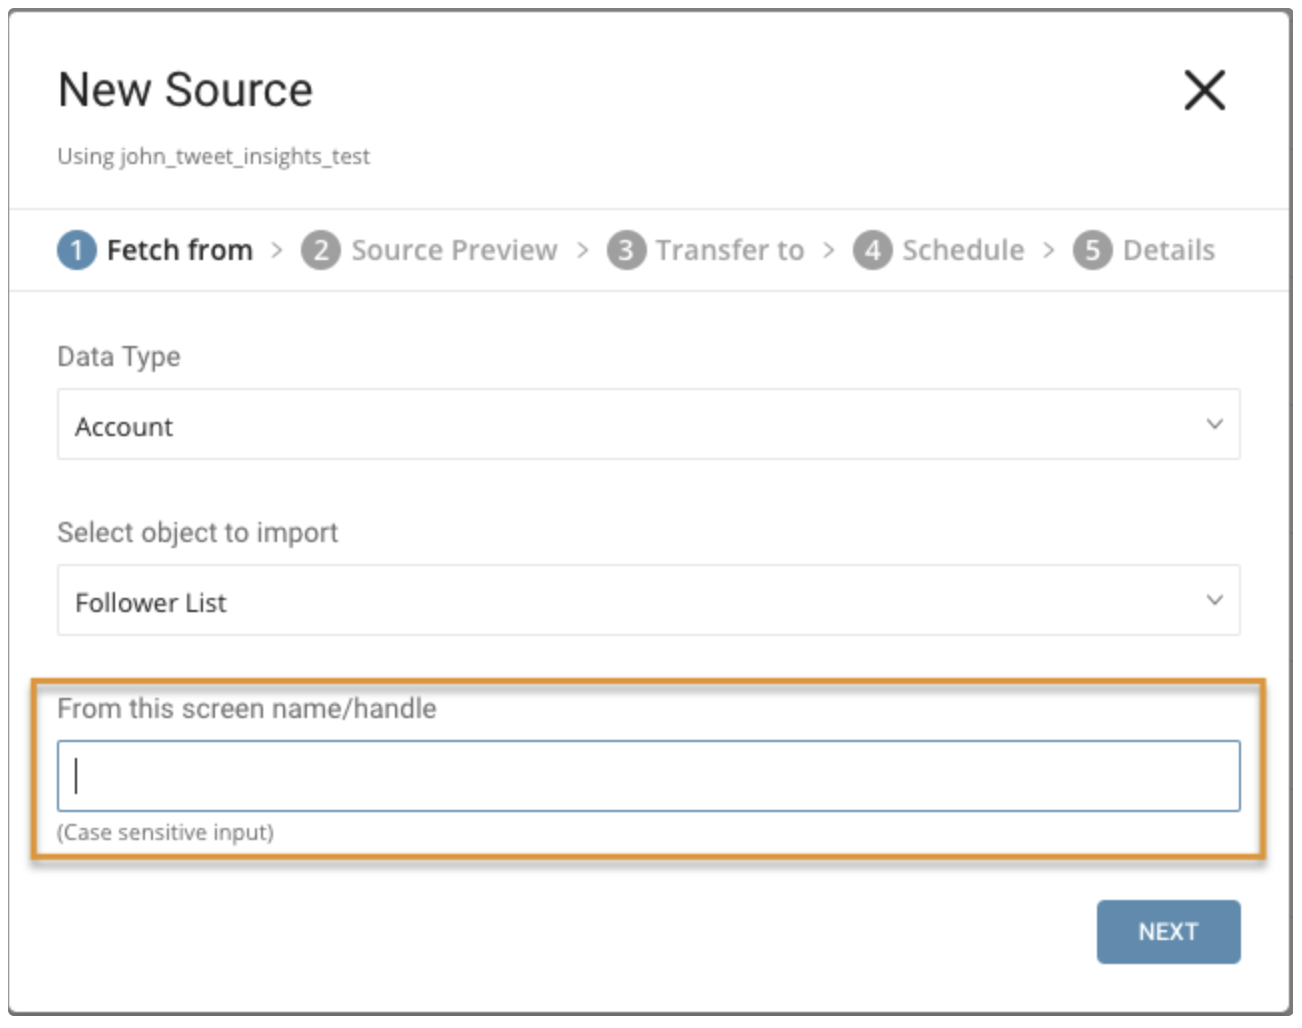
Parameters:
- From this screen name/handle: username of Twitter Account
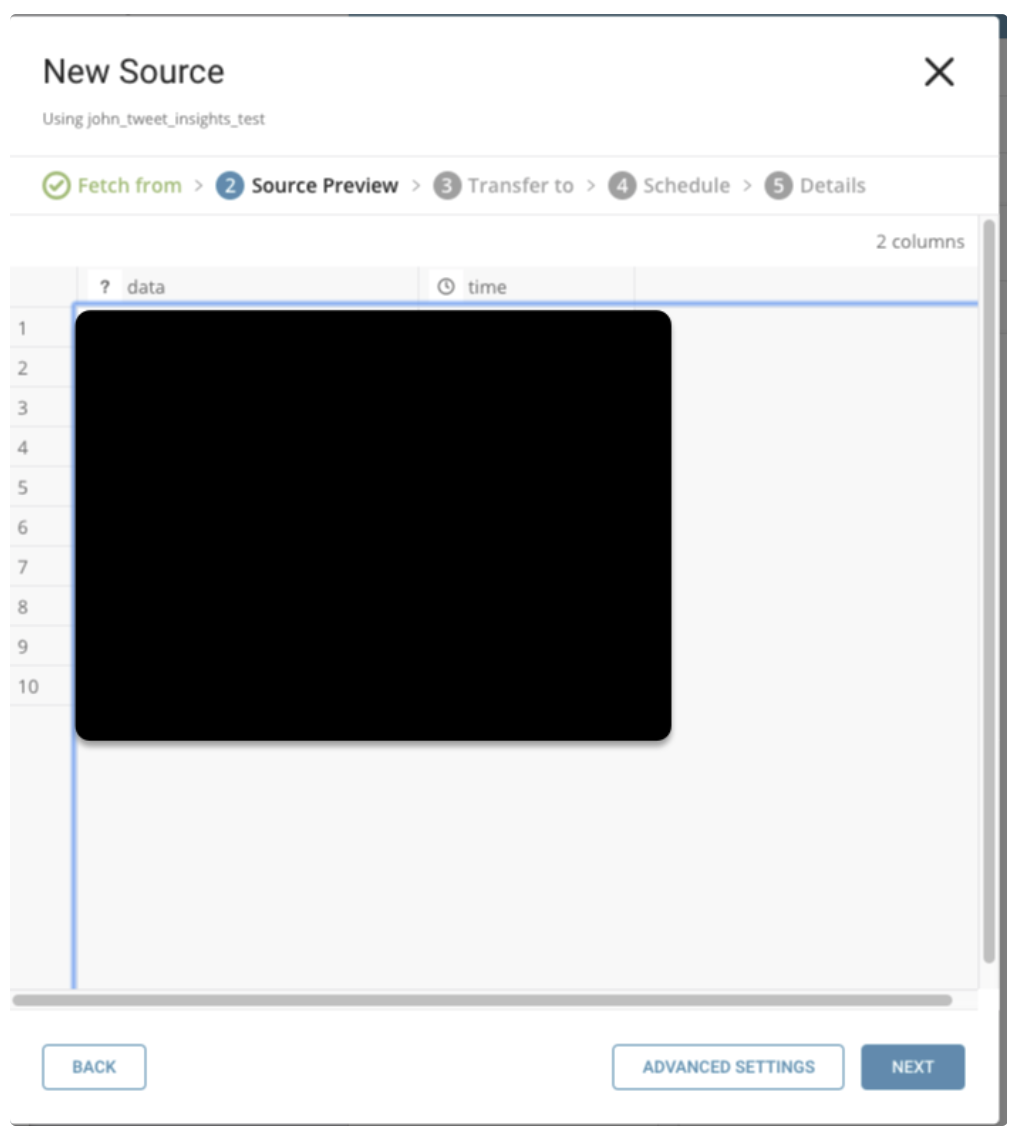
After completing your configuration, select Next.
You’ll see a preview of your data. To make changes, select Advanced Settings, otherwise select Next.
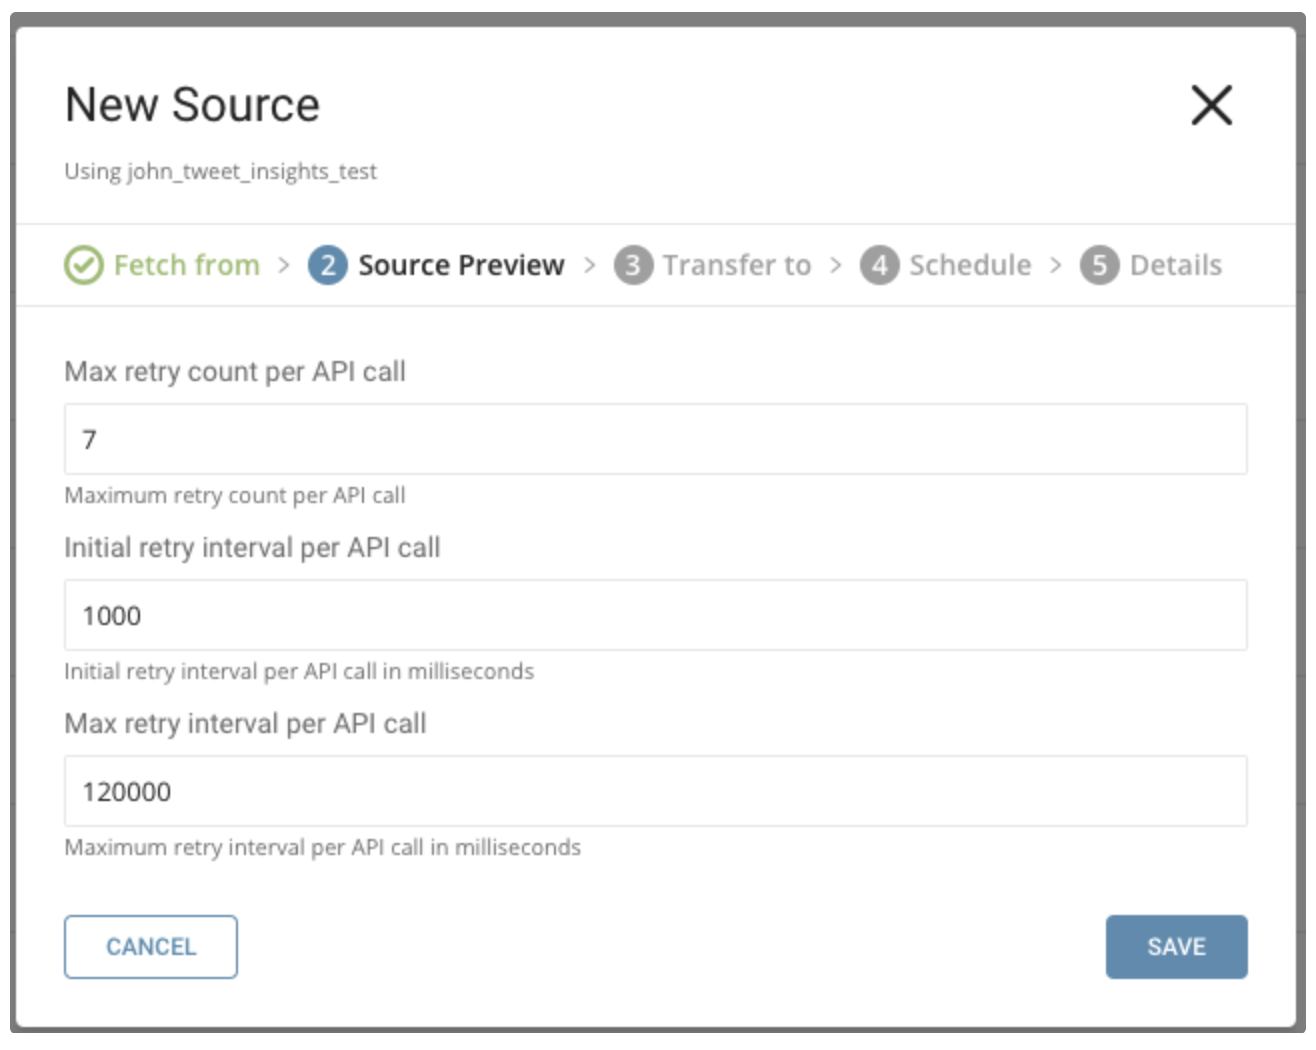
You can specify the following parameters:
Maximum retry times. Specifies the maximum retry times for each API call.
  Type: number
  Default: 7
Initial retry interval millisecond. Specifies the wait time for the first retry.
  Type: number
  Default: 1000
Maximum retry interval milliseconds. Specifies the maximum time between retries.
  Type: number
  Default: 120000
Choose existing ones or create a new database and table.

Create a new database and give your database a name. Complete similar steps for Create new table.
Select whether to append records to an existing table or replace your existing table.
If you want to set a different partition key seed rather than use the default key, you can specify one using the popup menu.
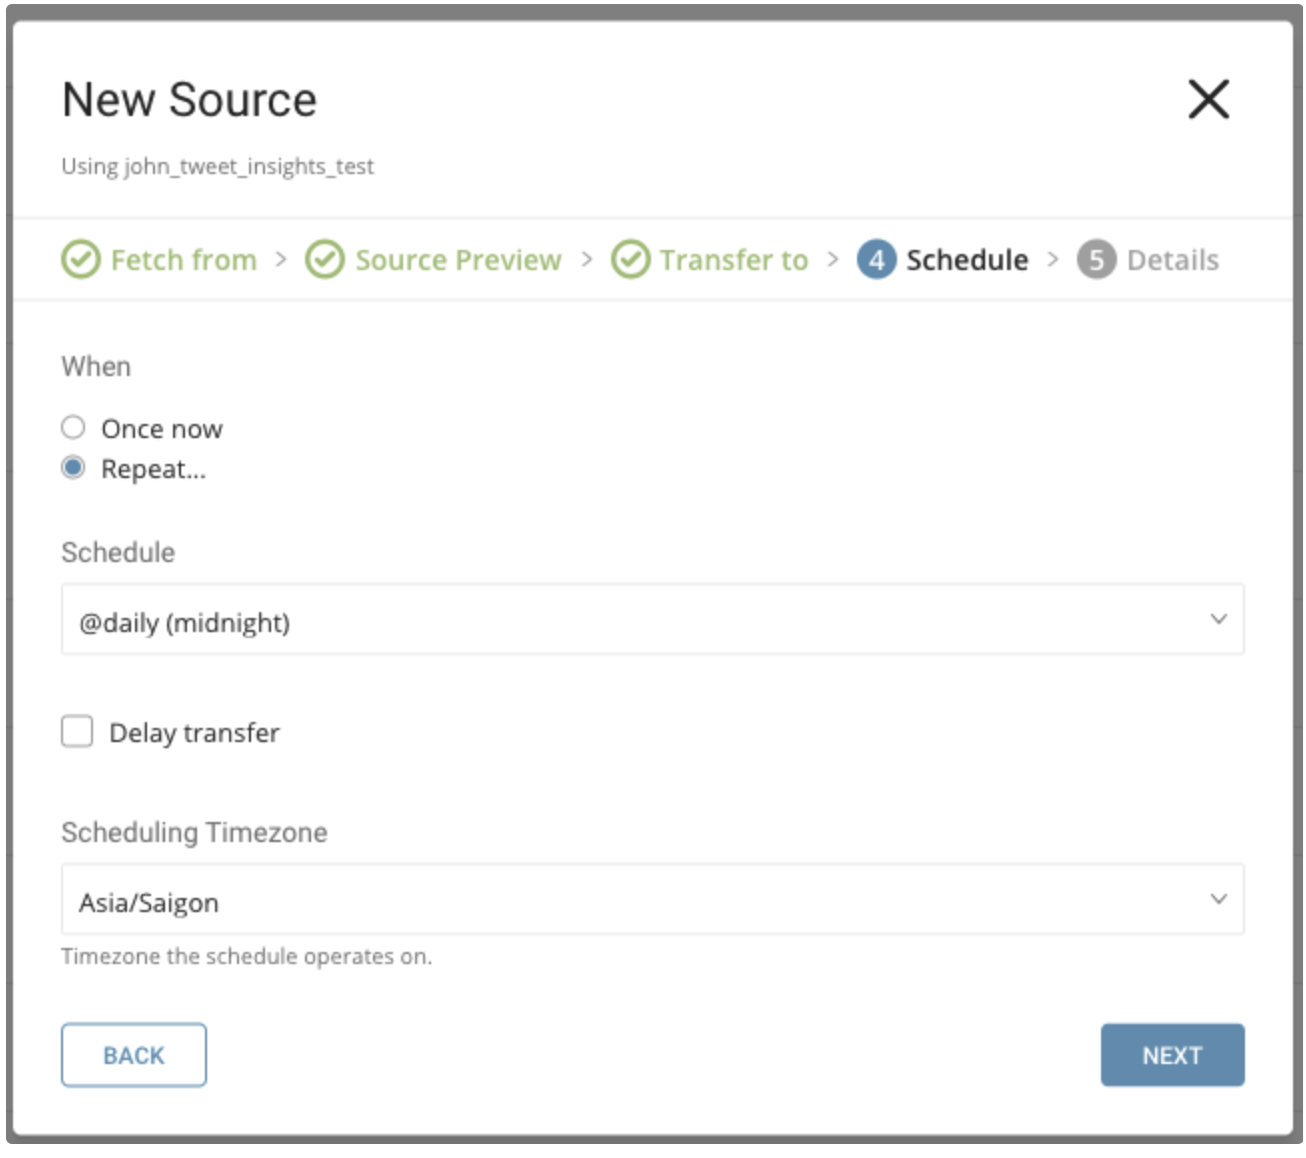
In the When tab, you can specify a one-time transfer, or schedule an automated recurring transfer.
Parameters
Once now: set one time job.
Repeat…
- Schedule: accepts these three options: @hourly, @daily, and @monthly and custom cron.
- Delay Transfer: add a delay of execution time.
TimeZone: supports extended timezone formats like ‘Asia/Tokyo’.
Name your transfer and select Done to start.
After your transfer has run, you can see the results of your transfer in the Databases tab.
You can use the Treasure Data console to configure your connection.
Install the newest Treasure Data Toolbelt.
The configuration file includes an in: section where you specify what comes into the connector from Twitter Tweet Insights and an out: section where you specify what the connector puts out to the database in Treasure Data.
The following example shows how to specify import Tweets, without incremental scheduling.
in:
  type: twitter_tweet_insights
  comsumer_key: xxxxxxxx
  comsumer_secret: xxxxxxxx
  is_paid_account: false
  data_type: tweets
  tweet_type: all
  30_day_env: xxxxxxxx
  full_archive_env: xxxxxxxx
  handle: xxxxxxxx
  include_video: false
  from_date: 2019-01-17T00:00:00.000Z
  to_date: 2019-01-27T00:00:00.000Z
  tweet_incremental: false
out:
 mode: append
The following example shows how to specify import Tweets, with incremental scheduling.
in:
 type: twitter_tweet_insights
 comsumer_key: xxxxxxxx
 comsumer_secret: xxxxxxxx
 is_paid_account: false
 data_type: tweets
 tweet_type: all
 30_day_env: xxxxxxxx
 full_archive_env: xxxxxxxx
 handle: xxxxxxxx
 include_video: false
 from_date: 2019-01-17T00:00:00.000Z
 to_date: 2019-01-27T00:00:00.000Z
 tweet_incremental: true
out:
 mode: append
The following example shows how to specify import ReTweets, without incremental scheduling.
in:
 type: twitter_tweet_insights
 comsumer_key: xxxxxxxx
 comsumer_secret: xxxxxxxx
 is_paid_account: false
 data_type: tweets
 tweet_type: retweets
 30_day_env: xxxxxxxx
 full_archive_env: xxxxxxxx
 handle_retweet: xxxxxxxx
 include_video: false
 from_date: 2019-01-17T00:00:00.000Z
 to_date: 2019-01-27T00:00:00.000Z
 tweet_incremental: false
out:
 mode: append
The following example shows how to specify import ReTweets, with incremental scheduling.
in:
 type: twitter_tweet_insights
 comsumer_key: xxxxxxxx
 comsumer_secret: xxxxxxxx
 is_paid_account: false
 data_type: tweets
 tweet_type: retweets
 30_day_env: xxxxxxx
 full_archive_env: xxxxxxxx
 handle_retweet: xxxxxxxx
 include_video: false
 from_date: 2019-01-17T00:00:00.000Z
 to_date: 2019-01-27T00:00:00.000Z
 tweet_incremental: true
out:
 mode: append
The following example shows how to specify an import User Timeline, without incremental scheduling.
in:
 type: twitter_tweet_insights
 comsumer_key: xxxxxxxx
 comsumer_secret: xxxxxxxx
 is_paid_account: false
 data_type: account
 account_type: user
 account_label: xxxxxxxx
 account_incremental: false
out:
 mode: append
The following example shows how to specify an import User Timeline, with incremental scheduling.
in:
 type: twitter_tweet_insights
 comsumer_key: xxxxxxxx
 comsumer_secret: xxxxxxxx
 is_paid_account: false
 data_type: account
 account_type: user
 account_label: xxxxxxxx
 account_incremental: true
out:
 mode: append
The following example shows how to specify import Follower IDs.
in:
 type: twitter_tweet_insights
 comsumer_key: xxxxxxxx
 comsumer_secret: xxxxxxxx
 is_paid_account: false
 data_type: account
 account_type: id
 account_label: xxxxxxxx
out:
 mode: append
The following example shows how to specify the import Follower List.
in:
 type: twitter_tweet_insights
 comsumer_key: xxxxxxxx
 comsumer_secret: xxxxxxxx
 is_paid_account: false
 data_type: account
 account_type: list
 account_label: xxxxxxxx
out:
mode: appendYou can preview data to be imported using the command td connector:preview.
$ td connector:preview load.yml You use td connector:issue to execute the job.
You must specify the database and table where you want to store the data before you execute the load job. Ex td_sample_db, td_sample_table
$ td connector:issue load.yml \
     --database td_sample_db \
     --table td_sample_table \
     --time-column date_time_column
It is recommended to specify --time-column option, because Treasure Data’s storage is partitioned by time. If the option is not given, the data connector selects the first long or timestamp column as the partitioning time. The type of the column, specified by --time-column, must be either of long or timestamp type (use Preview results to check for the available column name and type. Generally, most data types have a last_modified_date column).
If your data doesn’t have a time column, you can add the column by using the add_time filter option. See details at add_time filter plugin.
td connector:issue assumes you have already created a database (sample_db) and a table (sample_table). If the database or the table does not exist in TD, td connector:issue will fail. Therefore, you must create the database and table manually or use --auto-create-table td connector:issue to automatically create the database and table.
 $ td connector:issue load.yml \
      --database td_sample_db \
      --table td_sample_table \
      --time-column date_time_column \
      --auto-create-table
From the command line, submit the load job. Processing might take a couple of hours depending on the data size.
MaxResults param for Sandbox account is 100 while Premium is 500
Request rate limits at both minute and second granularity. The per-minute rate limit is 30 requests per minute. Requests are also limited to 10 per second. Requests are aggregated across both the data and counts endpoints. Monthly request limits are also applied. Sandbox environments are limited to 250 requests per month.
Users should check their application dashboard for request usage and monthly quota.