Snowflake offers a cloud-based data platform that allows customers to unlock the value of their data with near-unlimited scale, concurrency, and performance. Treasure Data's Snowflake Bulk Unloading integration provides a high-performance solution for importing large datasets from Snowflake tables into Treasure Data by leveraging Snowflake's Bulk Data Unloading feature. This integration offers up to 300% improved performance compared to the standard Snowflake import integration for large datasets. You can also learn more about Treasure Data's Snowflake Import Integration and Snowflake Export Integration.
This feature is in BETA version. For more information, contact your Customer Success Representative.
- Basic knowledge of Treasure Data
- An existing account of Snowflake data warehouse with appropriate permissions to query tables/views and manage stages
- For large datasets, ensure adequate resource allocation (especially CPU) for optimal performance
Go to Integrations Hub > Catalog and search. Select Snowflake Bulk Unload.
The following dialog opens.
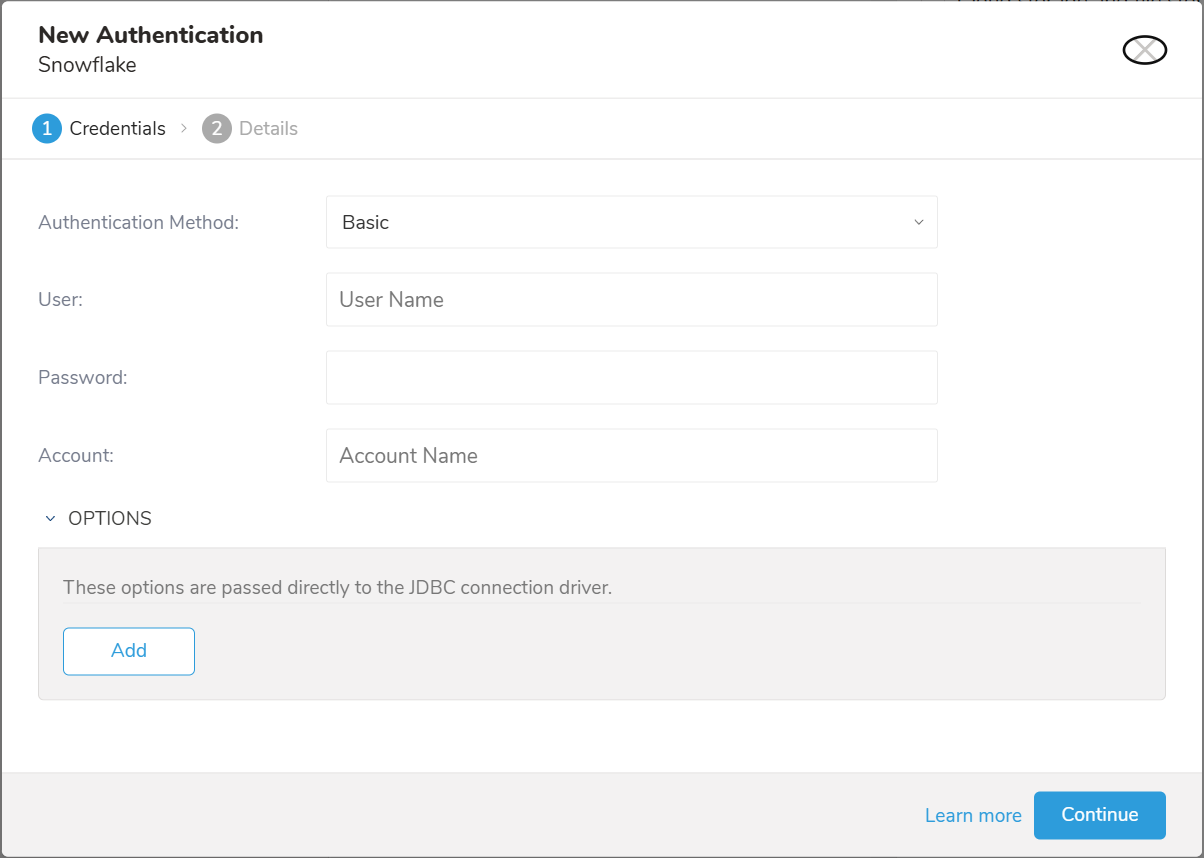
Select Authentication Method:
- Basic: Provide the required credentials: User, Password, and Account to authenticate Treasure Data to Snowflake.
- User: Snowflake login username.
- Password: Snowflake login password.
- Key Pair: Provide the Private Key and its Passphrase if it is the encrypted private key
- Private Key: Your generated private key. See configuring-key-pair-authentication
- Passphrase: The Private Key passphrase, or leave it empty if the Private Key is unencrypted.
- User: Snowflake login username.
- Account: Snowflake provided the account name. See how to find your account name in Snowflake.
- OPTIONS: JDBC connection options (if any)
Select Continue.
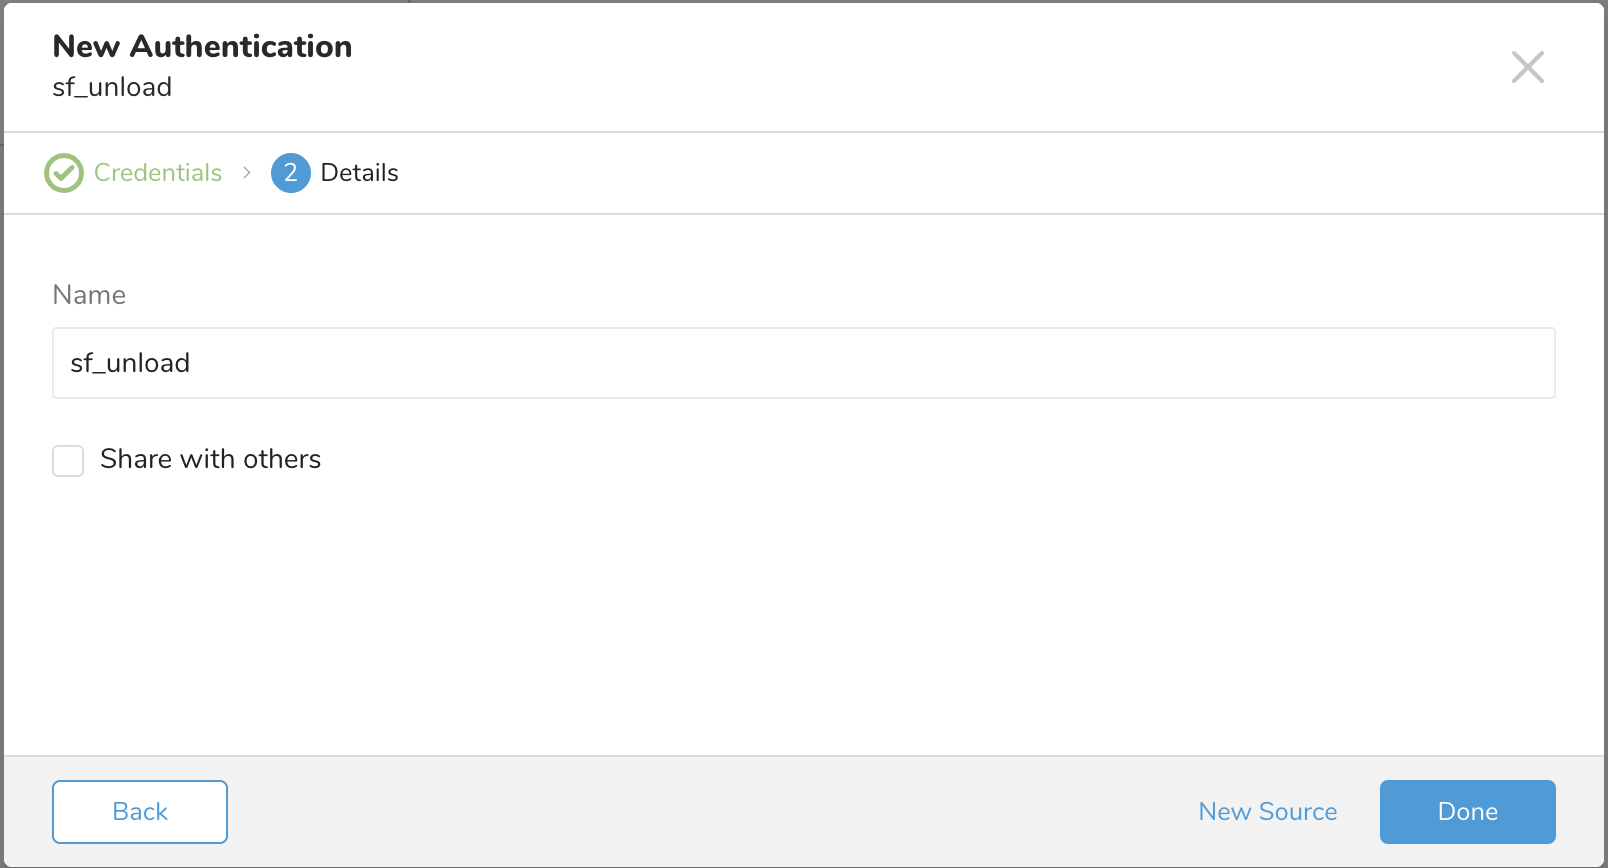
Specify a name for your data connector. Indicate if you want to share the authentication with others. Other team members can use your authentication to create a connector source if you share. Select Done.
Create a New Source on the Authentications page. 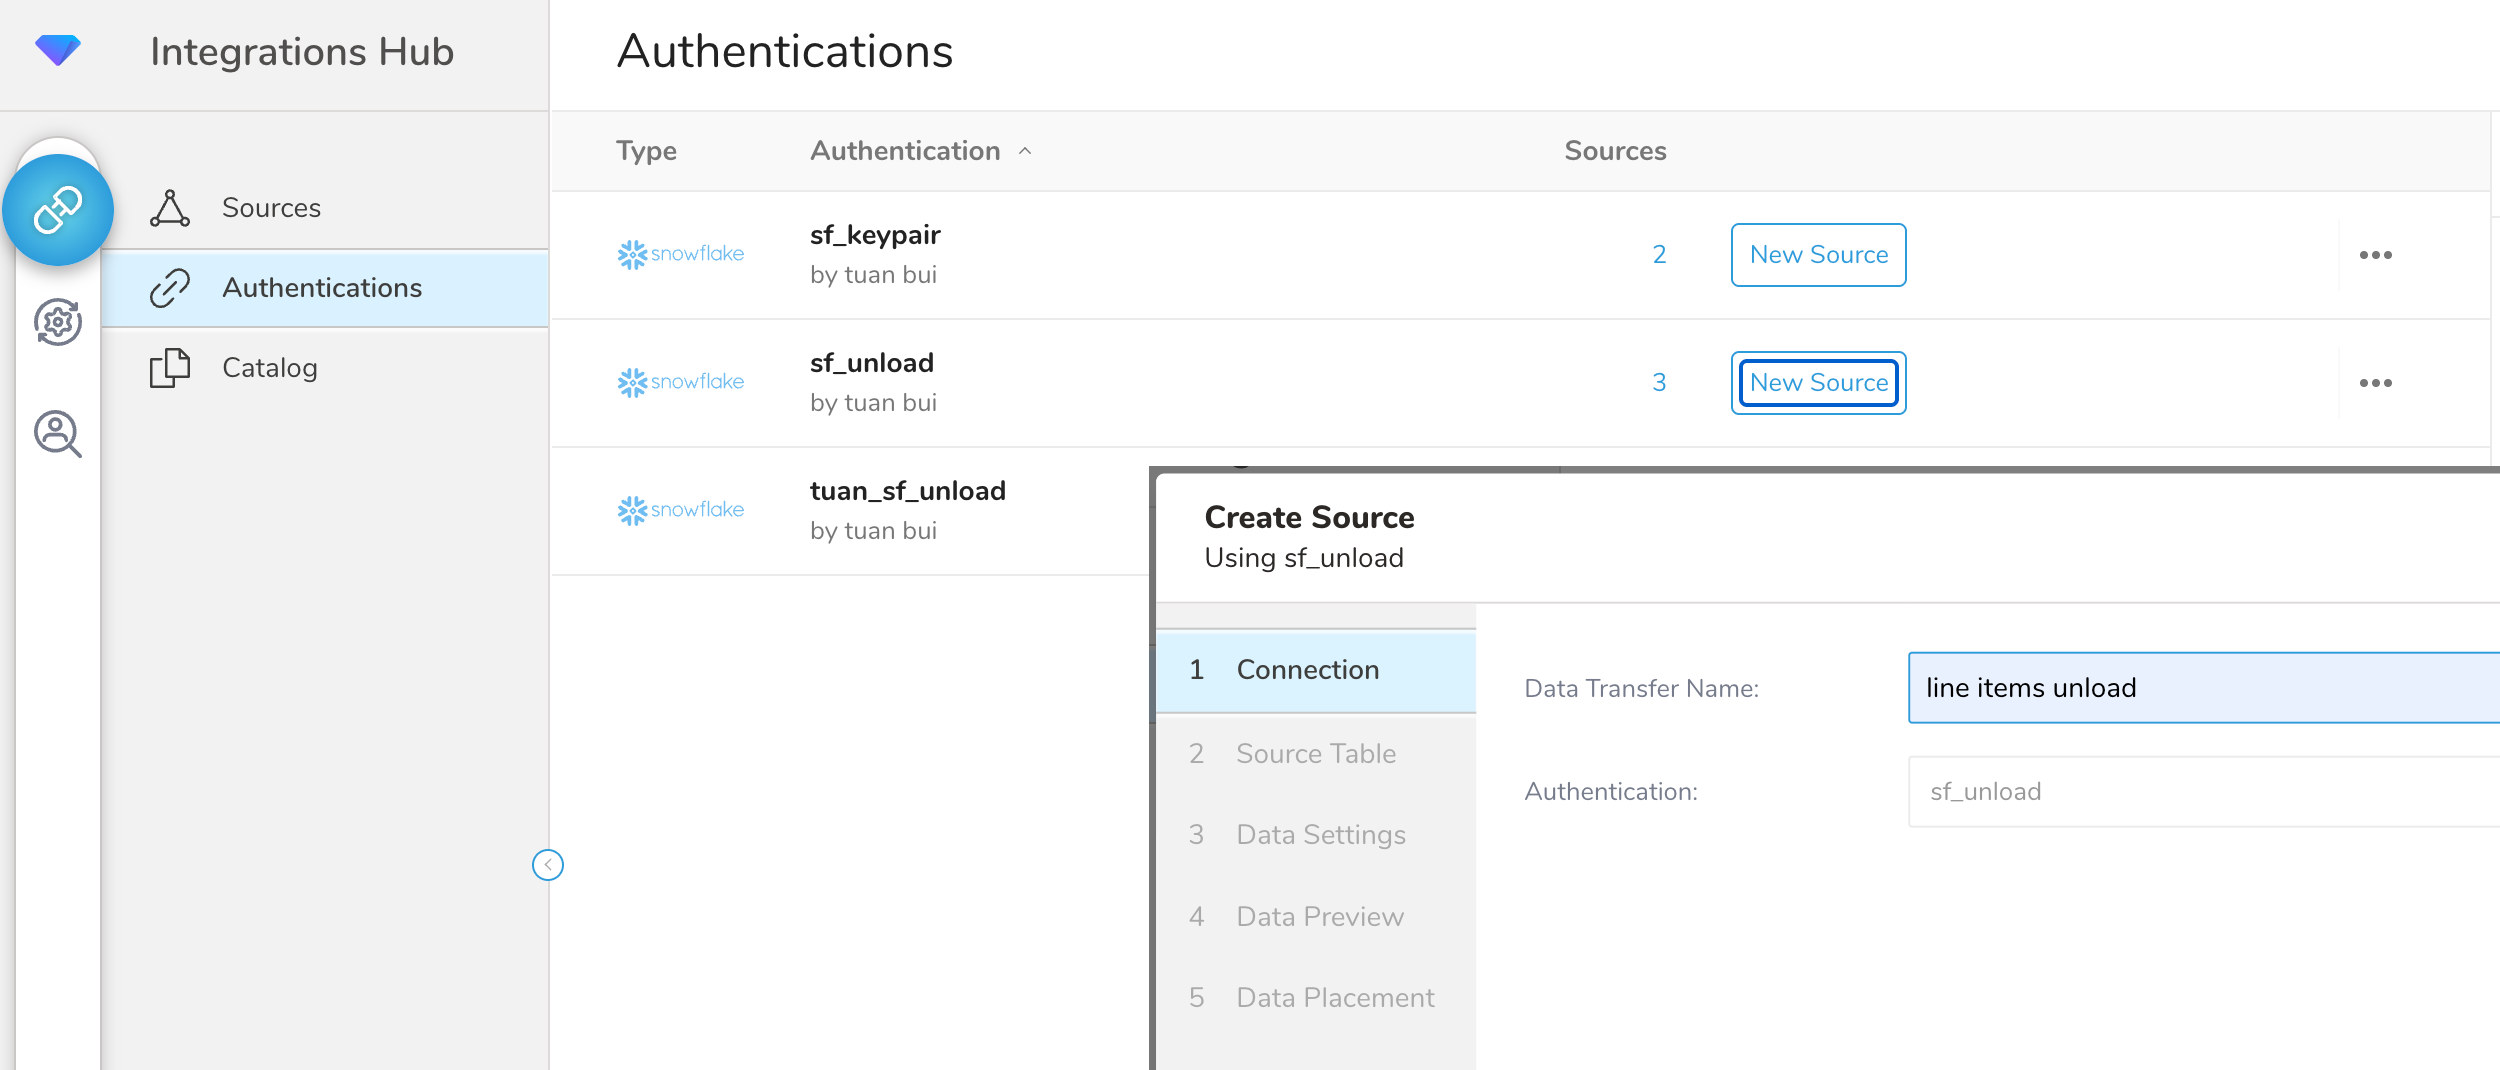 Give a name on Connection and click Next.
Complete the details of the Source Table. 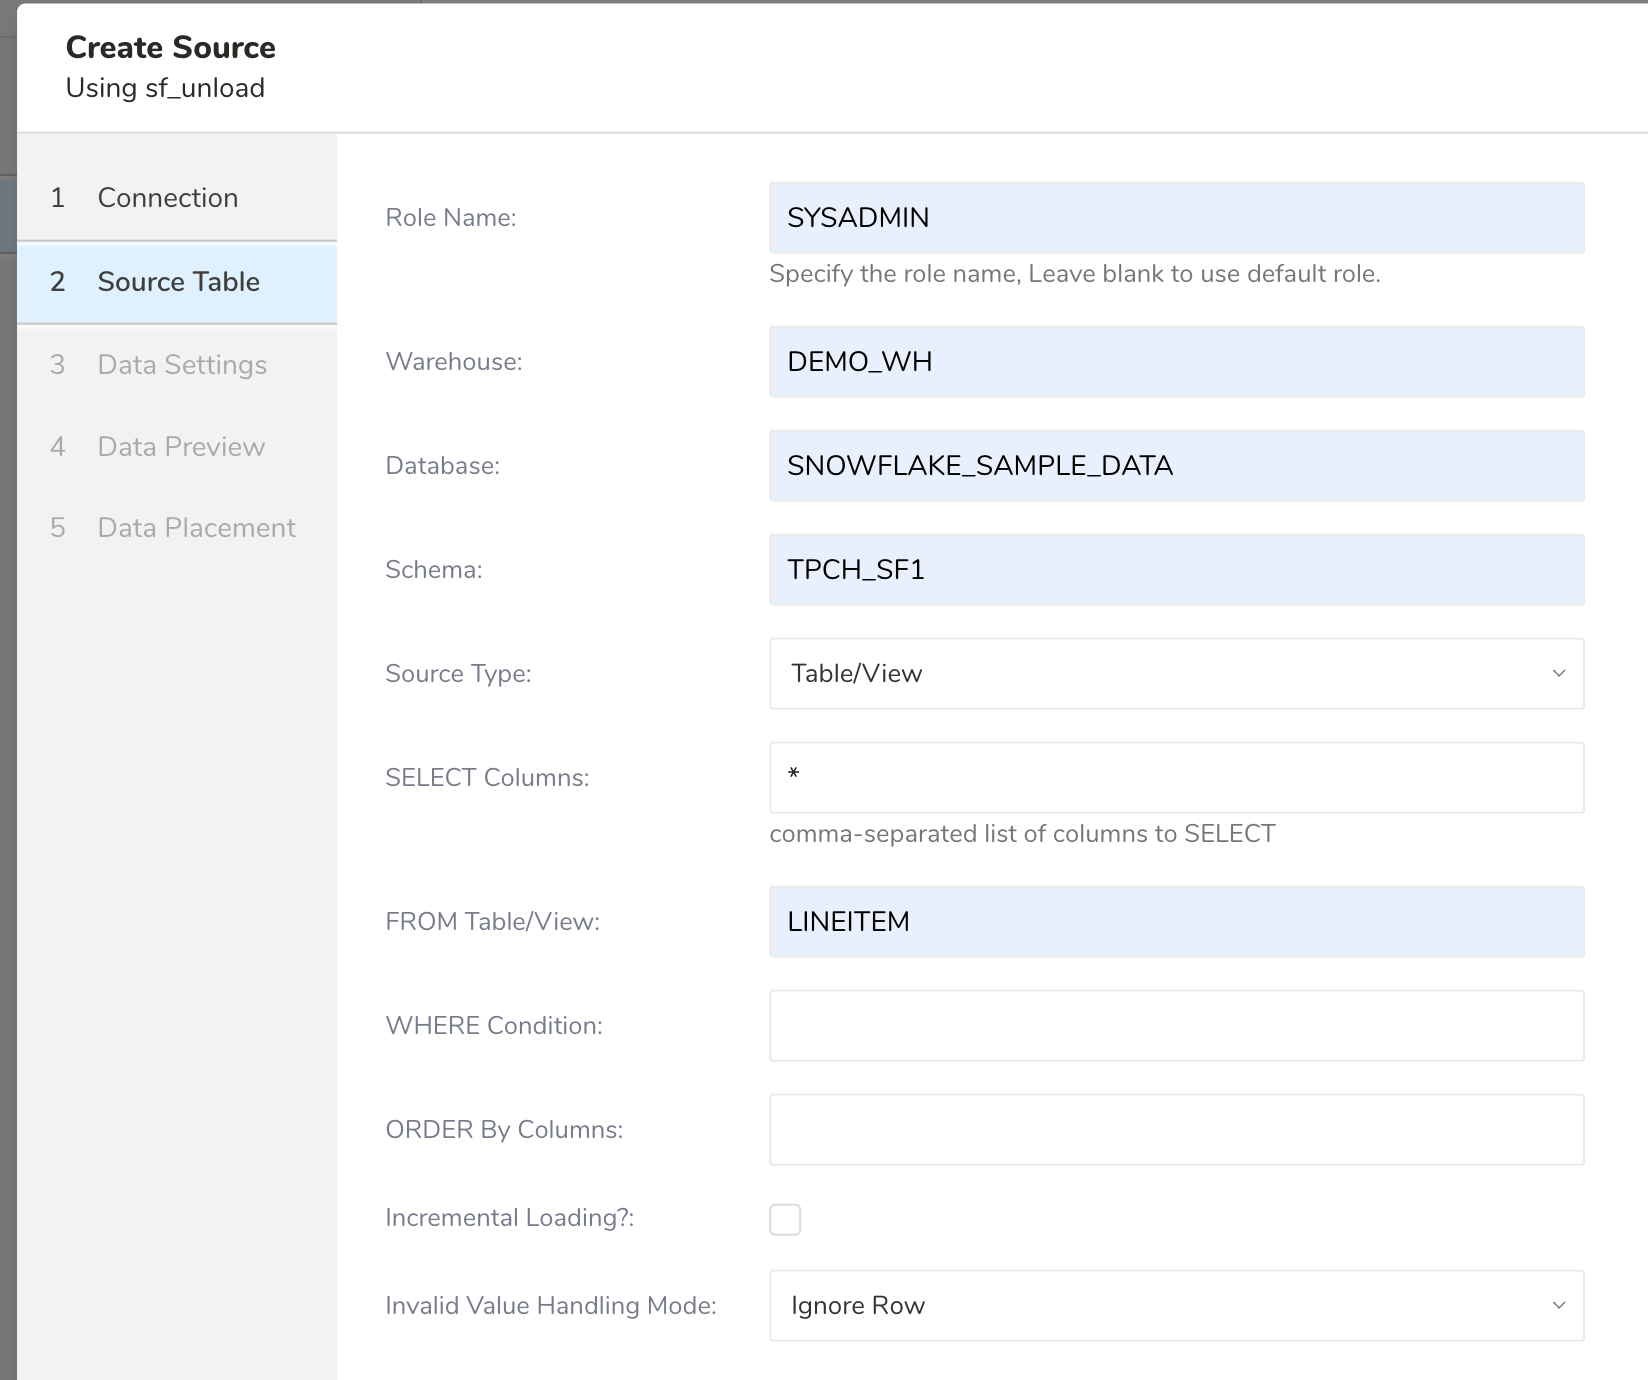
You must register the information that you want to ingest. The parameters are as follows:
Role Name: Specifies the default access control role to use in the Snowflake. Leave empty to use the default Role.
Warehouse: (Required) Specifies the virtual warehouse to use.
Database: (Required) Snowflake database.
Schema: (Required) Specifies the default schema for the specified database when connected.
Source Type: Select Table/View or Query
- Query:
- SELECT Query: the Raw SQL query to run. Allows SELECT type query only. INSERT, UPDATE, or modifying data are not allowed.
- Table/View (default):
- SELECT Columns: (Required) Accepts comma-separated column names or
*to select all columns from Table/View. - From Table/View: (Required) Destination table name.
- WHERE Condition: Specify WHERE condition to filter the rows
- ORDER By Columns: Expression of ORDER BY to sort rows
- SELECT Columns: (Required) Accepts comma-separated column names or
- Query:
Incremental Loading: Enables incremental loading with enhanced performance optimizations.
- Incremental Column(s): Column names for incremental loading, which allows Timestamp and Numeric columns. If not specified, the Primary column (if exists) is used.
- ORDER BY Columns: Not allowed when Incremental Loading is selected.
Invalid Value Handling Mode: When your table contains invalid data in a row, there are options to Fail Job or Ignore Row. When a Fail Job is selected, the current job stops and gives an ERROR status. When selecting Ignore Row, ignore the row containing the invalid value and keep running. If not specified, Fail Job is selected by default.
The specified Warehouse, Database, and Schema must already exist. The specified Role must have privileges in the specified warehouse, database, schema, and tables/views.
Warehouse: DEMO_WH
Database: Test_DB
Schema: PUBLIC
Source Type: Query selected
SELECT Query: SELECT column1, column2, column3
              FROM table_test
              WHERE column4 != 1
Incremental Loading: Checked
Incremental Column(s): column1Warehouse: DEMO_WH
Database: Test_DB
Schema: PUBLIC
Source Type: Table/View selected
SELECT Columns: column1, column2, column3
FROM Table/View: table_test
WHERE Condition: column4 != 1
ORDER By Columns:
Incremental Loading: Checked
Incremental Column(s): column1Select Next you will see the advanced data settings
Data Settings allow you to customize the Transfer. Edit the following section if needed.

- Stage File Size: Controls the size of individual stage files in bytes. Default is 100 MB (104,857,600 bytes). Larger files can improve performance for very large datasets but may require more memory (500 MB files are tested with 6GB of dataset and give a good result)
Columns are guessed from actual dataset. You can change the Data Type of the column if it does not match actual data.
- Column Name: Snowflake column name (do not modify).
- Data Type: Select the destination data type (string, boolean, timestamp, double, long, json).
- Timestamp Format: Format pattern for timestamp columns when destination type is string. For example: %Y-%m-%dT%H:%M:%S.%L%z
- Start After (values): When Incremental Loading is selected, and you specify this value, only data greater than this value is imported. The size and order of this field must be equal to Incremental Columns.
Network Timeout: Specifies how long to wait for a response when interacting with the Snowflake service before returning an error.
Query Timeout: Specifies how long to wait for a query to complete before returning an error. Zero (0) indicates to wait indefinitely.
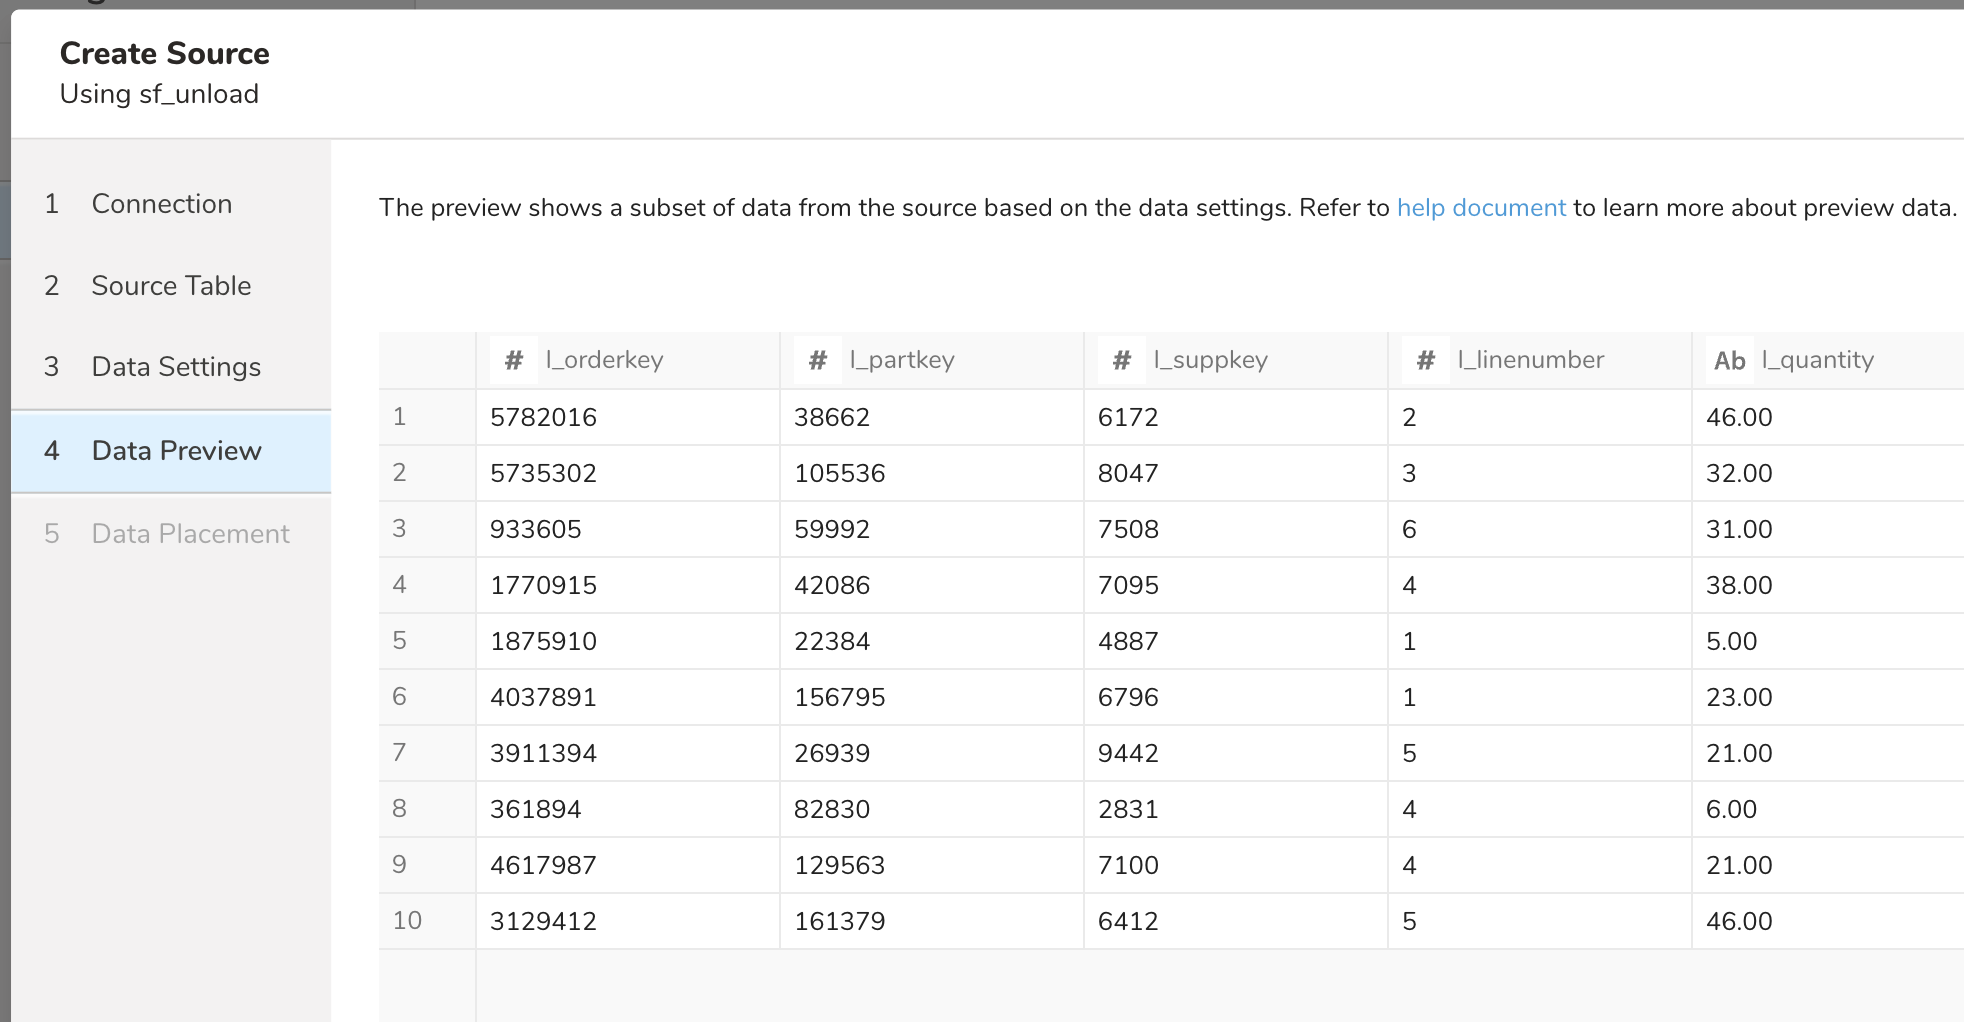
Select Next you'll see a preview of your data.
Preview uses Snowflake's SAMPLE feature to efficiently show sample rows without processing the entire dataset, which is particularly beneficial for large tables.
Preview might show dummy data if a query takes a long time to finish, such as when you use a heavy query. For example: querying a large table that contains an Order By column but is not indexed.
When you use a complex query with multiple conditions, joining tables, sometimes Preview shows "No records to preview" but it won't affect the Job result. Read more information about Previews.
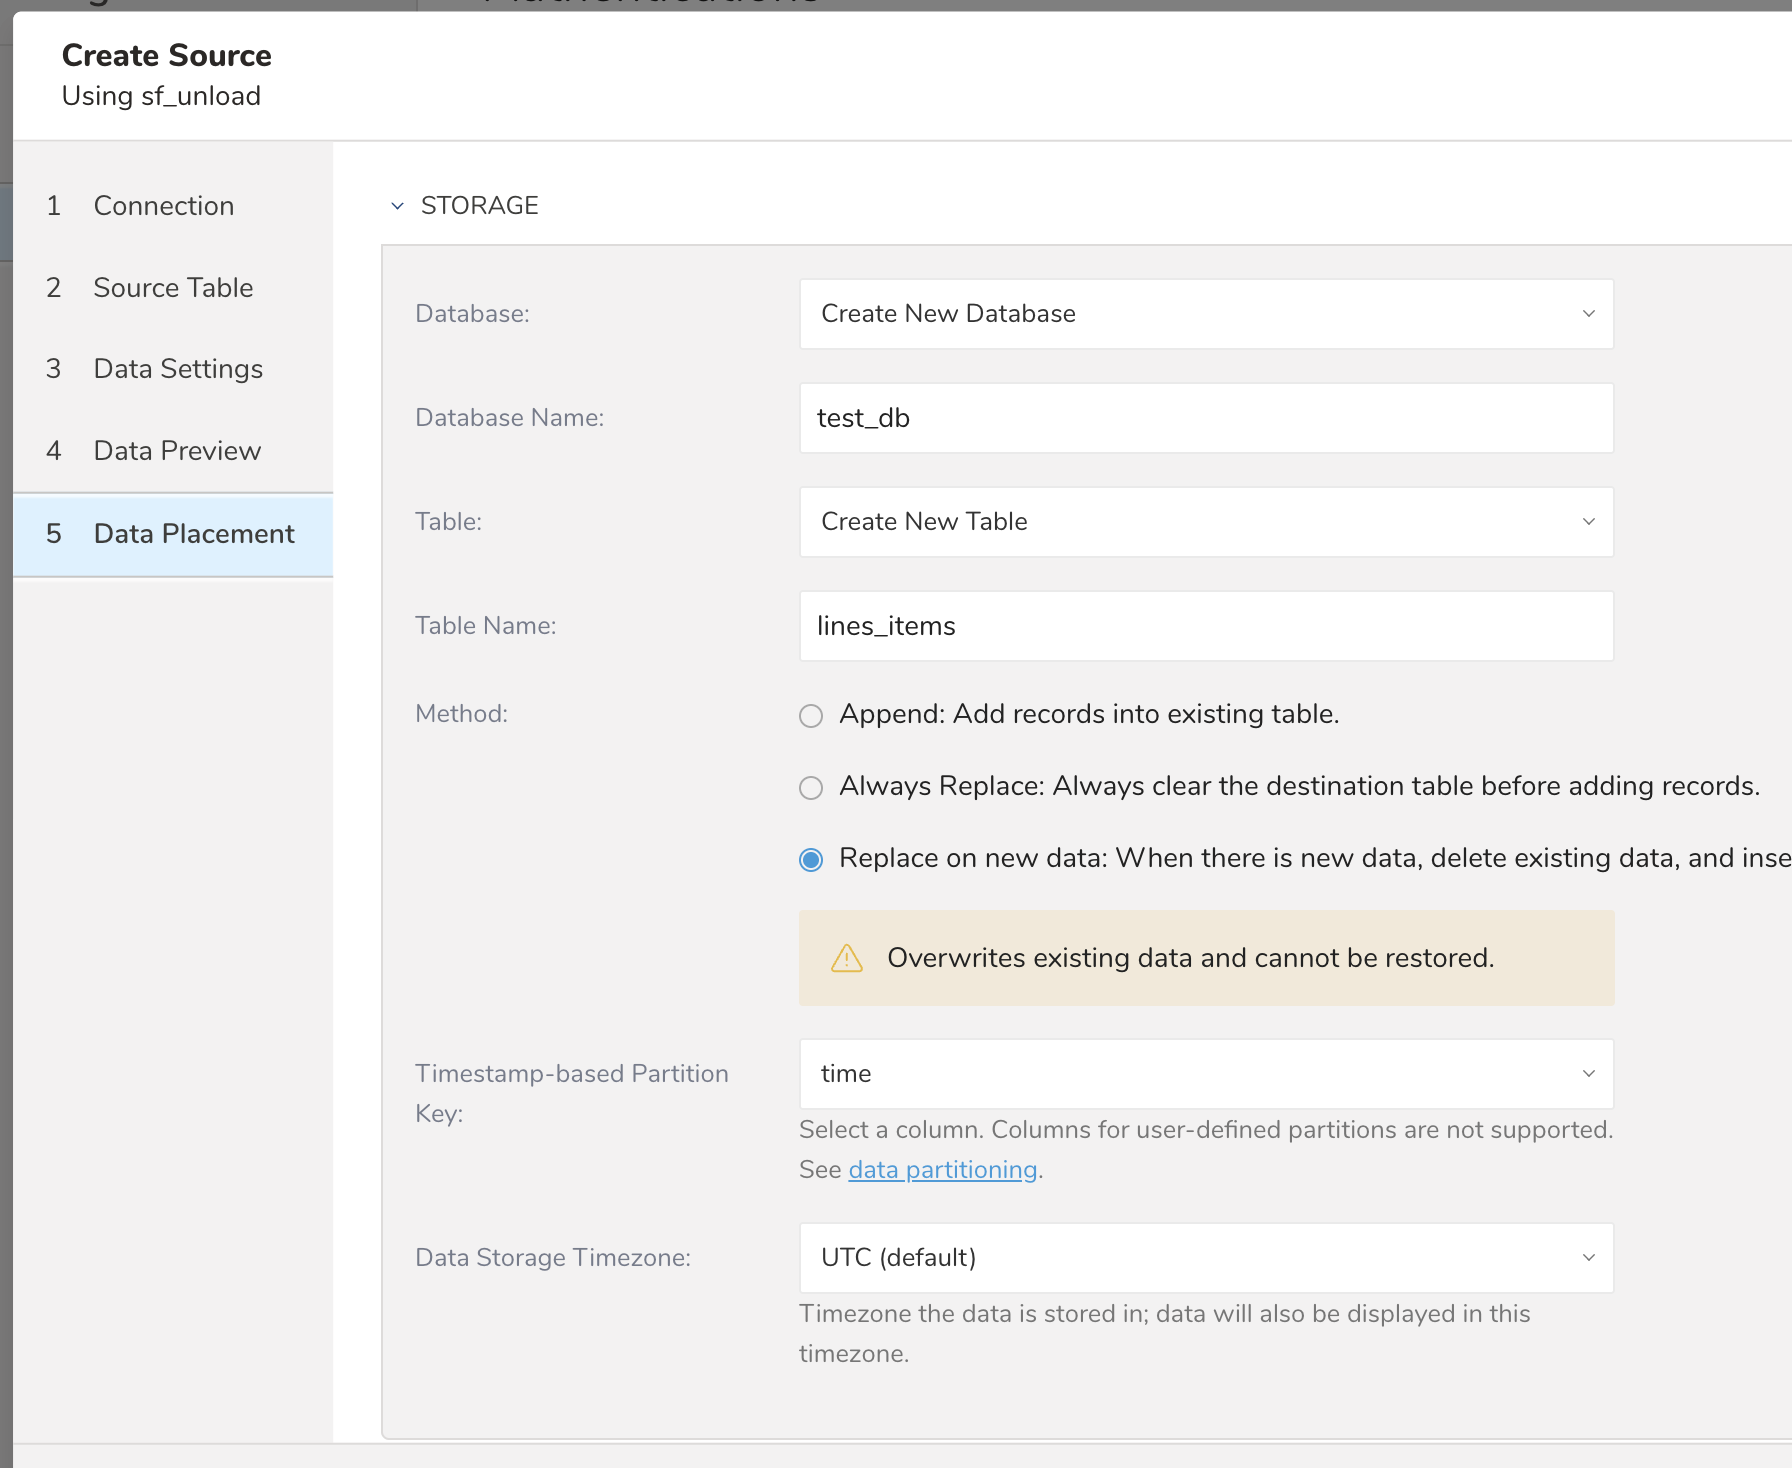
Choose an existing or create a new database and table that you want to import to.
- Method: Append or Replace. Select whether to append records to an existing table or replace your existing table.
- Timestamp-based Partition Key: Choose the long or timestamp column as the partitioning time. As default time column, it's used upload_time with using add_time filter.
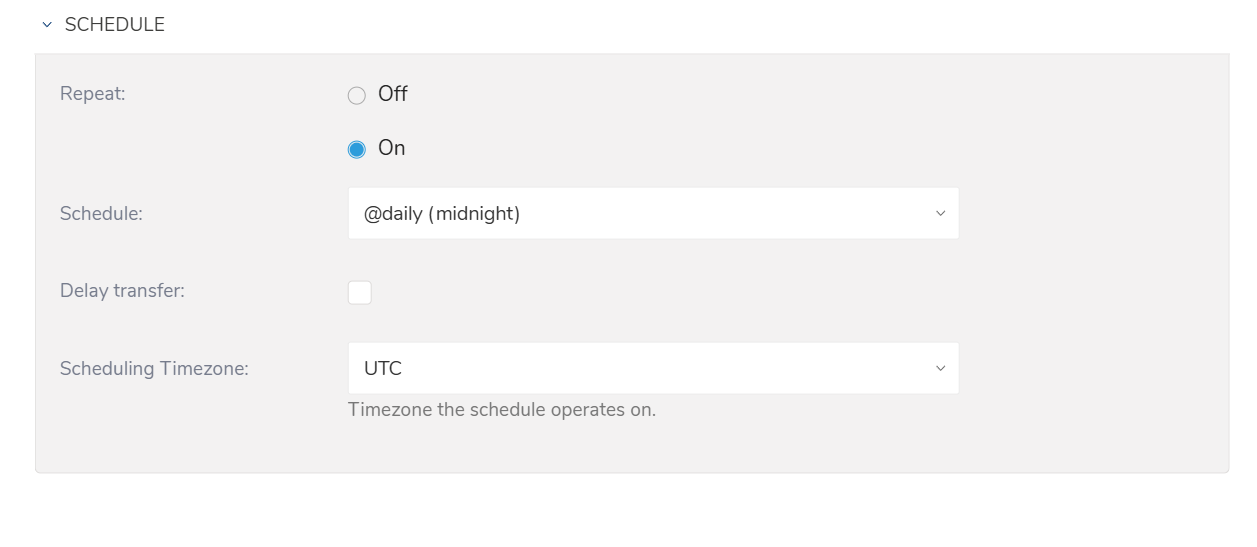
You can specify a one-time transfer, or you can schedule an automated recurring transfer.
Parameters
- Once now: Set one-time job.
- Repeat…
- Schedule: Options: @hourly, @daily, @monthly, and custom cron.
- Delay Transfer: Add a delay of execution time.
- Scheduling TimeZone: Supports extended timezone formats like 'Asia/Tokyo'.
Before setting up the connector, install the 'td' command. Install the Treasure Data Toolbelt.
The in: section is where you specify what comes into the connector from Snowflake and the out: section is where you specify what the connector puts out to the database in Treasure Data.
Provide your Snowflake account access information as follows:
in:
  type: snowflake_unload
  account_name: treasuredata
  user: Test_user
  password: xxxx
  warehouse: DEMO_WH
  db: TEST_DB
  schema: PUBLIC
  query: |
    SELECT column1, column2, column3
    FROM table_test
    WHERE column4 != 1
  invalid_value_option: ignore_row
out:
  mode: append
Configuration keys and descriptions are as follows:
| Config key | Type | Required | Description |
|---|---|---|---|
| type | string | yes | connector type (must be "snowflake_unload") |
| account_name | string | yes | specifies the name of your account (provided by Snowflake). See Snowflake account name. |
| warehouse | string | yes | specifies the virtual warehouse to use |
| db | string | yes | Snowflake default database to use |
| schema | string | yes | specifies the default schema to use for the specified database once connected |
| role | string | no | the default access control role to use in the Snowflake session initiated by the driver |
| auth_method | string | yes | authentication method. Currently supports: basic, key_pair (default "basic") |
| private_key | string | no | required if auth_method is key_pair |
| passphrase | string | no | the passphrase of the private_key |
| user | string | yes | Snowflake login name |
| password | string | no | required if auth_method is basic. Password for the specified user |
| query | string | no | the SQL query to run |
| incremental | boolean | no | if true, enables incremental loading using max values comparison instead of ORDER BY |
| incremental_columns | strings array | no | column names for incremental loading. If not specified will use Primary keys columns |
| invalid_value_option | string | no | options to handle invalid data in a row. Available options are fail_job and ignore_row |
| last_record | objects array | no | values of the last record for incremental loading |
| stage_file_size | integer | no | stage file size in bytes. Default 104857600 (100 MB) |
| network_timeout | integer | no | how long to wait for a response when interacting with the Snowflake service before returning an error. Default 0 |
| query_timeout | integer | no | how long to wait for a query to complete before returning an error. Default 0 |
| select | string | no | expression of select. Required when 'query' is not set. |
| table | string | no | Destination table name. Required when 'query' is not set. |
| where | string | no | condition to filter the rows |
| order_by | string | no | expression of ORDER BY to sort rows |
| columns | array | no | column settings with type, and format specifications. columns are guessed based on Snowflake sample data |
| stage_folder | string | no | internal stage folder configuration (automatically managed) |
Before running the connector, you should use the td connector:guess command to automatically detect column types and generate the complete configuration. This command samples data from Snowflake to infer the optimal column settings.
td connector:guess seed.yml -o load.ymlThis will generate a complete load.yml file with:
- Detected column names and types
- Optimal data type mappings based on Snowflake data types
- Performance settings for bulk unloading
An example of load.yml generated after running guess command:
in:
  type: snowflake_unload
  account_name: treasuredata
  user: snowflake_user
  password: xxxxx
  warehouse: DEMO_WH
  db: TEST_DB
  schema: PUBLIC
  query: |
    SELECT column1, column2, column3
    FROM table_test
    WHERE column4 != 1
  incremental: true
  incremental_columns: [column1, column3]
  last_record: [140, 1500.5]
  stage_file_size: 104857600
  invalid_value_option: ignore_row
  columns:
  - name: column1
    type: long
  - name: column2
    type: string
  - name: column3
    type: timestamp
    format: "%Y-%m-%dT%H:%M:%S.%L%z"
out:
  mode: append
For more details on available out modes, see modes.
To preview the data, issue the preview command
td connector:preview load.yml
+--------------+-----------------+----------------+
| COLUMN1:long | COLUMN2:string  | COLUMN3:double |
+--------------+-----------------+----------------+
| 100          | "Sample value1" | 1900.1         |
| 120          | "Sample value3" | 1700.3         |
| 140          | "Sample value5" | 1500.5         |
+--------------+-----------------+----------------+Submit the load job. It may take a couple of hours depending on the size of the data. You must specify the database and table where their data is stored.
It is recommended to specify the --time-column option because Treasure Data's storage is partitioned by time. If the option is not given, the data connector selects the first long or timestamp column as the partitioning time. The type of the column specified by --time-column must be either of long or timestamp type.
If your data doesn't have a time column you may add it using add_time filter option. For more information, see add_time filter plugin.
td connector:issue load.yml --database td_sample_db --table td_sample_table \
--time-column created_at
td connector:issue assumes you have already created a database(td_sample_db) and table(td_sample_table). If the database or the table do not exist in TD, td connector:issue will fail. Therefore you must create the database and table manually or use --auto-create-table option with td connector:issue command to automatically create the database and table.
td connector:issue load.yml \
--database td_sample_db --table td_sample_table \
--time-column created_at --auto-create-table
If you have a field called time, you don't have to specify the --time-column option.
td connector:issue load.yml --database td_sample_db --table td_sample_tableYou can schedule periodic data connector execution for periodic Snowflake bulk unloading import.
A new schedule can be created using the td connector:create command. The following are required:
- the name of the schedule
- the cron-style schedule
- the database and table where their data will be stored
- the Data Connector configuration file
td connector:create \
    daily_bulk_import \
    "10 0 * * *" \
    td_sample_db \
    td_sample_table \
    load.yml
It's also recommended to specify the --time-column option since Treasure Data's storage is partitioned by time (see also data partitioning).
td connector:create \
    daily_bulk_import \
    "10 0 * * *" \
    td_sample_db \
    td_sample_table \
    load.yml \
    --time-column created_at
The cron parameter also accepts three special options: @hourly, @daily and @monthly.
By default, the schedule is setup in UTC timezone. You can set the schedule in a timezone using -t or --timezone option. The --timezone option supports only extended timezone formats like 'Asia/Tokyo', 'America/Los_Angeles', etc. Timezone abbreviations like PST, CST are not supported and may lead to unexpected schedules.
You can see the list of scheduled entries by running the command td connector:list.
td connector:listConnection to Snowflake is made via their official JDBC driver. The JDBC driver forces the usage of SSL as default and mandatory ( i.e. connection with SSL = false will be rejected).
For connecting to Snowflake, this tool offers two JDBC authentication options:
- Basic (Username/Password): This standard login method will fail if Multi-Factor Authentication (MFA) is active on the user's Snowflake account. This is due to potential conflicts with the connector's authentication process during job runs.
- Key Pair Authentication: This secure method uses a cryptographic key pair. It is the recommended approach and works reliably whether MFA is enabled or not.
This connector uses Snowflake's Bulk Data Unloading feature to achieve high-performance data transfers. The process involves:
COPY INTO command: Uses the COPY INTO <location> command to copy data from Snowflake database tables into files in a Snowflake stage.
File Download: Downloads the files from the stage using the GET command directly to the connector.
Parallel Processing: Downloaded files are processed in parallel, significantly improving ingestion performance.
Incremental loading in the bulk unloading connector uses a different approach compared to the standard Snowflake connector:
- Max Values Approach: Instead of using ORDER BY statements, the connector uses max function queries to determine upper and lower bounds:
SELECT Max(inc_col) FROM table - Lexicographic Ordering: For multiple incremental columns, the connector uses lexicographically ordered column combinations to identify bounds.
- Enhanced Performance: This approach avoids expensive ORDER BY operations on large datasets.
Example with 2 incremental columns:
SELECT *
FROM my_table
WHERE (("region" > ?) OR ("region" = ? AND "date" > ?))
  AND (("region" < ?) OR ("region" = ? AND "date" <= ?))
The first execution loads all records, and subsequent executions only load records that fall within the new bounds determined by the max values.
Important Notes:
- Only Timestamp, Datetime and numerical columns are supported as incremental_columns
- For raw queries, incremental_columns is required because primary keys cannot be automatically detected for complex queries
- Make sure there are appropriate indexes on incremental columns for optimal performance
- Resource Allocation: This connector requires larger CPU allocation compared to regular connectors for optimal performance
- Stage File Size: Adjusting the
stage_file_sizeparameter can optimize performance based on your dataset size and available memory - Warehouse Size: Using larger Snowflake warehouses can improve unloading performance for very large datasets
- Parallel Processing: The connector automatically handles parallel processing of unloaded files for maximum throughput
- Stage File Issues: Check that the specified warehouse has sufficient resources for unloading operations
- Preview Issues: Large table previews use sampling and may not reflect actual data distribution
- Performance Issues: Consider increasing warehouse size or adjusting stage file size for better performance